Some nights you want tacos, but you do not want the assembly line. No shells snapping in half. No cheese ending up on the floor because a toddler grabbed the bag wrong.
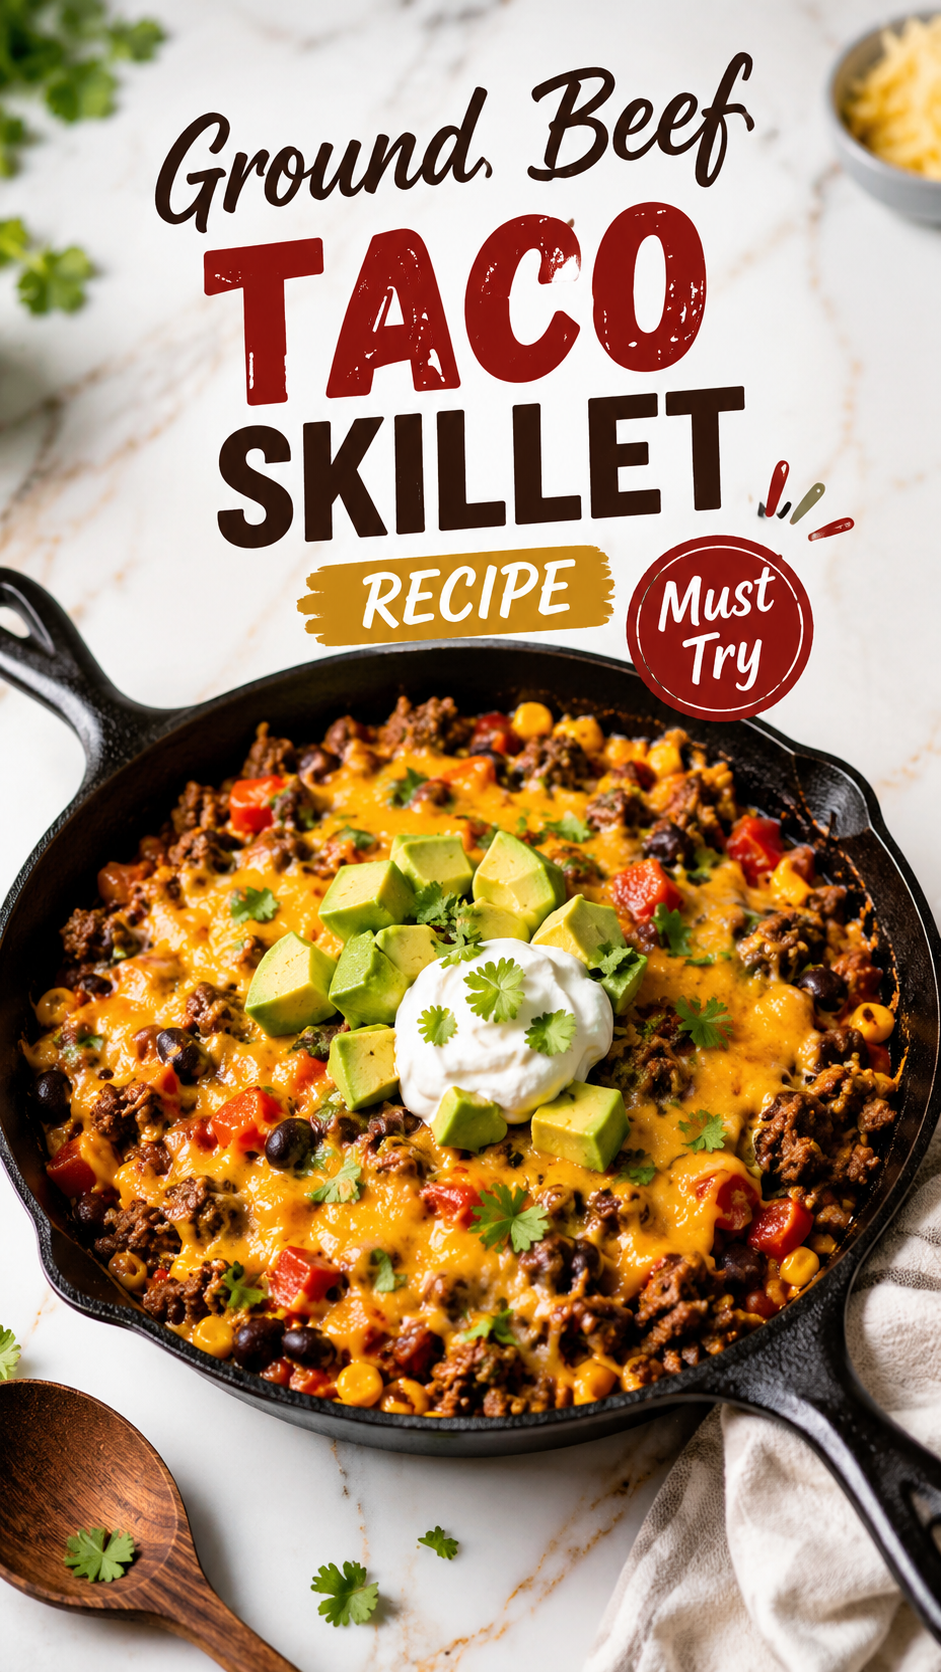
This taco skillet gives you every bit of that flavor without any of the chaos. One pan, about 30 minutes, and dinner is basically done deciding itself for you.
I started making this on nights when I genuinely could not be bothered to think, and now it is one of those recipes my husband requests by name. Not “tacos.” He asks for “the skillet thing” specifically. 🌮
So let’s get into it.
What You’ll Need
Here is everything going into the pan, plus a few things sitting nearby to finish it off.
For the skillet:
- 1 lb ground beef (80/20 works best)
- 1 small yellow onion, diced
- 3 cloves garlic, minced
- 1 packet taco seasoning (or 2 tbsp homemade blend)
- 1 can (15 oz) black beans, drained and rinsed
- 1 can (15 oz) diced tomatoes with green chilies
- 1 cup beef broth
- 1 cup long grain white rice, uncooked
- 1 cup frozen corn
- 1.5 cups shredded cheddar or Mexican blend cheese
- Salt and pepper, to taste
For topping (totally optional, but strongly recommended):
- Chopped cilantro
- Diced avocado
- Sour cream
- Lime wedges
- Sliced jalapeños
Tools You’ll Need
- A large, deep skillet with a lid (12-inch works well)
- Wooden spoon or spatula
- Cutting board and knife
- Measuring cups
That is genuinely it. No blender, no food processor, no fifteen bowls to wash after.
How to Make It
- Brown the beef. Heat your skillet over medium-high heat. Add the ground beef and break it apart as it cooks, about 5-6 minutes, until no pink remains. Drain excess grease if needed.
- Add the aromatics. Toss in the diced onion and cook for 2-3 minutes until it softens. Add garlic and cook for 30 seconds more, just until it smells incredible.
- Season it. Sprinkle in the taco seasoning and stir until the beef is fully coated.
- Build the base. Add the black beans, diced tomatoes (juices and all), beef broth, and uncooked rice. Stir everything together.
- Simmer. Bring the mixture to a boil, then reduce heat to low. Cover and let it simmer for 18-20 minutes, until the rice is tender and most of the liquid is absorbed.
- Fold in the corn. Stir in the frozen corn during the last 5 minutes of cooking. It just needs to heat through.
- Cheese it. Remove the lid, sprinkle cheese evenly over the top, then cover again for 2-3 minutes off the heat until it melts.
- Top and serve. Add cilantro, avocado, sour cream, jalapeños, whatever you’re into. Serve it straight from the skillet.
Pro Tips
A few things I learned the slightly hard way, so you don’t have to.
- Rinse your beans. Skipping this adds a starchy, canned taste that fights with the seasoning. Thirty seconds under the tap fixes it.
- Don’t peek too much. Every time you lift the lid while the rice cooks, you let steam escape and add cooking time. Trust the process for those 18 minutes.
- Use freshly shredded cheese if you can. The bagged, pre-shredded stuff has anti-caking agents that make it clump instead of melting smoothly. It’s a small swap, but it matters.
- Taste before you season with salt. Taco seasoning packets are already pretty salty, and so is beef broth. Add salt at the very end, if at all.
- Let it rest for 5 minutes after the cheese melts. It thickens up slightly and gets easier to serve without turning soupy on the plate.
Substitutions and Variations
This recipe bends easily, which is half the reason I keep coming back to it.
| Swap this | For this | Why it works |
|---|---|---|
| Ground beef | Ground turkey or chicken | Leaner, still holds seasoning well |
| White rice | Cauliflower rice | Lower carb, add it in the last 5 minutes instead of simmering |
| Black beans | Pinto beans | Slightly creamier texture |
| Beef broth | Chicken broth | Milder flavor, works fine |
| Cheddar | Pepper jack | Adds a spicy kick |
Want it vegetarian? Swap the beef for a plant-based ground substitute or extra beans, and use vegetable broth instead.
Want it dairy-free? Skip the cheese or use a dairy-free shredded blend. It still tastes great, just less gooey on top.
Want more heat? Add a diced jalapeño with the onions, or use a spicy taco seasoning blend.
Make Ahead Tips
You can prep a few pieces of this ahead of time to make weeknight cooking even faster.
- Dice the onion and mince the garlic up to 2 days ahead and store in the fridge.
- Brown the beef ahead of time, cool it, and refrigerate for up to 2 days. Just reheat it in the skillet before adding the rest.
- The entire dish can be assembled and cooked, then reheated the next day. The rice actually soaks up more flavor overnight.
Nutrition and Meal Pairing
One serving (about 1.5 cups) comes in around 420 calories, 24g protein, 32g carbs, and 20g fat, depending on your exact toppings and cheese amount. It is a solid, filling dinner on its own.
If you want to round it out:
- A simple side salad with lime vinaigrette
- Warm tortillas on the side for scooping
- A cold glass of horchata or a lime agua fresca
Leftovers and Storage
This skillet holds up well, which honestly makes it even more worth making.
- Fridge: Store in an airtight container for up to 4 days.
- Freezer: Freeze in individual portions for up to 3 months. Thaw overnight in the fridge before reheating.
- Reheating: Add a splash of broth or water before microwaving to loosen the rice back up. Stir halfway through.
FAQ
Can I use instant rice instead of regular rice? Yes, but reduce the simmer time to about 8-10 minutes and check it early so it doesn’t turn mushy.
Why is my rice still crunchy after 20 minutes? Your lid might not be sealing tightly enough, letting too much steam escape. Add a splash more broth, cover tightly, and give it a few more minutes.
Can I double this recipe? Yes, just use a larger, wider skillet or a Dutch oven so the rice cooks evenly.
Is this spicy? Not really, on its own. The heat level depends entirely on your taco seasoning and toppings, so it’s easy to adjust either way.
Can kids eat this? Very easily. Just go light on the jalapeños and let everyone customize their own toppings at the table.
Wrapping Up
This is the kind of recipe that quietly becomes part of your regular rotation without you really deciding it should. One pan, real ingredients, and a flavor that tastes like way more effort went into it than actually did.
Give it a try this week, and let me know in the comments how yours turned out. If you tweaked it with a different protein or topping combo, I would genuinely love to hear about it.