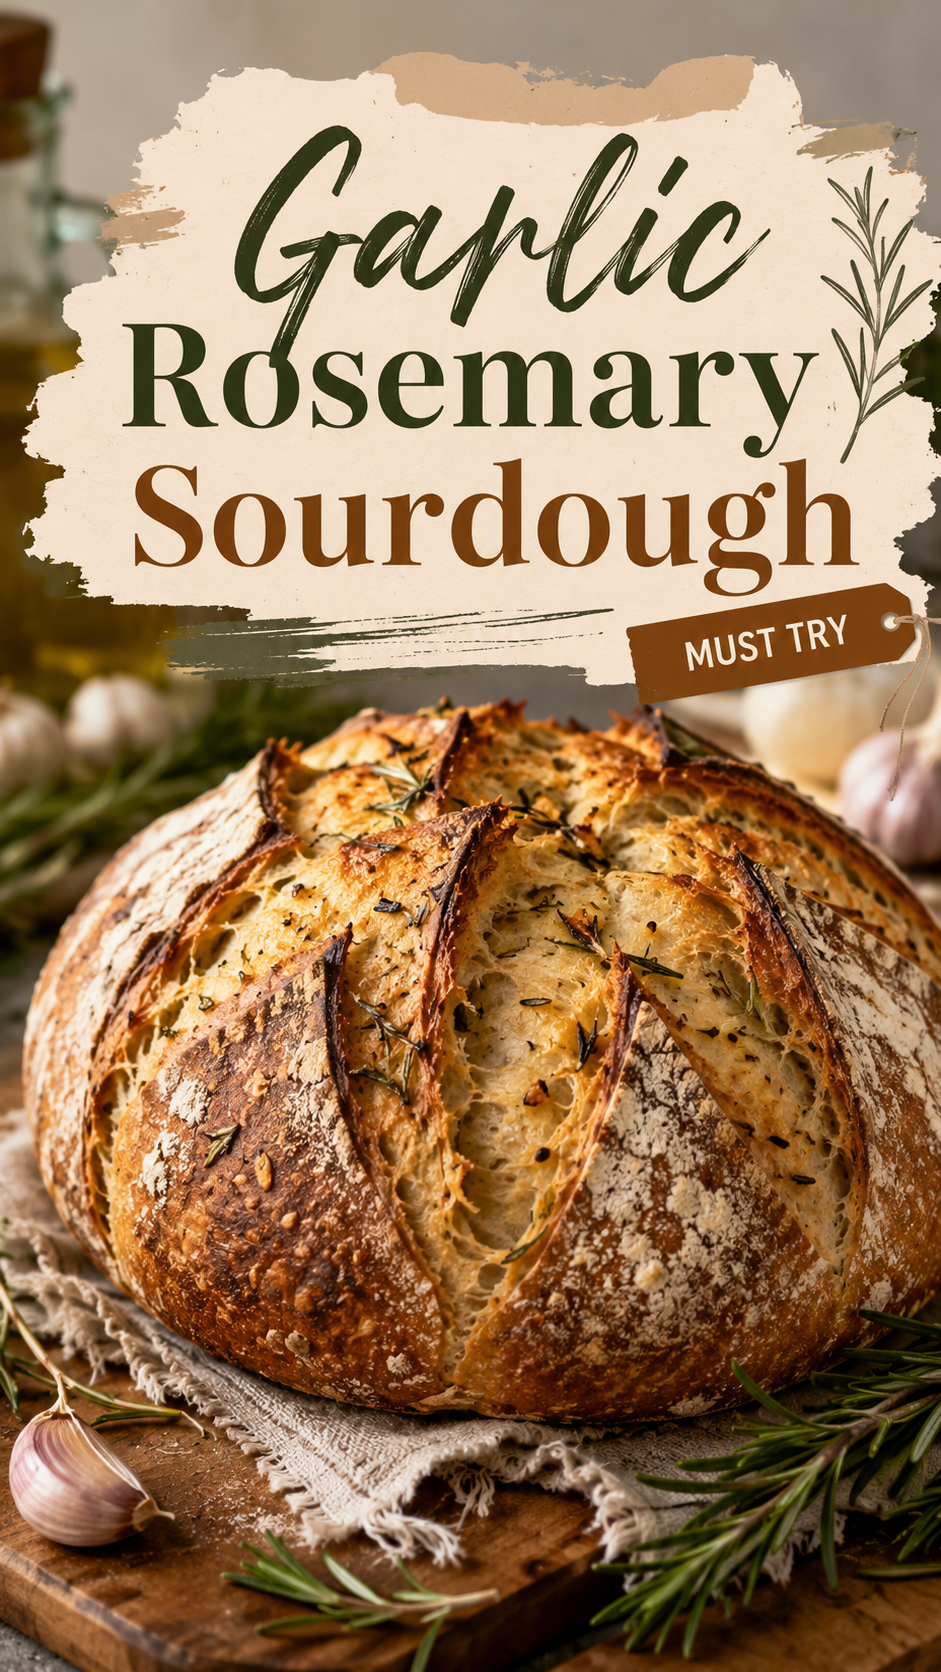
My husband Silas walked into the kitchen, stopped in the doorway, and said “okay, what is that smell, I need to know right now.”
That’s the reaction this bread gets. Every single time.
I’ve been feeding my sourdough starter for years now, and this garlic rosemary loaf is the one I come back to more than any other. It’s got that deep golden crust that shatters when you slice it, and a soft chewy center studded with roasted garlic and fresh rosemary.
It sounds fancy. It’s not.
If you’ve made a basic sourdough loaf before, you already have the skills for this one. We’re just adding two ingredients that turn a good loaf into the one your neighbors ask you about.
And if you’ve never made sourdough before, this is honestly a great place to start. The garlic and rosemary hide a lot of small mistakes, so even a slightly dense loaf still tastes incredible.
Let’s get into it.
Why This Recipe Works
The garlic gets roasted first. Raw garlic in bread dough can taste harsh and bitter once baked. Roasting it first mellows it into something sweet and almost caramelized.
Fresh rosemary beats dried here. Dried rosemary turns woody and sharp in the oven. Fresh rosemary stays fragrant and soft, and it perfumes the entire loaf instead of just a few bites.
A long, slow ferment builds flavor. This isn’t a rushed recipe. The extended rise is what gives sourdough its signature tang and those big, irregular air pockets.
No fancy equipment required. You don’t need a stand mixer or a bread machine. Your hands and a bowl do all the work.
What You’ll Need
| Ingredient | Amount |
|---|---|
| Active sourdough starter | 100g (about ½ cup, fed and bubbly) |
| Bread flour | 500g (about 4 cups) |
| Water, room temperature | 350g (about 1 ½ cups) |
| Fine sea salt | 10g (about 2 tsp) |
| Garlic cloves | 8-10, roasted |
| Fresh rosemary, chopped | 3 tbsp, plus extra for topping |
| Olive oil | 2 tbsp, plus more for roasting garlic |
| Flaky sea salt | For topping, optional |
A quick note on the flour. Bread flour has more protein than all purpose, and that protein is what gives sourdough its chew and structure. You can use all purpose in a pinch, but the loaf will be a bit flatter and softer.
Tools You’ll Need
- Large mixing bowl
- Kitchen scale (seriously, don’t skip this one)
- Bench scraper
- Banneton or a bowl lined with a floured towel
- Dutch oven with a lid
- Sharp knife or bread lame for scoring
- Parchment paper
Pro Tips
- Roast your garlic the night before. It saves time on baking day and the flavor actually deepens overnight in the fridge.
- Do the float test on your starter. Drop a spoonful in water before you begin. If it floats, it’s active enough to use. If it sinks, feed it and wait a few more hours.
- Don’t rush the bulk ferment. Sourdough is not a same-day bread if you want real flavor. Give it the full 6 to 8 hours, longer if your kitchen runs cold.
- Score with confidence. One quick, deep slash works better than a hesitant, shallow one. The dough needs somewhere to expand or it’ll crack in odd places.
- Let it cool completely before slicing. I know this is the hardest part. Cutting into a hot loaf turns the crumb gummy, and all that steam you’re releasing is still finishing the bake.
How to Make Garlic Rosemary Sourdough
Step 1: Roast the Garlic
Preheat your oven to 400°F. Slice the top off a whole garlic bulb, drizzle with olive oil, wrap it in foil, and roast for 35 to 40 minutes.
It’s ready when the cloves are soft and golden and your kitchen smells incredible. Let it cool, then squeeze the cloves out and mash them lightly with a fork.
Step 2: Mix the Dough
In your large bowl, combine the sourdough starter and water. Whisk it together until the starter mostly dissolves.
Add the bread flour and mix with your hands until no dry flour remains. It’ll look shaggy and a little messy. That’s exactly right.
Cover the bowl and let it rest for 30 minutes. This is called autolyse, and it lets the flour fully hydrate before you add salt.
Step 3: Add Salt, Garlic, and Rosemary
Sprinkle the salt over the dough along with a tablespoon of water. Pinch and fold it in until fully combined.
Add your roasted garlic and chopped rosemary, folding gently until they’re evenly distributed throughout the dough.
Step 4: Bulk Ferment
Cover the bowl and let the dough rise at room temperature for 6 to 8 hours. During the first 2 to 3 hours, do a set of stretch and folds every 30 minutes.
To stretch and fold, grab one side of the dough, pull it up, and fold it over itself. Rotate the bowl a quarter turn and repeat 4 times.
The dough is ready when it’s noticeably puffy and has nearly doubled in size.
Step 5: Shape the Loaf
Turn the dough out onto a lightly floured surface. Shape it into a round by pulling the edges toward the center, then flip it seam side down.
Use your hands to drag the dough in a circular motion, creating tension on the surface. This tension is what gives you that nice dome shape.
Step 6: Cold Proof
Place the shaped dough seam side up in your floured banneton or towel-lined bowl. Cover and refrigerate for 12 to 18 hours.
This cold proof isn’t optional if you want that classic sourdough tang. It also makes the dough much easier to score.
Step 7: Bake
Preheat your oven to 500°F with the Dutch oven inside for at least 30 minutes.
Turn the dough out onto parchment paper, score the top with a sharp knife, and top with a sprig of rosemary and a pinch of flaky salt if you’d like.
Carefully lower the dough into the hot Dutch oven, cover with the lid, and bake for 20 minutes. Remove the lid, drop the temperature to 450°F, and bake for another 20 to 25 minutes until deeply golden.
Step 8: Cool
Transfer the loaf to a wire rack and let it cool for at least an hour before slicing. I promise it’s worth the wait.
Substitutions and Variations
| Original | Swap | Notes |
|---|---|---|
| Fresh rosemary | Fresh thyme or sage | Use the same amount, adjust to taste |
| Roasted garlic | Garlic powder, 1 tbsp | Convenient, but less depth of flavor |
| Bread flour | All purpose flour | Loaf will be slightly softer and flatter |
| Regular salt topping | Everything bagel seasoning | Adds a fun savory crunch |
| Dutch oven | Baking stone with steam pan | Works, but crust may be slightly less crisp |
If you want a cheesy version, fold in a half cup of shredded parmesan along with the garlic. Silas requests this variation more than any other.
Make Ahead Tips
You can roast the garlic up to 3 days ahead and store it in the fridge in an airtight container.
The cold proof step actually works in your favor here. You can shape the dough one evening and bake it the next morning, or even push the cold proof to 24 hours if your schedule needs it.
Estimated Nutrition (Per Slice)
| Nutrient | Amount |
|---|---|
| Calories | 165 |
| Carbohydrates | 30g |
| Protein | 5g |
| Fat | 3g |
| Fiber | 1g |
| Sodium | 290mg |
These numbers are estimates based on a loaf cut into 12 slices. I always recommend running the exact ingredient brands you use through Cronometer before publishing or relying on these for dietary tracking.
What to Serve With It
This loaf holds up to just about anything, but a few of our favorites:
- Warm with a slab of salted butter, no toppings needed
- Alongside a bowl of tomato soup for dipping
- Toasted and rubbed with a raw garlic clove, olive oil, and flaky salt
- As the base for an epic grilled cheese
- Torn up and served next to a cheese board
Storage and Reheating
Store the cooled loaf at room temperature in a paper bag or bread box for up to 3 days. Avoid plastic bags, since they trap moisture and soften the crust.
For longer storage, slice the loaf and freeze it in a freezer bag for up to 3 months. Pull out slices as needed and toast straight from frozen.
To refresh a day old loaf, pop it in a 350°F oven for 8 to 10 minutes. The crust crisps right back up.
Frequently Asked Questions
Do I need a mature sourdough starter for this recipe?
Yes, your starter should be active and doubling reliably within 4 to 6 hours of feeding. A young or sluggish starter will struggle to leaven this dough properly.
Can I add the garlic and rosemary without roasting first?
You can, but raw garlic tends to turn sharp and slightly bitter during the long bake. Roasting first gives you a much sweeter, mellower flavor throughout the loaf.
Why did my loaf turn out dense?
This usually means the bulk ferment ended too early, or your starter wasn’t active enough when you mixed the dough. Give the dough more time next round and watch for visible puffiness rather than a clock.
Can I skip the Dutch oven?
A Dutch oven traps steam, which is what gives sourdough its shiny, crackly crust. You can bake without one using a baking stone and a pan of hot water on the oven’s bottom rack, though the crust won’t be quite as dramatic.
Is it normal for the dough to be really sticky?
Yes, high hydration dough like this one is naturally tacky. Wet hands instead of extra flour will make it much easier to handle.
Can I make this into rolls instead of one big loaf?
Absolutely. Divide the dough into 8 to 10 portions after shaping and reduce the bake time to around 25 minutes total.
Wrapping Up
This garlic rosemary sourdough has become one of those recipes I make on repeat, mostly because Silas asks for it, but also because there’s nothing quite like pulling a loaf like this out of your own oven.
Give it a try this week, and if you do, come back and drop a comment below. I want to know how your loaf turned out, whether you tried a variation, and any questions you’ve got along the way.