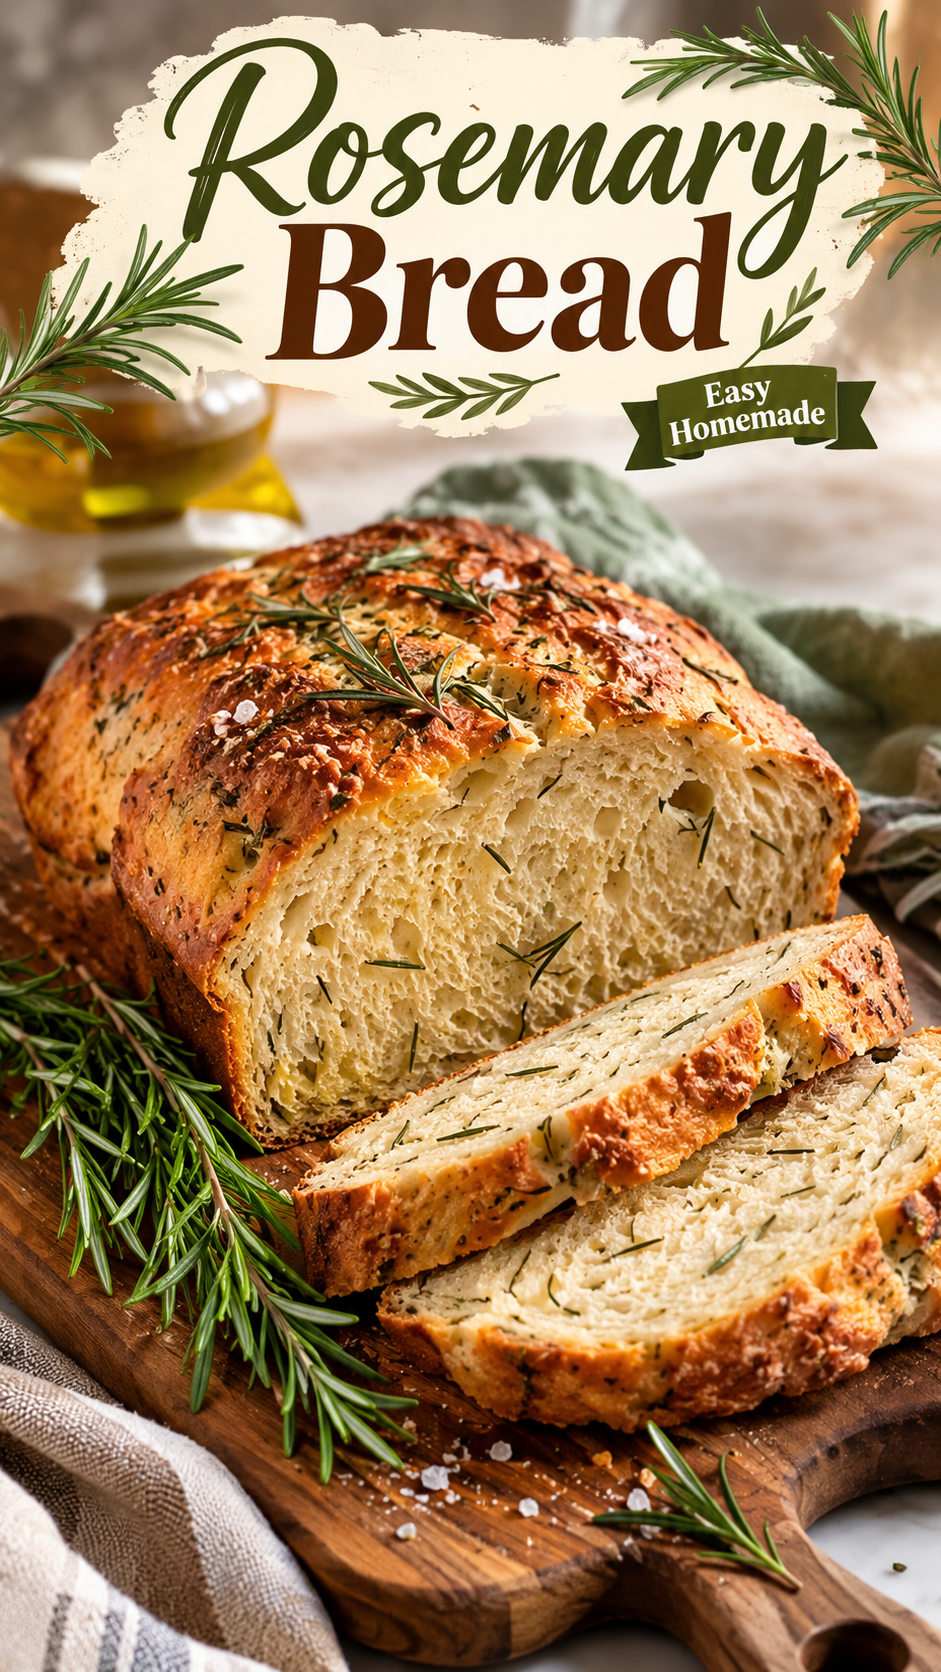
I’m not exaggerating. Twice now, someone has walked past my kitchen window, stopped, and then knocked to ask what I was baking.
That’s the power of rosemary bread. It’s not just a loaf. It’s basically a doorbell for compliments.
And the wild part? It’s stupidly easy to make. No fancy bread machine, no years of sourdough starter babying, none of that.
Just a few pantry staples, one bowl, and a little patience while it rises.
I first made this after a trip to a tiny bakery in Tuscany where the smell hit me before I even walked in the door. I went home determined to recreate it. Took me a few tries (RIP, loaf number two, you were a brick 😅), but I finally landed on a version that’s soft, chewy, and ridiculously fragrant.
Let’s get into it.
What You’ll Need
Here’s everything you’ll need to pull this off. Nothing weird, nothing you have to hunt down at three specialty stores.
| Ingredient | Amount |
|---|---|
| Warm water (about 110°F) | 1 ½ cups |
| Active dry yeast | 2 ¼ tsp (1 packet) |
| Granulated sugar | 1 tbsp |
| All-purpose flour | 3 ¾ cups |
| Fine sea salt | 1 ½ tsp |
| Olive oil (extra virgin, plus more for brushing) | 3 tbsp |
| Fresh rosemary, chopped | 3 tbsp (plus extra for topping) |
| Flaky sea salt (for topping) | For sprinkling |
That’s it. Eight ingredients and most of them are already sitting in your kitchen right now.
Tools You’ll Need
- Large mixing bowl
- Measuring cups and spoons
- Wooden spoon or dough whisk
- Clean kitchen towel
- Baking sheet or 9×5 loaf pan
- Parchment paper
- Pastry brush (a spoon works too, honestly)
Pro Tips
Before you dive in, here are a few things I learned the hard way so you don’t have to.
- Check your yeast is alive before committing. Mix your warm water, sugar, and yeast, then wait 5-10 minutes. If it doesn’t get foamy and bubbly on top, your yeast is dead and your bread won’t rise. Toss it and start over with fresh yeast.
- Don’t use hot water. Water that’s too hot (above 120°F) will actually kill the yeast, which defeats the entire purpose. Warm like bathwater is the sweet spot.
- Let it rise somewhere actually warm. I turn my oven on for one minute, turn it off, then pop the covered bowl inside with the door cracked. Cold kitchens are the number one reason people think their bread “didn’t work.”
- Toast your rosemary in olive oil first. This one changed everything for me. A quick 30-second sizzle in warm olive oil before adding it to the dough makes the flavor so much deeper and less sharp.
- Don’t skip the flaky salt on top. It sounds small, but that little crunch against the soft bread is honestly half the reason people go back for seconds.
How to Make Rosemary Bread
Step 1: Activate your yeast. In your large bowl, combine the warm water, sugar, and yeast. Give it a light stir and let it sit for 5-10 minutes until foamy.
Step 2: Warm your rosemary. While the yeast is doing its thing, warm the olive oil in a small pan over low heat. Add the chopped rosemary and let it sizzle gently for about 30 seconds. Set aside to cool slightly.
Step 3: Mix the dough. Add the flour, salt, and the rosemary oil mixture into the bowl with your yeast mixture. Stir with a wooden spoon until a shaggy dough forms.
Step 4: Knead it out. Turn the dough onto a floured surface and knead for about 8-10 minutes. You’re looking for a smooth, slightly tacky (but not sticky) ball. It should spring back a little when you poke it.
Step 5: First rise. Place the dough in a lightly oiled bowl, cover with a towel, and let it rise somewhere warm for 1 to 1 ½ hours, until doubled in size.
Step 6: Shape the loaf. Punch the dough down gently and shape it into a round or oval loaf. Place it on a parchment-lined baking sheet, or into a greased loaf pan if you’d rather have that classic sandwich shape.
Step 7: Second rise. Cover again and let it rise for another 30-45 minutes. It won’t double again, but it should look noticeably puffier.
Step 8: Preheat and top. While it rises, preheat your oven to 400°F. Right before baking, brush the top with olive oil and sprinkle generously with flaky salt and extra rosemary.
Step 9: Bake. Bake for 25-30 minutes, until golden brown on top and it sounds hollow when you tap the bottom.
Step 10: Cool (the hardest part). Let it cool on a wire rack for at least 15 minutes before slicing. I know. I know. But cutting into it too early makes the inside gummy.
Substitutions and Variations
| Original | Swap | Notes |
|---|---|---|
| All-purpose flour | Bread flour | Gives a chewier, more artisan texture |
| Fresh rosemary | Dried rosemary (1 tbsp) | Slightly less bright, still tasty |
| Olive oil | Melted butter | Softer crumb, richer flavor |
| Plain loaf | Add garlic | Mince 2-3 cloves into the rosemary oil step |
| Plain loaf | Add parmesan | Fold ½ cup grated parmesan into the dough |
| Regular loaf | Focaccia style | Press into a pan, dimple with fingers, top generously with oil |
Make Ahead Tips
Short on time the day you want to serve it? Here’s how to get ahead.
- Make the dough the night before. After the first knead, pop the dough in the fridge overnight instead of doing a room-temp rise. Pull it out in the morning, let it come to room temp for an hour, then shape and continue as normal.
- Freeze the shaped, unbaked loaf. Wrap tightly and freeze for up to a month. Thaw in the fridge overnight, then let it come to room temperature before its second rise and bake.
- Bake ahead and reheat. This bread reheats beautifully. Wrap it in foil and warm at 300°F for about 10 minutes to bring back that fresh-baked feel.
Nutrition (Per Slice, Based on 12 Slices)
| Nutrient | Amount |
|---|---|
| Calories | 165 |
| Carbohydrates | 28g |
| Protein | 4g |
| Fat | 4g |
| Fiber | 1g |
| Sodium | 320mg |
Note: values are estimates and will vary depending on exact ingredients and slice size.
Leftovers and Storage
This bread is best within the first two days, but it holds up well if you store it right.
- Counter: Store in a paper bag or loosely wrapped in a towel for up to 3 days. Avoid plastic bags, they trap moisture and make the crust go soft and weird.
- Fridge: Not recommended. Bread actually goes stale faster in the fridge than at room temp.
- Freezer: Slice it first, then freeze in a zip-top bag for up to 3 months. Pull out individual slices as needed and toast straight from frozen.
- Reheating: A quick 5-minute stint in a 300°F oven brings the crust right back to life.
FAQ
Why didn’t my bread rise? Nine times out of ten, it’s the yeast. Either it was expired, or the water was too hot and killed it. Always do the foam test before mixing everything together.
Can I make this without a stand mixer? Yes, this whole recipe is designed to be made by hand. A wooden spoon and a little arm strength is all you need.
Can I use dried rosemary instead of fresh? You can. Use about a third of the amount since dried herbs are more concentrated in flavor.
Why is my bread dense instead of fluffy? This usually comes down to under-kneading, or not letting it rise long enough. Both steps build the gluten structure that gives bread its lift.
Can I add cheese into the dough? Definitely. Parmesan or asiago folded into the dough in step 3 is incredible with the rosemary.
Is this bread vegan? Yes, as written it’s fully vegan. Just make sure your sugar is a vegan-certified brand if that matters to you.
Wrapping Up
Okay, your kitchen is about to smell incredible and honestly, that’s reason enough to make this.
But beyond the smell, this bread is soft, chewy, a little salty on top, and shockingly easy for something that looks so impressive on a table.
Make it once and I promise you’ll be finding excuses to make it again. Serve it with soup, tear it apart next to a bowl of pasta, or just eat it plain with a little more olive oil for dipping.
If you give this a try, come back and leave a comment below. I want to know how your loaf turned out, and if you tried any of the variations, tell me which one won you over.