My neighbor showed up at my door mid-dinner once. No warning, just a knock and a very hopeful face.
“What is that smell?” he asked. I told him it was just chicken drumsticks. He didn’t believe me.
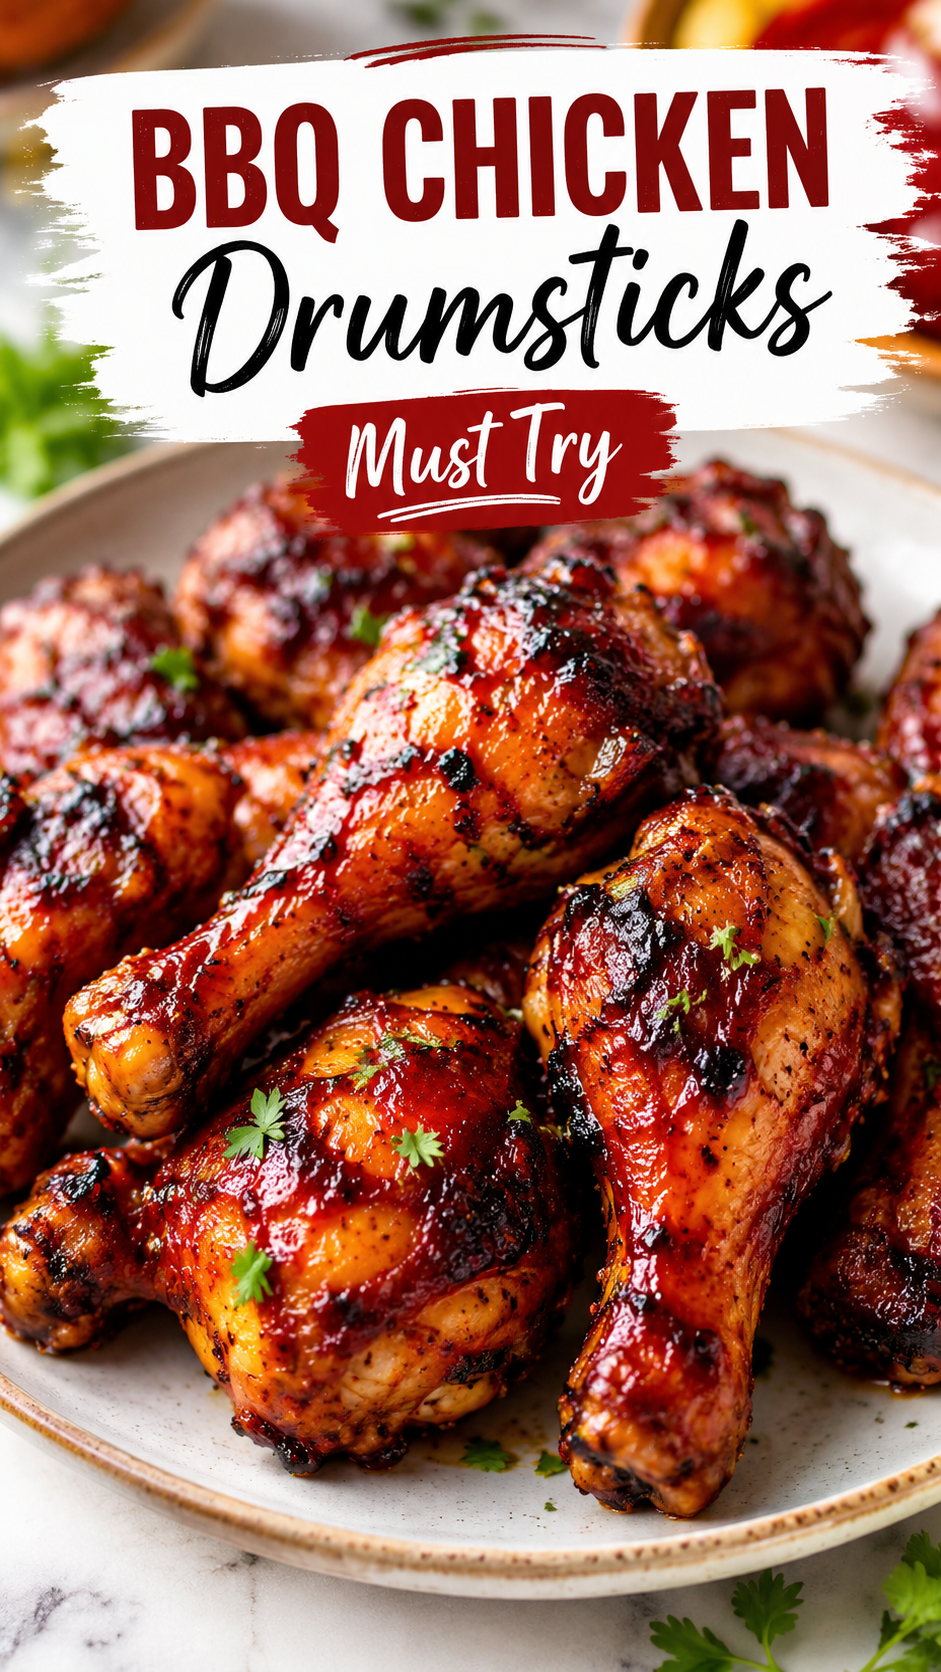
That’s the thing about BBQ chicken drumsticks done right. They smell like way more effort than they actually are.
Silas, my husband and permanent taste-tester, has requested these on a loop for two years now. I’ve made them for backyard hangouts, lazy Sundays, and one memorable Tuesday when we just needed something good.
They’re cheap, they’re forgiving, and they taste like you spent way longer on them than you did. 🍗
Let’s get into it.
Why This Recipe Works
Drumsticks are the most underrated cut of chicken. Fight me on this.
They’ve got dark meat, which means more fat, which means more flavor. They’re basically impossible to overcook into dryness the way chicken breast is.
And the skin? When it crisps up under that sticky BBQ glaze, it’s genuinely one of the best textures in home cooking.
This recipe uses a simple dry rub first, then a BBQ sauce glaze at the end. That two-step process is the whole secret. Sauce too early and it burns. Sauce too late and it never sticks.
What You’ll Need
For the drumsticks:
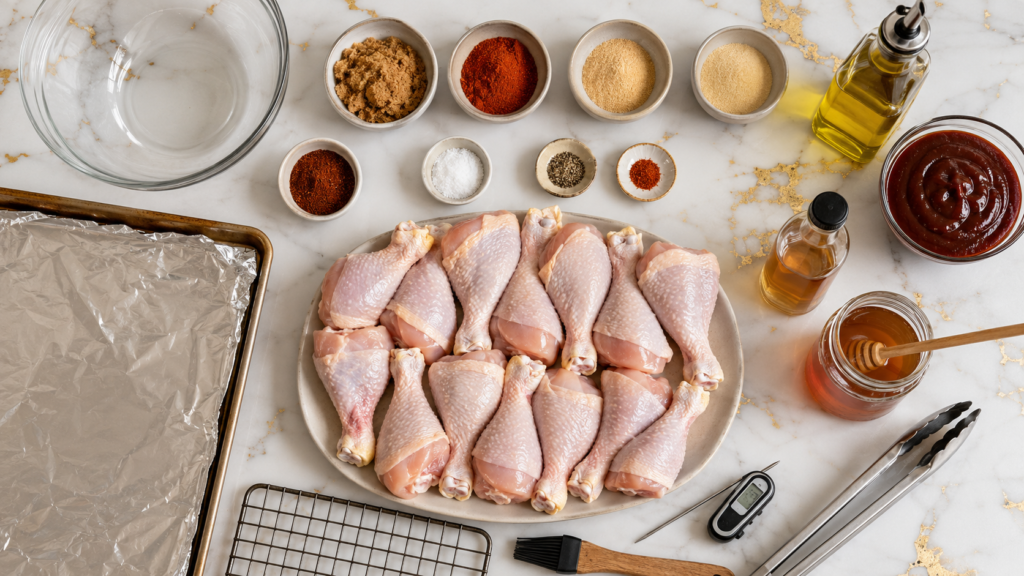
- 12 chicken drumsticks (about 3 to 3.5 lbs)
- 2 tablespoons olive oil
- 1 tablespoon brown sugar
- 1 tablespoon smoked paprika
- 2 teaspoons garlic powder
- 2 teaspoons onion powder
- 1 teaspoon chili powder
- 1 teaspoon salt
- 1/2 teaspoon black pepper
- 1/4 teaspoon cayenne pepper (optional, for a kick)
For the glaze:
- 1 cup BBQ sauce (your favorite bottled kind, or homemade)
- 1 tablespoon apple cider vinegar
- 1 teaspoon honey
That’s it. Nothing exotic, nothing you can’t find at a regular grocery store.
Tools You’ll Need
- Large mixing bowl
- Baking sheet
- Wire rack (optional, but it helps a lot)
- Aluminum foil
- Meat thermometer
- Basting brush
- Tongs
Pro Tips
1. Pat the chicken completely dry first. Wet skin doesn’t crisp. Grab some paper towels and really work the moisture off before the rub goes on.
2. Use a wire rack if you have one. Setting the drumsticks on a rack over the baking sheet lets air circulate underneath. That’s how you get crispy skin on all sides instead of just the top.
3. Don’t sauce until the last 10 to 15 minutes. BBQ sauce has sugar in it. Sugar burns fast. Add it too early and you’ll end up with a blackened, bitter mess instead of that glossy caramelized finish.
4. Check the internal temp, not the clock. Every oven runs a little different. Drumsticks are done at 165°F, but honestly I like to pull mine closer to 175°F. The extra time breaks down more connective tissue and the meat gets even more tender.
5. Let them rest for 5 minutes before serving. I know it’s tempting to dig in immediately (Silas never listens to me on this one). Resting keeps the juices locked in instead of running out onto the plate.
Step-by-Step Instructions
Step 1: Make the rub
In a small bowl, mix the brown sugar, smoked paprika, garlic powder, onion powder, chili powder, salt, pepper, and cayenne if using.
Step 2: Prep the chicken
Pat the drumsticks dry with paper towels. Toss them in a large bowl with the olive oil, then sprinkle the dry rub over top. Massage it in until every drumstick is coated.
Step 3: Preheat and arrange
Preheat your oven to 400°F. Line a baking sheet with foil for easy cleanup and set a wire rack on top if you have one. Arrange the drumsticks in a single layer, not touching.
Step 4: First bake
Bake for 25 minutes. This is where the skin starts to render and crisp up before any sauce touches it.
Step 5: Make the glaze
While that’s happening, whisk together the BBQ sauce, apple cider vinegar, and honey in a small bowl.
Step 6: Glaze and finish
Pull the drumsticks out and brush them generously with the glaze on all sides. Return to the oven for another 12 to 15 minutes, until the internal temperature hits at least 165°F.
Step 7: Broil for extra char (optional)
Want that slightly charred, sticky look you get from a real grill? Switch the oven to broil for the last 2 to 3 minutes. Watch it closely, this step moves fast.
Step 8: Rest and serve
Let the drumsticks sit for 5 minutes. Brush with a little extra glaze right before serving if you’re feeling generous.
Grilling Instead of Baking
Prefer the grill? Here’s the quick version.
- Preheat to medium heat, around 375°F
- Cook the rubbed drumsticks for 25 to 30 minutes, turning occasionally
- Brush with glaze during the last 10 minutes only
- Pull once internal temp hits 165°F
The oven method is more consistent, but the grill gives you that smoky flavor you just can’t fake indoors.
Substitutions and Variations
| Original | Swap | Why It Works |
|---|---|---|
| Chicken drumsticks | Chicken thighs | Same dark meat, same cook method |
| Brown sugar | Coconut sugar | Lower glycemic option, similar sweetness |
| BBQ sauce | Honey mustard | Completely different but still great glazed |
| Cayenne pepper | Smoked chipotle powder | Deeper, smokier heat |
| Olive oil | Avocado oil | Higher smoke point for grilling |
Want it spicier? Double the cayenne and add a dash of hot sauce to the glaze.
Want it kid-friendly? Skip the cayenne entirely and use a sweeter BBQ sauce.
Make-Ahead Tips
You can mix the dry rub up to a week ahead and store it in an airtight container.
The drumsticks can also be rubbed and refrigerated up to 24 hours before cooking. Honestly, this makes them taste even better. The rub has more time to work its way into the meat.
Just don’t glaze them ahead of time. Save that step for right before baking.
Estimated Nutrition
Rough estimate per serving (3 drumsticks):
- Calories: approximately 380
- Protein: approximately 32g
- Fat: approximately 22g
- Carbs: approximately 14g
Note: these numbers are estimates only and will vary depending on the exact brands and products you use. Always verify with a tool like Cronometer using your specific ingredients before relying on these for dietary tracking.
Pairing Suggestions
These drumsticks are bold and sticky, so I like pairing them with something cool and simple.
- Creamy coleslaw
- Corn on the cob with butter
- A simple cucumber and tomato salad
- Cornbread
- Iced tea or a cold lager
Storage and Reheating
Fridge: Store leftover drumsticks in an airtight container for up to 4 days.
Freezer: They freeze well for up to 3 months. Let them cool completely first.
Reheating: Skip the microwave if you can. It turns the skin soggy. Instead, reheat in a 350°F oven for about 12 minutes, or until warmed through. This brings back most of that crispy texture.
FAQ
Can I use boneless chicken for this recipe? You can, but drumsticks specifically hold up better to the two-stage cooking process because the bone helps regulate the cooking temperature and keeps the meat from drying out.
Why is my BBQ sauce burning? It’s almost always because it went on too early. BBQ sauce has sugar, and sugar scorches at high heat. Always add it in the final stretch of cooking.
Do I need to flip the drumsticks while baking? Not necessary if you’re using a wire rack, since the air circulates underneath. If you’re baking directly on the sheet, flip once halfway through for even browning.
What’s the best BBQ sauce to use here? Whatever you already love. A tangy vinegar-based sauce and a sweet, thick classic sauce both work well with this rub.
Can I make these ahead for a party? Yes. Bake them fully, then reheat in a 350°F oven right before serving. Add a fresh brush of sauce on top to make them look and taste freshly made.
Wrapping Up
There’s a reason these drumsticks keep making a reappearance at my house. They’re easy, they’re cheap, and they genuinely taste like something worth bragging about.
Silas has eaten these more times than I can count and still asks when I’m making them again.
Give them a try this week. Then come back and tell me how they turned out, what glaze you used, or if your neighbor showed up at your door too. I want to hear about it in the comments. 👇