I wasn’t even trying to show off.
I just cracked my kitchen window because it was hot, and apparently mango and lime carry further than I thought. Ten minutes later my neighbor Priya was standing on my porch asking what I was making.
That’s the power of this cake. It smells like summer before you’ve even cut a slice.
And here’s the thing that surprised me most. No oven required for the mousse part. No fancy pastry degree. Just a few bowls, some patience while it chills, and a blender doing most of the heavy lifting.
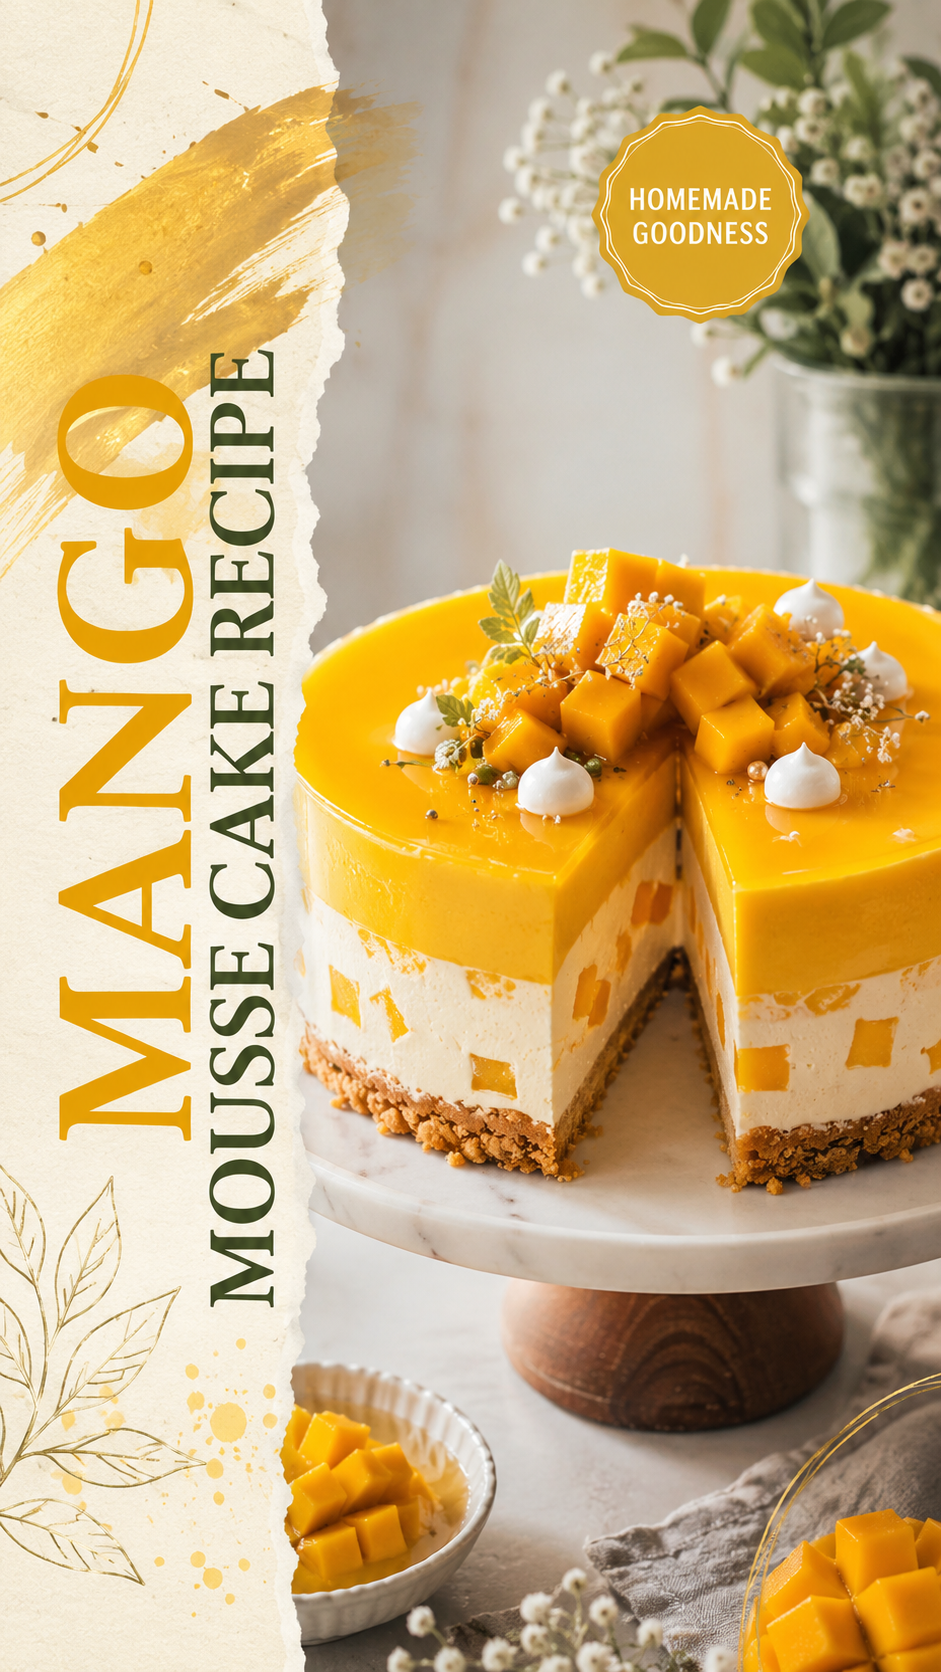
I’ve made a lot of desserts that look impressive and taste like a letdown. This one’s the opposite. It looks like something from a bakery window, but it’s honestly one of the more forgiving cakes I’ve made.
Let’s get into it. 🥭
What You’ll Need
For the cake base:
| Ingredient | Amount |
|---|---|
| All-purpose flour | 1 ½ cups |
| Granulated sugar | ¾ cup |
| Baking powder | 1 ½ tsp |
| Salt | ¼ tsp |
| Eggs | 3 large |
| Vegetable oil | ⅓ cup |
| Whole milk | ½ cup |
| Vanilla extract | 1 tsp |
For the mango mousse:
| Ingredient | Amount |
|---|---|
| Ripe mangoes, cubed | 3 large (about 2 ½ cups puree) |
| Heavy whipping cream, cold | 2 cups |
| Granulated sugar | ½ cup |
| Unflavored gelatin | 2 ½ tsp |
| Cold water | ¼ cup |
| Fresh lime juice | 1 tbsp |
For the topping:
| Ingredient | Amount |
|---|---|
| Fresh mango, thinly sliced | 1 |
| Mint leaves | a small handful |
| Mirror glaze or apricot jam (optional, for shine) | 2 tbsp |
Nothing exotic here. If your grocery store has a produce section, you’re set.
Tools You’ll Need
- 9-inch springform pan
- Blender or food processor
- Hand mixer or stand mixer
- Mixing bowls (at least 3)
- Small saucepan
- Rubber spatula
- Offset spatula for smoothing
Pro Tips
Learned most of these the hard way, so you don’t have to.
- Use mangoes that are almost overripe. Slightly soft, very fragrant. Underripe mango makes a mousse that tastes more like a vegetable than a fruit.
- Bloom your gelatin properly. Sprinkle it over cold water and let it sit untouched for 5 full minutes before heating. Rushing this step is the #1 reason mousse turns out grainy.
- Don’t overwhip the cream. Stop at soft peaks, not stiff. Overwhipped cream makes the mousse dense instead of airy, and nobody wants a mango brick.
- Chill the cake base completely before adding the mousse layer. A warm cake will melt your mousse right into a soup. Ask me how I know.
- Line your springform pan with acetate or parchment around the inside edge. It makes unmolding so much cleaner, and honestly, this is the trick that makes it look bakery-bought.
How to Make It
Step 1: Bake the cake layer
Preheat your oven to 350°F. Grease your springform pan and line the bottom with parchment.
In one bowl, whisk together the flour, sugar, baking powder, and salt.
In another, whisk the eggs, oil, milk, and vanilla.
Combine the wet and dry ingredients until just mixed. Don’t overmix, or you’ll end up with a tough cake instead of a soft one.
Pour into the pan and bake for 20-25 minutes, until a toothpick comes out clean.
Let it cool completely in the pan. This part takes patience, but it matters.
Step 2: Make the mango puree
Blend your cubed mango until completely smooth. You should get around 2 ½ cups of puree.
Set aside about ¼ cup for the topping later if you want extra flavor bursts on top.
Step 3: Bloom and melt the gelatin
Sprinkle the gelatin over the cold water in a small bowl. Let it sit for 5 minutes untouched.
Then microwave it in 10-second bursts, or heat it gently on the stove, until it’s fully liquid and clear. No lumps.
Step 4: Build the mousse
Whip the cold heavy cream with the sugar until soft peaks form.
In a separate bowl, mix the mango puree with the lime juice and the melted gelatin, stirring quickly so it doesn’t clump.
Fold the mango mixture into the whipped cream gently, in three additions. Fold, don’t stir. You want to keep all that air in there.
Step 5: Assemble
Once your cake base is fully cooled, keep it in the springform pan and line the inside edge with acetate or parchment.
Pour the mango mousse over the cake layer and smooth the top with an offset spatula.
Refrigerate for at least 6 hours, but overnight is better if you can swing it.
Step 6: Decorate and serve
Once set, carefully remove the springform ring and peel away the liner.
Top with sliced mango, mint leaves, and a light glaze if you’re feeling fancy.
Slice with a warm knife for the cleanest cuts. Wipe it between slices.
Substitutions and Variations
| Original | Swap | Notes |
|---|---|---|
| Heavy cream | Coconut cream | Makes it dairy-free, adds a tropical note |
| Gelatin | Agar-agar (1:1, adjusted for heat method) | Good for a vegetarian version |
| All-purpose flour | 1:1 gluten-free flour blend | Texture stays close to original |
| Mango | Peach or passionfruit puree | Great if mango’s out of season |
| Regular sugar | Honey or maple syrup | Reduce liquid slightly to balance |
Make Ahead Tips
This cake is honestly better made a day ahead. The flavors settle and the mousse firms up more evenly.
You can bake the cake layer up to 2 days in advance. Wrap it tightly and keep it at room temperature.
The full assembled cake keeps well in the fridge for up to 3 days before serving.
Just hold off on adding fresh mango slices and mint until right before you serve it, or they’ll go a little sad and soggy.
Additional Details
Nutrition (per slice, based on 10 slices):
| Nutrient | Amount |
|---|---|
| Calories | 310 |
| Fat | 19g |
| Carbohydrates | 31g |
| Sugar | 24g |
| Protein | 4g |
Estimated values, will vary based on exact ingredients used.
Meal pairing suggestions: This cake is rich enough to stand alone, but if you’re serving it after a heavier dinner, pair it with something light like grilled fish or a citrusy salad beforehand so the mousse feels like a proper finale.
Time efficiency tip: Bake your cake layer the night before. That alone saves you almost an hour of active hands-on time the day you plan to serve it.
Leftovers and Storage
Store any leftover cake covered in the fridge for up to 3 days. The mousse holds up surprisingly well.
Freezing: You can freeze individual slices wrapped tightly in plastic wrap, then foil, for up to a month. Thaw in the fridge overnight, not on the counter, or the mousse gets watery.
Skip freezing the whole cake with fresh mango topping already on it. The mango texture doesn’t survive freezing well.
FAQ
Can I make this without a springform pan?
You technically can with a deep cake ring, but a springform pan makes unmolding significantly easier. I’d really recommend picking one up if you don’t have one.
Why is my mousse not setting?
Usually it’s one of two things. Either the gelatin wasn’t fully bloomed and dissolved, or the mousse didn’t chill long enough. Give it the full 6 hours minimum.
Can I use canned mango puree?
Yes, though fresh mango gives you a brighter, less syrupy flavor. If using canned, check the sugar content and adjust the added sugar in the recipe accordingly.
My mousse turned out grainy. What happened?
That’s almost always a gelatin issue. It either wasn’t bloomed long enough, or it was added to the mixture while too hot, causing it to seize slightly.
Can I make this into cupcakes or individual cups instead?
Absolutely. Layer crumbled cake and mousse into small glasses or jars for an easy no-slice version. Great for parties.
Wrapping Up
This is one of those recipes that looks like it took hours of skill, but really just takes a little patience and a good blender.
Make it once and I promise you’ll understand exactly why my neighbor came knocking.
If you give this a try, come back and leave a comment. I want to know how it turned out for you, what you swapped, and if anyone else showed up at your door because of the smell. 🍋