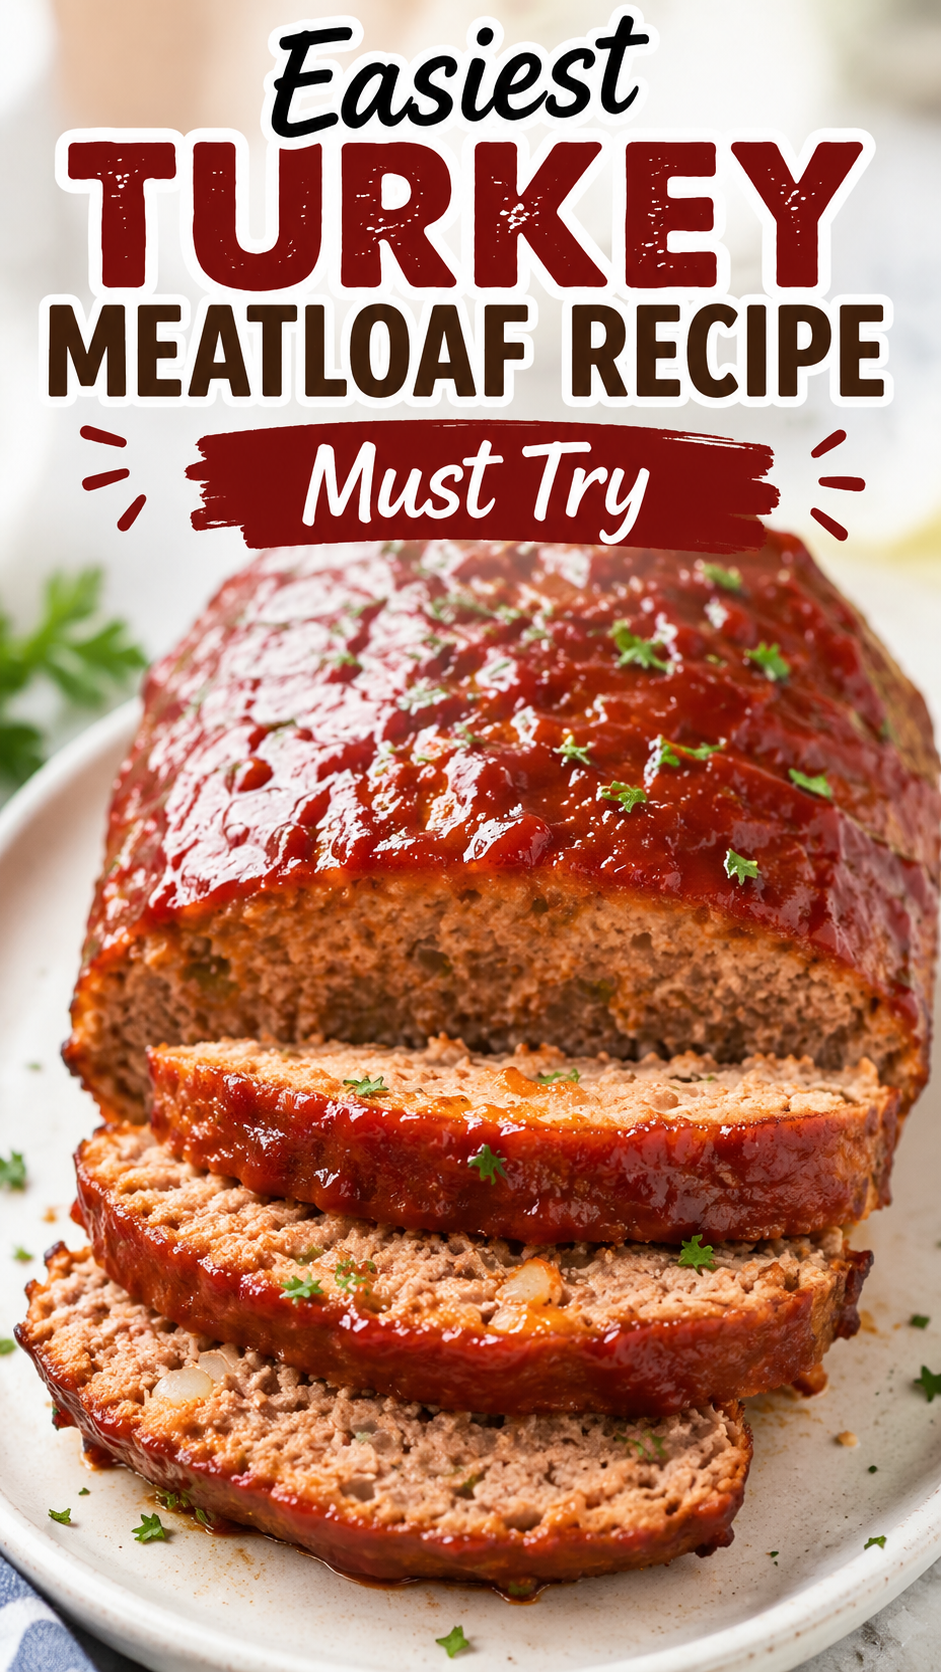
Can we talk about how turkey meatloaf has a reputation problem?
I get it. Turkey is lean, which sounds healthy, but it also means it can turn into a dry, crumbly brick if you’re not careful. I’ve had the sad, flavorless kind at potlucks and it’s honestly a little traumatic.
But here’s the thing. A good turkey meatloaf can be just as juicy and flavorful as the classic beef version, and I’m going to show you exactly how.
This recipe uses a couple of small tricks that make a huge difference. We’re talking a moist, tender loaf with a glossy, tangy glaze on top that caramelizes in the oven.
No dry texture. No bland flavor. Just a cozy, comforting dinner that also happens to be one of the easier things you’ll cook this week. 🦃
Let’s get into it.
Why This Recipe Actually Works
Most turkey meatloaf recipes fail for one simple reason: they don’t add enough moisture back in.
Turkey is naturally lower in fat than beef, so if you skip a few key ingredients, you end up with something closer to a hockey puck than a dinner.
This recipe fixes that with:
- Grated onion and garlic instead of chopped, so they melt right into the meat instead of staying as separate chunks
- A panade (that’s just breadcrumbs soaked in milk) which keeps everything tender
- An egg to bind it all together without drying it out
- A tangy glaze that adds moisture and flavor right on top
It’s genuinely a simple process. You mix, you shape, you glaze, you bake. That’s it.
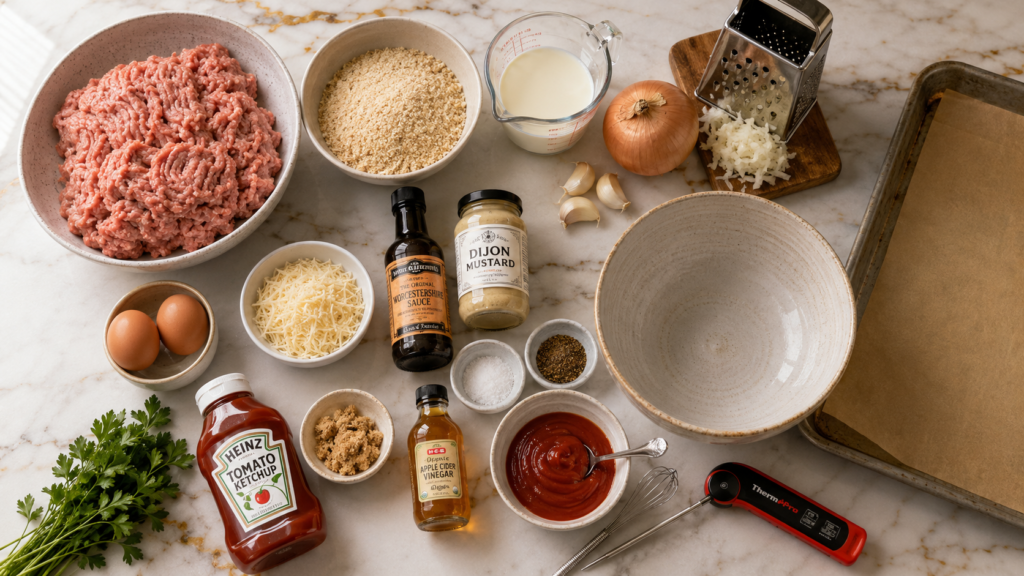
What You’ll Need
For the Meatloaf
- 2 pounds ground turkey (a mix of 93% and 85% lean works best, but 93% alone is fine too)
- 1 cup breadcrumbs (plain or panko)
- ⅔ cup milk
- 1 small yellow onion, grated
- 3 garlic cloves, grated or minced
- 2 large eggs
- ¼ cup grated parmesan cheese
- 2 tablespoons Worcestershire sauce
- 1 tablespoon Dijon mustard
- 1 teaspoon salt
- ½ teaspoon black pepper
- ½ teaspoon smoked paprika
- 2 tablespoons chopped fresh parsley (optional, but pretty)
For the Glaze
- ½ cup ketchup
- 2 tablespoons brown sugar
- 1 tablespoon apple cider vinegar
- 1 teaspoon Worcestershire sauce
Tools You’ll Need
- Large mixing bowl
- Box grater (for the onion and garlic)
- Loaf pan or a rimmed baking sheet
- Meat thermometer (this one is non-negotiable, more on that below)
- Small bowl for the glaze
- Parchment paper
Pro Tips Before You Start
1. Don’t skip the grating. Grating the onion and garlic instead of chopping them means they release their moisture directly into the meat mixture. Less chewing, more flavor in every bite.
2. Let the breadcrumbs actually soak. Give the milk and breadcrumbs at least 5 minutes together before mixing everything else in. This little panade is basically the secret to a moist loaf.
3. Don’t overmix the meat. I know it’s tempting to really work the mixture together, but overmixing makes the texture dense and tough. Mix just until everything is combined.
4. Free-form beats a loaf pan. Shaping the meatloaf on a parchment-lined baking sheet (instead of packing it into a loaf pan) lets the sides get slightly caramelized instead of steamed. Big flavor difference.
5. Use a thermometer, always. Turkey needs to hit 165°F internally, but pulling it the second it hits that number (instead of overcooking “just to be safe”) is what keeps it juicy.
How to Make Turkey Meatloaf
Step 1: Prep the Panade
In a large mixing bowl, combine the breadcrumbs and milk. Let it sit for 5 to 10 minutes until the crumbs soften and soak up the liquid.
Step 2: Mix the Meatloaf
Add the ground turkey, grated onion, grated garlic, eggs, parmesan, Worcestershire sauce, Dijon mustard, salt, pepper, smoked paprika, and parsley to the bowl with your soaked breadcrumbs.
Using clean hands (this really is the easiest way), mix everything together just until combined. Stop as soon as you don’t see any streaks of egg or loose breadcrumbs.
Step 3: Shape It
Preheat your oven to 375°F.
Line a rimmed baking sheet with parchment paper. Transfer the meat mixture onto the sheet and shape it into a loaf, roughly 9 inches long and 4 inches wide.
Try to keep the thickness even throughout so it cooks at the same rate all the way through.
Step 4: Make the Glaze
In a small bowl, whisk together the ketchup, brown sugar, apple cider vinegar, and Worcestershire sauce.
Step 5: Glaze and Bake
Brush about half of the glaze over the top and sides of the meatloaf.
Bake for 35 minutes, then pull it out and brush on the remaining glaze. Return it to the oven for another 15 to 20 minutes, or until a meat thermometer inserted into the center reads 165°F.
Step 6: Rest Before Slicing
Let the meatloaf rest for at least 10 minutes before slicing.
I know it’s hard to wait. But this is what keeps all those juices inside the meatloaf instead of running out all over your cutting board.
Substitutions and Variations
| Original Ingredient | Swap Option | Notes |
|---|---|---|
| Ground turkey | Ground chicken | Slightly milder flavor, same method |
| Breadcrumbs | Crushed crackers or oats | Gluten-free oats work great here |
| Milk | Unsweetened almond milk | Keeps it dairy-light |
| Parmesan | Nutritional yeast | For a dairy-free version |
| Ketchup glaze | BBQ sauce | Smokier, slightly sweeter finish |
| Dijon mustard | Yellow mustard | A bit milder, still works |
Want to sneak in some veggies? Finely grated carrot or zucchini blends right into the mixture without anyone noticing.
Make-Ahead Tips
This is one of those recipes that’s actually better with a little planning ahead.
- Mix it the night before. Combine everything, shape the loaf, cover it tightly, and refrigerate for up to 24 hours before baking.
- Freeze it raw. Shape the meatloaf, wrap it tightly in plastic wrap and foil, and freeze for up to 3 months. Thaw overnight in the fridge before baking.
- Freeze it cooked. Slice leftovers and freeze in a single layer before transferring to a freezer bag. This makes reheating individual portions so much easier.
Nutrition Estimates (Per Serving)
Note: this recipe makes about 6 servings.
| Nutrient | Approximate Amount |
|---|---|
| Calories | 290 |
| Protein | 27g |
| Fat | 14g |
| Carbohydrates | 15g |
| Sugar | 7g |
| Sodium | 620mg |
A quick note: these numbers are estimates based on standard ingredient values, not a lab test. I’d recommend running the exact recipe through Cronometer (or your nutrition tracker of choice) before treating these as gospel, especially if you’re tracking macros closely.
What to Pair With Turkey Meatloaf
- Garlic mashed potatoes
- Roasted green beans or broccoli
- A simple side salad with vinaigrette
- Buttered egg noodles
- Cornbread, if you’re feeling extra cozy
Leftovers and Storage
Fridge: Store leftover slices in an airtight container for up to 4 days.
Freezer: Freeze cooked slices for up to 3 months. Wrap them individually so you can pull out just what you need.
Reheating: Reheat slices in the microwave in 30-second bursts, or in a 300°F oven for about 10 minutes covered with foil. This keeps them from drying out.
Bonus idea: Cold meatloaf slices make a genuinely great sandwich the next day. Add a little extra ketchup and some sharp cheddar and thank me later.
FAQ
Can I use ground beef instead of turkey?
Yes, this recipe works with ground beef too. You may want to skip the parmesan for a more classic flavor, but the ratios stay the same.
Why did my turkey meatloaf come out dry?
This usually happens from overcooking, skipping the panade step, or using 99% lean turkey (too little fat). Stick with 93% lean and pull it at exactly 165°F.
Can I make this without eggs?
You can substitute a flax egg (1 tablespoon ground flaxseed mixed with 3 tablespoons water) for a similar binding effect.
Do I have to use the glaze?
Nope, but I really recommend it. It adds moisture on top and a little tang that balances out the richness of the meat.
Can I cook this in a loaf pan instead?
Yes, though the texture will be slightly softer since the sides won’t caramelize as much. Bake time stays about the same, just check for doneness with your thermometer.
Wrapping Up
Turkey meatloaf doesn’t have to be the boring, dry dinner everyone dreads.
With a few small adjustments, this one comes out juicy, flavorful, and honestly kind of addictive with that tangy glaze on top.
Make it for a weeknight dinner, slice it up for sandwiches the next day, or freeze half for a future you that’s going to be very grateful.
If you try this recipe, I’d love to hear how it turned out. Drop a comment below and let me know what you paired it with, or if you tried any of the substitutions!