Okay, real talk. Mongolian beef has nothing to do with Mongolia.
No really. It’s not even a thing there. It’s a Taiwanese-American invention that somehow got slapped with the wrong country’s name and stuck around anyway.
But here’s why you’re actually here: it’s ridiculously good, and you’ve probably been paying $14 plus delivery fees for a dish that takes 20 minutes to make at home.
I made this for the first time on a random Tuesday because I didn’t feel like ordering out, and I haven’t ordered the takeout version since. The beef comes out tender, the sauce is sticky-sweet with a savory backbone, and it tastes shockingly close to your favorite restaurant version.
Let’s fix your weeknight dinner problem.
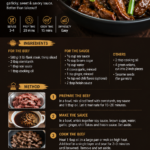
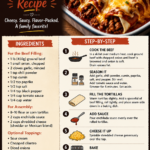
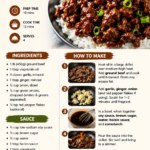
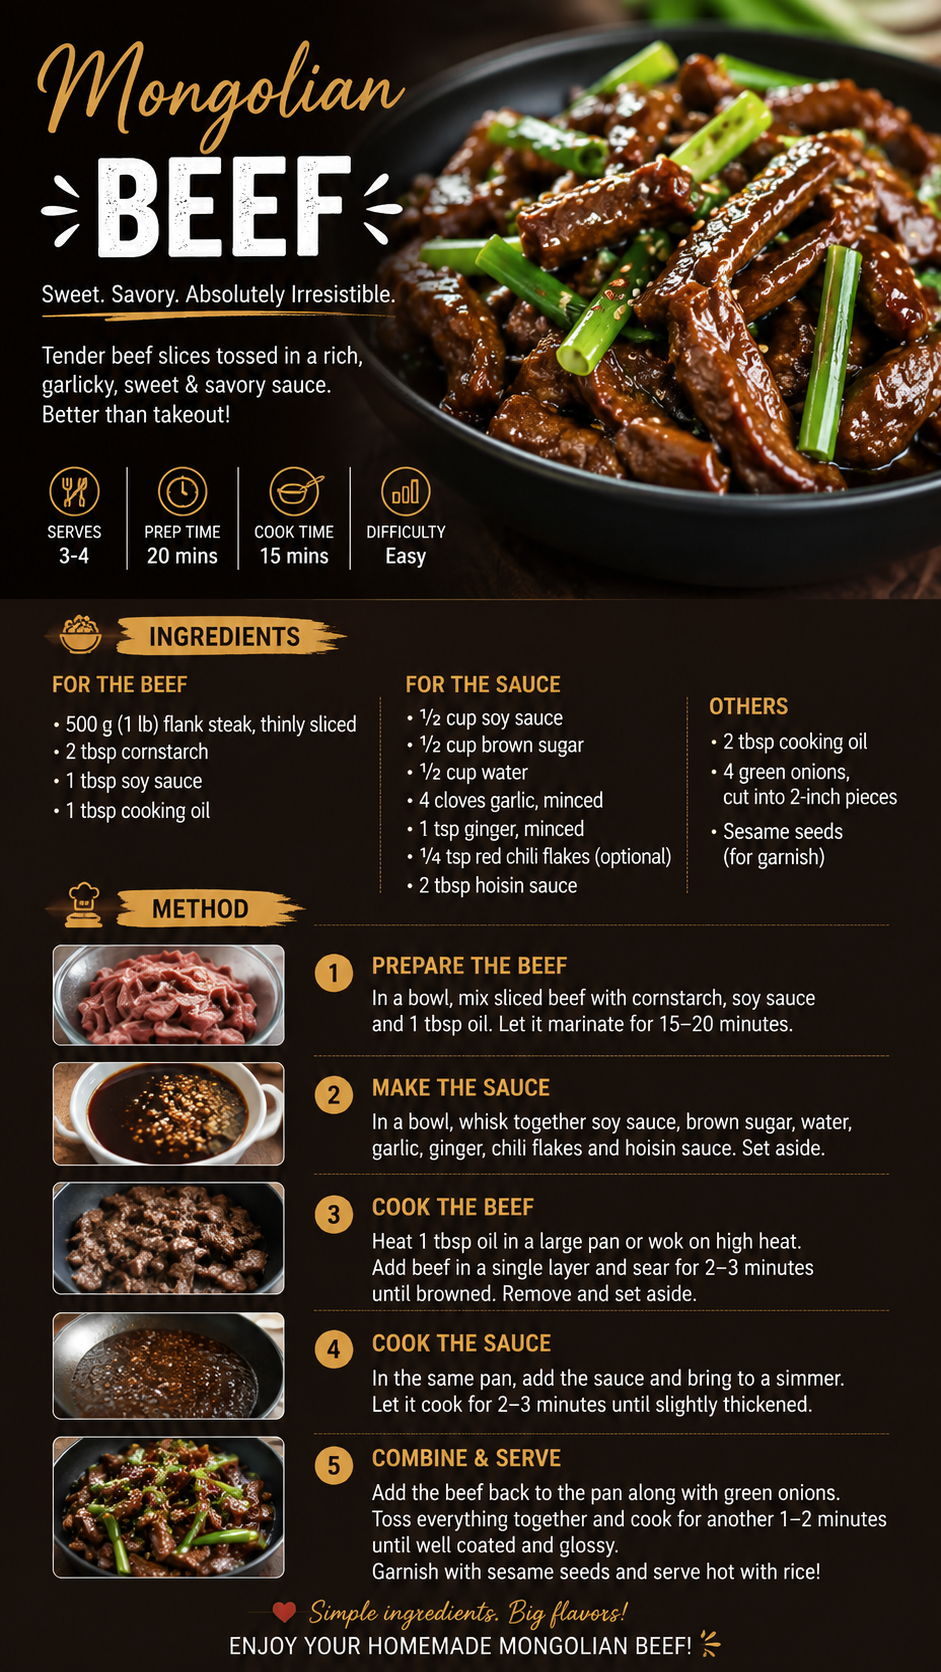
What You’ll Need
Here’s everything going into this dish:
For the beef:
- 1 lb flank steak, thinly sliced against the grain
- 1/4 cup cornstarch
- 3 tablespoons vegetable oil (for frying)
For the sauce:
- 1 tablespoon vegetable oil
- 1 tablespoon minced garlic
- 1 teaspoon minced ginger
- 1/2 cup low-sodium soy sauce
- 1/2 cup water
- 2/3 cup brown sugar (packed)
- 1/2 teaspoon red pepper flakes (optional, for a little heat)
To finish:
- 3 green onions, sliced into 2-inch pieces
- Cooked white rice, for serving
That’s it. Nothing exotic, nothing you’ll need to drive across town for.
Tools You’ll Need
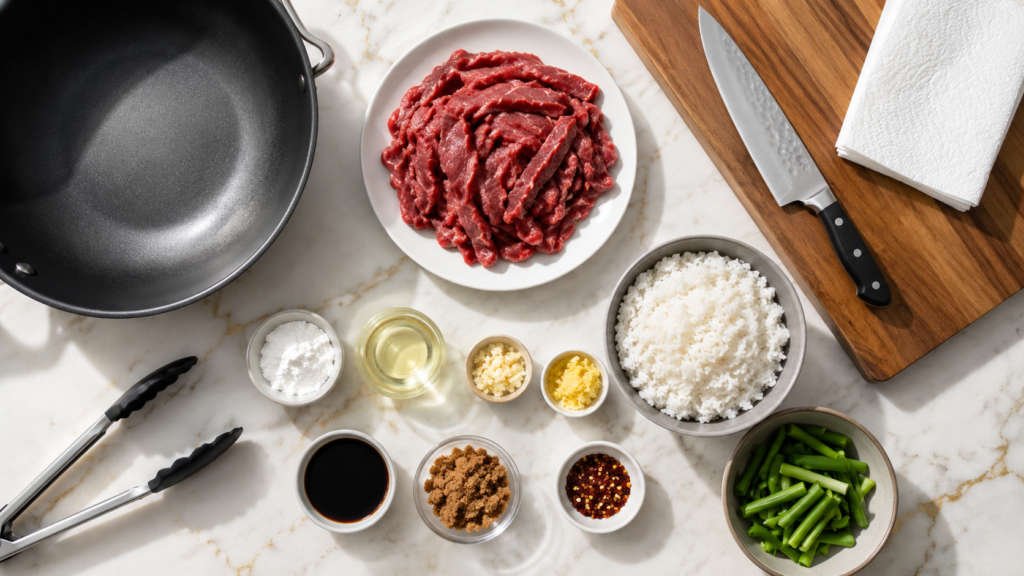
- A large skillet or wok
- A mixing bowl (for tossing the beef in cornstarch)
- Tongs
- A sharp knife (for slicing the steak thin)
- Paper towels (for draining the beef after frying)
Pro Tips Before You Start
1. Freeze the steak for 15 minutes before slicing. This makes it so much easier to get those thin, even slices. Soft, room-temp meat slides around the cutting board and you’ll end up with chunks instead of strips.
2. Always slice against the grain. Look at the direction of the muscle fibers and cut perpendicular to them. This is the difference between tender beef and beef that fights you while you chew.
3. Don’t skip the cornstarch coating. This is what gives the beef that slightly crispy edge that soaks up the sauce instead of getting soggy. Skip it, and you basically just made boiled beef in sauce.
4. Fry in batches. Crowding the pan steams the meat instead of crisping it. Give each piece some breathing room.
5. Let the sauce reduce before adding the beef back in. The sauce needs a few minutes to thicken on its own. Add the beef too early and you’ll end up with a thin, watery sauce instead of that glossy, clingy texture you want.
How to Make Mongolian Beef
Step 1: Coat the beef
Toss your sliced flank steak in the cornstarch until every piece is evenly coated. Shake off any excess.
Step 2: Fry the beef
Heat 3 tablespoons of oil in your skillet or wok over medium-high heat. Fry the beef in batches for about 2-3 minutes per side, until golden and slightly crispy.
Move the cooked beef to a paper towel-lined plate as you go.
Step 3: Make the sauce
In the same pan, lower the heat to medium. Add a tablespoon of oil, then toss in the garlic and ginger. Cook for about 30 seconds, just until fragrant.
Step 4: Build the sauce
Pour in the soy sauce, water, and brown sugar. Stir well and let it come to a simmer.
Let it cook for 3-4 minutes, until it starts to thicken slightly.
Step 5: Bring it together
Add the beef back into the pan. Toss everything together so the beef gets fully coated in that glossy sauce.
Let it simmer for another 2 minutes so the sauce thickens up and clings to every piece.
Step 6: Finish with green onions
Add the green onions in the last 30 seconds of cooking. You just want them to soften slightly, not wilt completely.
Step 7: Serve
Spoon it over a bowl of hot white rice and dig in.
Substitutions and Variations
| Original | Swap | Notes |
|---|---|---|
| Flank steak | Sirloin or skirt steak | Both work well, slice thin |
| Brown sugar | Honey or coconut sugar | Slightly different flavor, still works |
| Soy sauce | Tamari or coconut aminos | Great for gluten-free |
| Vegetable oil | Avocado oil | Higher smoke point |
| Beef | Chicken thighs | Cooks faster, still delicious |
| Beef | Crispy tofu | For a vegetarian version |
Want it spicier? Double the red pepper flakes or add a drizzle of chili oil at the end.
Want it extra crispy? Double-fry the beef. Fry once, let it rest for 5 minutes, then fry again for 60 seconds before adding it to the sauce.
Make Ahead Tips
You can slice and coat the beef in cornstarch up to a day ahead. Keep it covered in the fridge until you’re ready to fry.
The sauce can also be made 2-3 days in advance. Store it in the fridge and reheat it gently before adding the cooked beef.
This is genuinely one of those meals where prepping ahead makes weeknight cooking almost too easy.
Nutritional Breakdown (Per Serving, Serves 4)
| Nutrient | Amount |
|---|---|
| Calories | ~420 |
| Protein | 28g |
| Carbs | 32g |
| Fat | 18g |
| Sodium | ~980mg |
This will vary depending on your exact brands and how much sauce you use. Using low-sodium soy sauce makes a noticeable difference here.
What to Pair It With
- Steamed broccoli or bok choy on the side
- A simple cucumber salad for crunch
- Jasmine rice or even cauliflower rice if you’re cutting carbs
- A cold glass of iced tea, because this dish has some heat to balance
Leftovers and Storage
Mongolian beef keeps well in the fridge for up to 4 days in an airtight container.
To reheat, use a skillet over medium heat rather than the microwave. The stovetop brings back some of that texture instead of leaving you with mushy beef.
You can also freeze it for up to 2 months. Thaw overnight in the fridge before reheating.
FAQ
Is Mongolian beef actually from Mongolia? No. It’s a Taiwanese-American creation, likely inspired by Hunan-style beef dishes. The name is basically marketing.
Is this spicy? Not really, unless you add the red pepper flakes or extra chili oil. The base sauce is sweet and savory, not heat-forward.
Can I make this gluten-free? Yes. Swap the soy sauce for tamari or coconut aminos and double check your cornstarch brand, though most are naturally gluten-free.
Why is my sauce too thin? You probably added the beef back in too early or didn’t let the sauce simmer long enough. Give it those extra few minutes to thicken on its own.
Can I bake the beef instead of frying it? You can, but you’ll lose some of that crispy texture. If you want a lighter version, bake at 400°F for about 12-15 minutes, flipping halfway.
Wrapping Up
This is one of those recipes that feels fancier than the effort it actually takes.
Twenty minutes, a handful of pantry staples, and you’ve got something that tastes like it came from your favorite takeout spot, minus the delivery fee and the wait.
Make this one and let me know in the comments how it turned out for you. And if you have any questions before you start cooking, drop them below too. I’ll help you troubleshoot.