Silas asked me why I owned three different cheesecake pans if I never actually used them.
Fair question. Springform pans are intimidating. Water baths are a whole production. And cracked cheesecake tops have made me cry more than once in this kitchen. 🍰
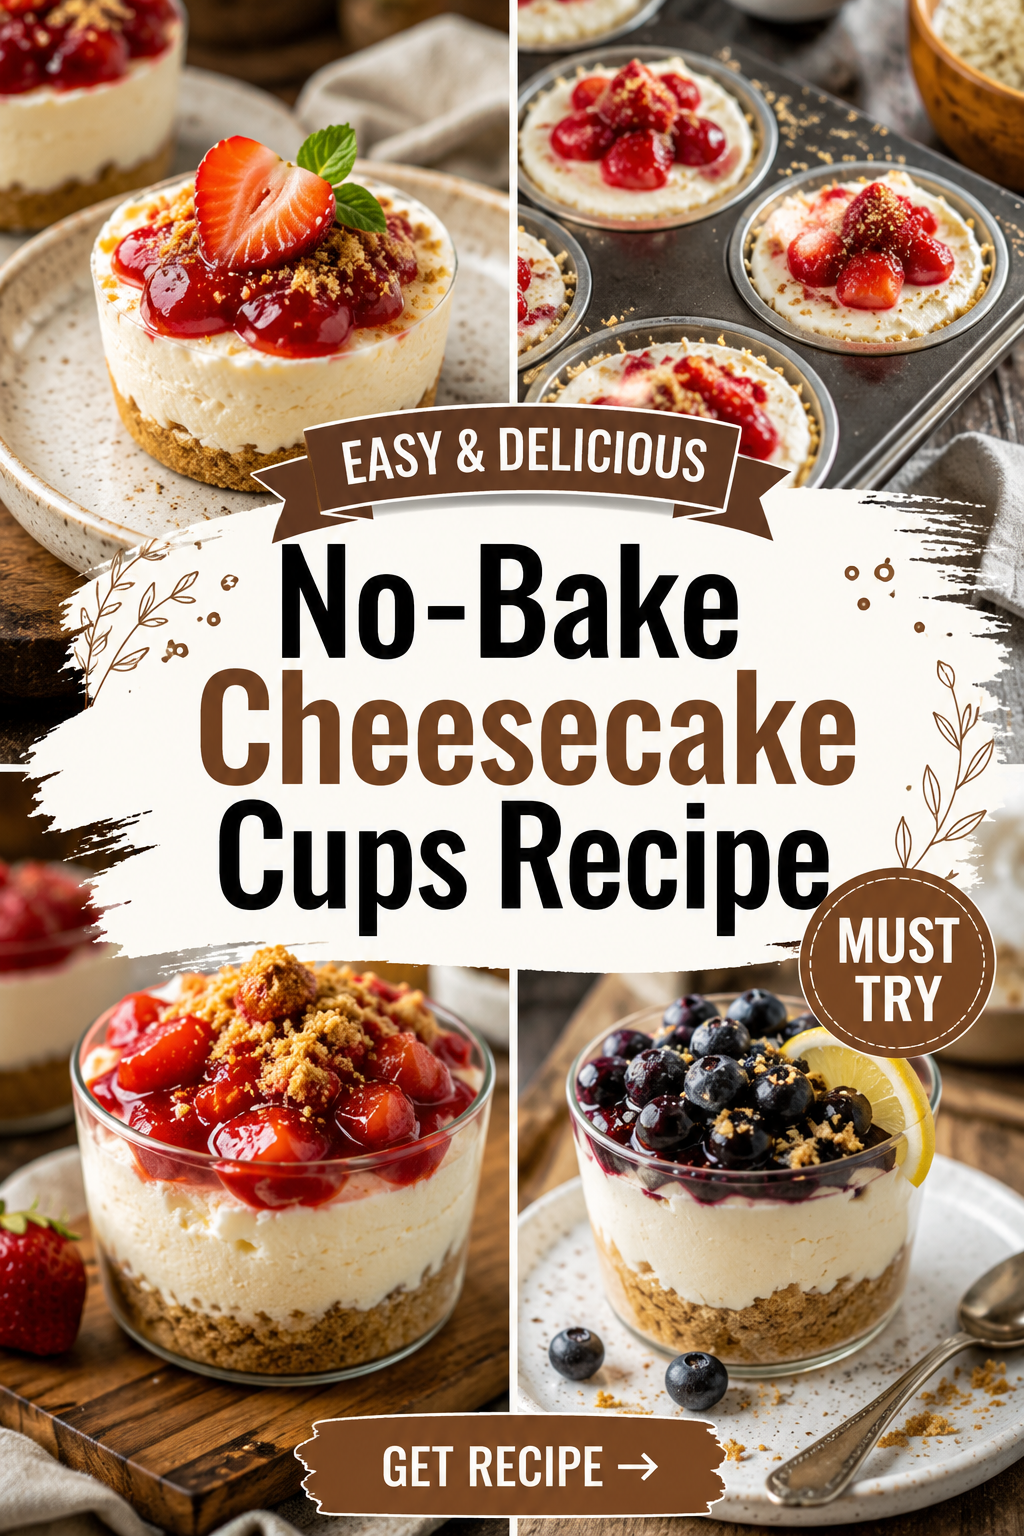
So a few weeks ago, on one of those nights where we wanted something sweet but I had zero interest in turning on the oven, I made these instead. No-bake cheesecake cups, layered in little jars, done before Silas even finished loading the dishwasher.
He had two. Then went back for a third when he thought I wasn’t looking.
That’s when I knew this recipe was staying in the rotation for good.
Why This Recipe Works
You get all that tangy, creamy cheesecake flavor without babysitting an oven for an hour.
No cracks. No water bath. No waiting for anything to cool overnight.
Just a graham cracker crust, a whipped cream cheese filling, and whatever topping you’re craving. Twenty minutes of actual work, then the fridge does the rest.
They also happen to look really impressive for something this easy, which never hurts when you’re bringing dessert to someone else’s house.
What You’ll Need
| Ingredient | Amount |
|---|---|
| Graham crackers, crushed | 1 ½ cups |
| Unsalted butter, melted | 6 tablespoons |
| Granulated sugar (for crust) | 2 tablespoons |
| Cream cheese, softened | 16 oz (2 blocks) |
| Powdered sugar | ¾ cup |
| Vanilla extract | 1 teaspoon |
| Lemon juice | 1 tablespoon |
| Heavy whipping cream | 1 cup |
| Fresh berries or fruit topping | 1 to 1 ½ cups |
A note on the cream cheese: let it sit out for at least 30 minutes before you start. Cold cream cheese is the number one reason people end up with lumpy filling.
Tools You’ll Need
- Mixing bowls (2)
- Hand mixer or stand mixer
- Small jars, glasses, or ramekins (6 to 8, depending on size)
- Rubber spatula
- Measuring cups and spoons
- Fork or the bottom of a glass (for pressing the crust)
Pro Tips
- Use full-fat cream cheese. The low-fat kind gets watery and won’t hold its shape once whipped. This isn’t the place to save calories.
- Whip the cream separately, then fold it in. If you dump everything in one bowl at once, you’ll lose all that light, airy texture that makes these feel like cheesecake mousse instead of a brick.
- Don’t skip the lemon juice. It’s barely there, but it cuts through the sweetness and gives you that classic cheesecake tang. Without it, the filling tastes flat.
- Chill for at least an hour before serving. I know it’s tempting to dig in right away, but the flavors need time to settle and the texture firms up beautifully once it’s cold.
- Layer, don’t dump. Alternating crust, filling, and topping in clear jars makes these look like something from a bakery window. It takes an extra thirty seconds and it’s worth it.
How to Make No-Bake Cheesecake Cups
- Make the crust. In a bowl, mix the crushed graham crackers, melted butter, and 2 tablespoons of sugar until it looks like wet sand.
- Divide the crust between your jars. Press about 2 tablespoons into the bottom of each jar using a fork or the bottom of a glass. Pack it down firmly so it holds together.
- Beat the cream cheese. In a large bowl, beat the softened cream cheese until it’s completely smooth, about 2 minutes. Scrape down the sides so there are no hidden lumps.
- Add the sweetness. Mix in the powdered sugar, vanilla extract, and lemon juice. Beat until fully combined and smooth.
- Whip the cream. In a separate bowl, whip the heavy cream until stiff peaks form. This usually takes 3 to 4 minutes with a hand mixer.
- Fold, don’t stir. Gently fold the whipped cream into the cream cheese mixture using a spatula. Fold just until combined so you keep all that air in there.
- Layer it up. Spoon or pipe the filling on top of the crust in each jar, filling about three-quarters full.
- Chill. Cover and refrigerate for at least 1 hour, though overnight is even better if you can wait that long.
- Top and serve. Right before serving, add your fresh berries, fruit compote, or whatever topping you’re using.
Substitutions and Variations
| Original | Swap | Notes |
|---|---|---|
| Graham crackers | Digestive biscuits or vanilla wafers | Crush finely for the best texture |
| Heavy cream | Cool Whip, thawed | Skip the whipping step entirely |
| Fresh berries | Fruit preserves or lemon curd | Warm slightly for easy spreading |
| Regular cream cheese | Dairy-free cream cheese | Filling will be slightly softer |
| Granulated sugar in crust | Brown sugar | Adds a deeper, almost caramel note |
Chocolate lovers can swap the graham cracker crust for crushed Oreos and fold a few tablespoons of cocoa powder into the filling. Silas requests this version more than the original at this point.
Make-Ahead Tips
These are actually better made ahead, which makes them one of my go-to desserts when I’m hosting.
- Make the crust and filling up to 2 days in advance. Store the filling covered in the fridge.
- Assemble the jars up to 24 hours before serving, just hold off on the fresh fruit topping until right before guests arrive so it doesn’t get soggy.
- If you’re prepping for a party, the individual jars also travel really well with lids on.
Estimated Nutrition (Per Serving)
This is an estimate based on standard ingredient values and will vary depending on your specific brands and portion sizes. It is not a substitute for professional nutritional analysis.
| Nutrient | Amount |
|---|---|
| Calories | 340 |
| Fat | 25g |
| Carbohydrates | 26g |
| Sugar | 19g |
| Protein | 4g |
What to Pair These With
A cup of strong coffee or espresso balances out the sweetness perfectly.
If you’re serving these after dinner, they pair nicely with something light beforehand, like grilled chicken or a citrusy salad, so no one feels overly full by dessert.
For a summer gathering, I like putting these out alongside a fruit platter so people can add their own toppings.
Storing and Reheating Leftovers
Cheesecake cups keep well in the fridge, covered, for up to 4 days.
I don’t recommend freezing the assembled cups since the texture of the whipped filling changes once thawed. If you want to freeze ahead, freeze the crust and filling separately, then assemble once thawed in the fridge overnight.
There’s no reheating needed here. Straight from the fridge is exactly how these are meant to be eaten.
FAQ
Can I make this in one big dish instead of individual jars? Yes. Press the crust into an 8×8 pan, spread the filling on top, chill, and slice into squares once set.
Why is my filling runny? This usually means the cream cheese wasn’t fully softened, or the whipped cream wasn’t whipped to stiff peaks before folding it in.
Can I use low-fat cream cheese? You can, but the filling will be noticeably softer and less stable. Full-fat holds its shape best.
How far in advance can I make these for a party? Up to 24 hours, fully assembled minus the topping. Add fresh fruit right before serving.
Do I need a mixer for this recipe? A hand mixer makes it much easier, especially for whipping the cream to stiff peaks. It’s technically possible by hand, but it takes a lot longer.
Wrapping Up
I still own all three of those springform pans, gathering dust in the back of a cabinet.
But on a weeknight when the craving hits and the oven is staying off, this is the recipe I reach for every single time.
Give it a try, and let me know in the comments how yours turned out. I’d love to hear what toppings you went with.