I used to think jerky was just something you grabbed off a shelf.
Then I made a batch in my own oven and that idea went out the window completely.
It tasted better. It cost a fraction of the price. And I actually knew what was in it, which felt like a small miracle after reading the ingredient list on a store-bought bag.
My husband and I take a lot of road trips, and jerky is our go-to snack for the car. We were burning through bags of the stuff every single trip.
So one weekend I decided to just make my own. 🥩
I won’t lie, I thought it would be complicated. It’s not. It just takes patience and a few hours of mostly doing nothing while your oven does the work.
Here’s the full recipe, plus everything I wish someone had told me before my first attempt.
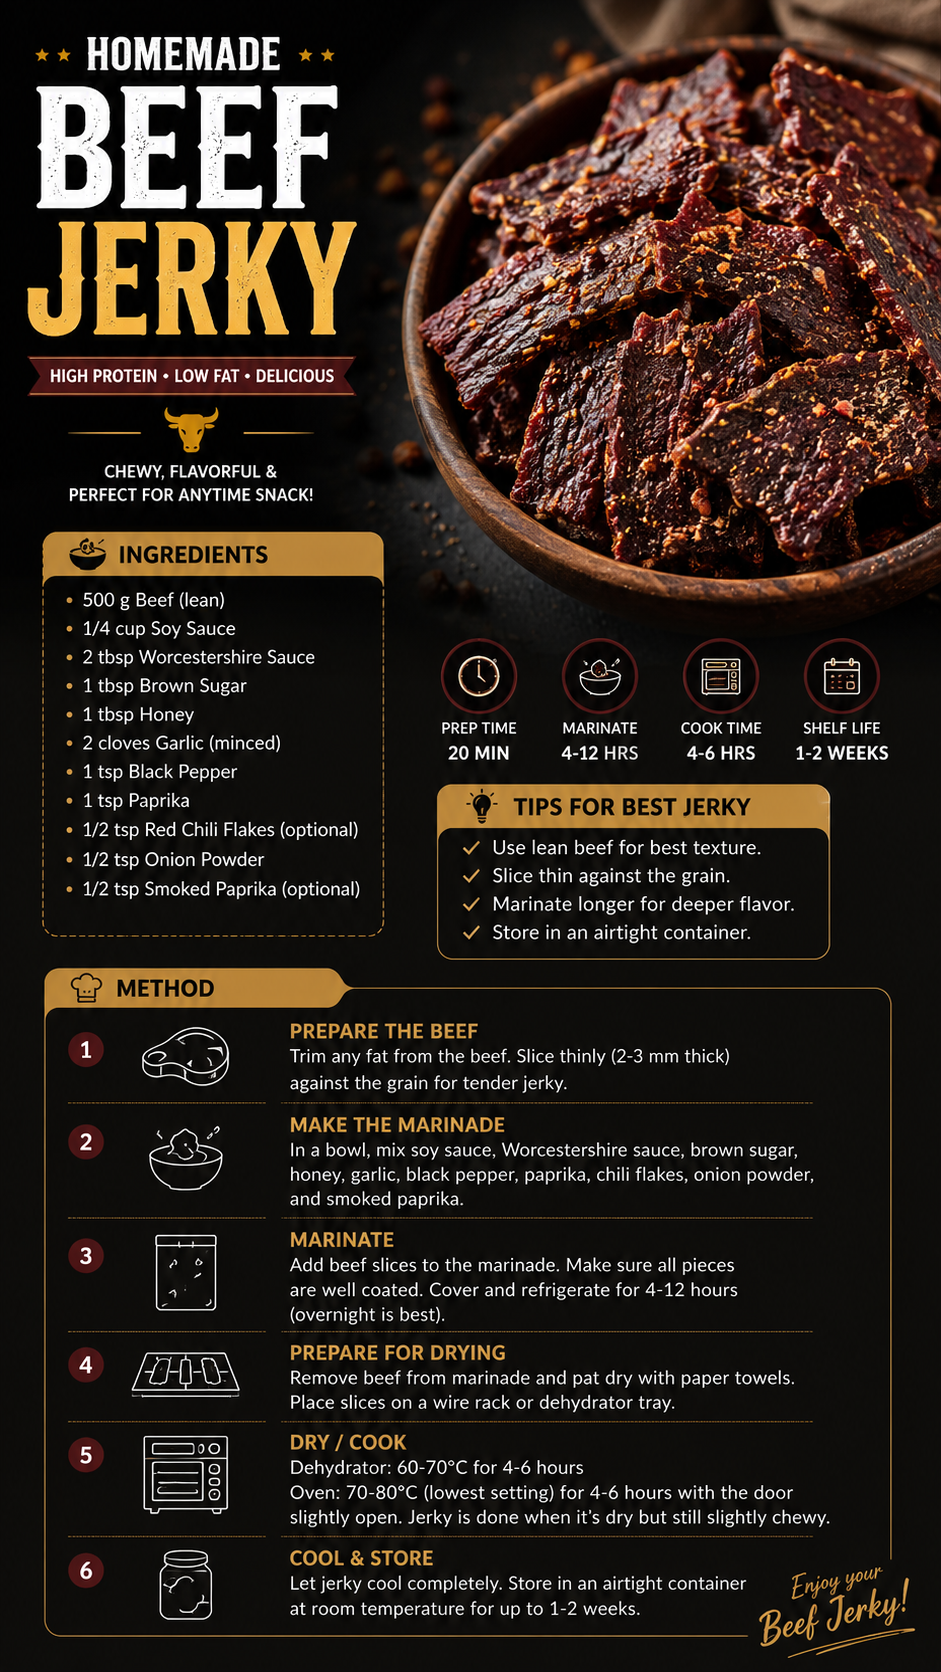
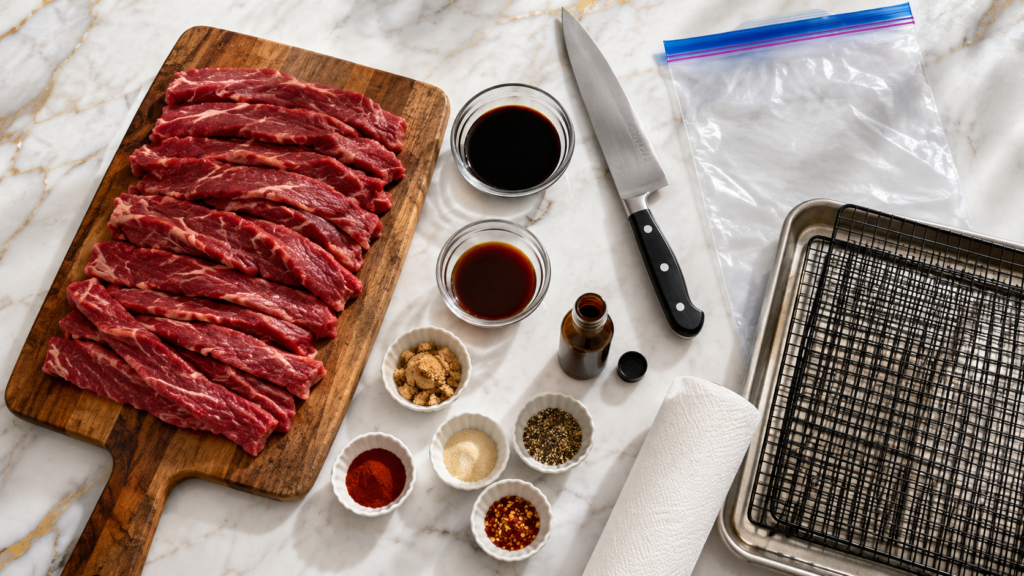
What You’ll Need
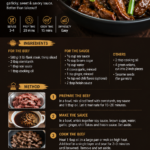
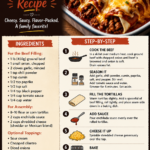
For the meat:
- 2 lbs flank steak or top round (lean cuts dry out the best)
For the marinade:
- 1/2 cup soy sauce
- 1/4 cup Worcestershire sauce
- 2 tablespoons brown sugar
- 1 tablespoon smoked paprika
- 1 teaspoon garlic powder
- 1 teaspoon onion powder
- 1/2 teaspoon black pepper
- 1/2 teaspoon red pepper flakes (optional)
- 1 teaspoon liquid smoke (optional, but it adds a lot)
That’s it. No weird filler ingredients, no mystery preservatives.
Tools You’ll Need
- Sharp knife or a meat slicer
- Cutting board
- Large bowl or a gallon-sized ziplock bag
- Wire cooling racks
- Baking sheets (to catch drips)
- Oven, or a dehydrator if you own one
- Paper towels
How To Make It
1. Trim the fat. Fat doesn’t dry out the same way meat does, so trim off as much as you can before slicing.
2. Slice the meat thin. Aim for about 1/8 to 1/4 inch thick. Slightly frozen meat is so much easier to cut evenly, so pop it in the freezer for 30-45 minutes first.
3. Mix the marinade. Whisk everything together in a bowl until the sugar dissolves.
4. Marinate. Add the sliced meat to the marinade, toss to coat, and refrigerate for 6 to 24 hours. Overnight is the sweet spot.
5. Pat it dry. Pull the meat out and pat off the excess marinade with paper towels. This step matters more than people think.
6. Arrange on racks. Lay the strips flat on wire racks set over baking sheets, leaving a little space between each piece.
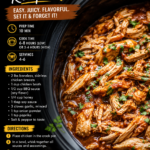
7. Dry it out. Bake at 175°F (or your oven’s lowest setting) for 3 to 4 hours, propping the door open slightly so moisture can escape.
8. Check for doneness. Bend a piece. It should crack and turn white at the bend, not snap clean in half. If it bends easily with no cracking, it needs more time.
9. Cool completely. Let it sit at room temperature before storing. Bagging it warm traps moisture and that’s how jerky goes bad fast.
Pro Tips
A few things I learned the hard way so you don’t have to:
- Slice against the grain for tender jerky, with the grain for chewy jerky. This one detail completely changes the texture.
- Don’t skip patting the meat dry. Wet meat steams instead of drying, and you’ll end up with rubbery jerky after hours of waiting.
- Don’t overcrowd the racks. Air needs to move around every piece, so give it room.
- Lower and slower beats hot and fast. Cranking the heat just cooks the outside while the inside stays wet.
- Taste test one piece once it cools. Texture changes a lot between hot-out-of-the-oven and fully cooled.
Substitutions and Variations
- Soy sauce: swap for coconut aminos if you need it gluten-free or soy-free.
- Brown sugar: honey or coconut sugar both work, just whisk a little longer to dissolve.
- Meat: ground turkey or venison both make great jerky, though ground meat needs a jerky gun or press instead of slicing.
- Heat level: skip the red pepper flakes for a milder batch, or add cayenne for more kick.
- Smoky flavor without liquid smoke: a few drops of mesquite seasoning gets you close.
Make Ahead Tips
You can marinate the meat up to 24 hours in advance, but try not to go past that. The salt and acid start breaking down the texture too much beyond a day.
Finished jerky also keeps well, so doubling the batch and freezing half is an easy way to stay stocked without doing this twice in one month.
Worth Knowing
Nutrition (rough estimate per ounce)
| Nutrient | Amount |
|---|---|
| Calories | 70-90 |
| Protein | 9-11g |
| Fat | 1-3g |
| Sodium | 400-600mg |
These numbers shift depending on how much marinade gets absorbed, so think of this as a ballpark rather than gospel.
Diet Swaps
- Gluten-free: use tamari or coconut aminos instead of regular soy sauce.
- Lower sodium: cut the soy sauce by half and add a splash of water.
- Keto-friendly: skip the brown sugar or use a sugar substitute that measures the same.
Pairing Ideas
Jerky pairs surprisingly well with sharp cheese and crackers, or tossed into a trail mix with nuts and dried fruit for hikes.
Time Efficiency
Ask your butcher to slice the meat for you. Most will do it for free, and it skips the trickiest part of the whole process.
Leftovers and Storage
| Storage Method | How Long It Lasts |
|---|---|
| Room temperature, airtight container | Up to 2 weeks |
| Refrigerator | Up to 1 month |
| Freezer | Up to 6 months |
Keep it in an airtight bag or jar, away from direct sunlight. If you notice any moisture inside the bag, that’s a sign it wasn’t fully dried, and it should go in the fridge instead of sitting at room temp.
FAQ
Can I make this without a dehydrator? Yes, the oven method above works just as well. A dehydrator just frees up your oven.
Why is my jerky tough instead of chewy? It was likely sliced with the grain instead of against it, or dried a bit too long.
Is homemade jerky healthier than store-bought? Generally yes, since you control the sugar, sodium, and skip the preservatives most commercial brands rely on.
Can I use ground beef? You can, with a jerky gun to flatten it into strips before drying. The texture comes out a little different but still tasty.
Where does the word “jerky” even come from? It traces back to “ch’arki,” a Quechua word used by Indigenous peoples in the Andes for dried, salted meat. People have been making versions of this for centuries. 😮
How do I know it’s safe to eat? Texture is your best clue. It should bend and crack, never feel squishy or leave moisture on your fingers.
Wrapping Up
Once you make a batch of this, the bagged stuff at the gas station just won’t hit the same.
It takes a little time, but almost none of it is hands-on, which makes it one of those recipes that feels way more impressive than the actual effort involved.
Give it a try, and let me know in the comments how your batch turned out. I’d love to hear what flavor combinations you experimented with, or if you ran into any questions along the way.