I brought a pan of these to a neighborhood potluck last summer and came home with an empty dish and three people asking for the recipe before I even left the driveway.
That’s when I knew this one was a keeper.
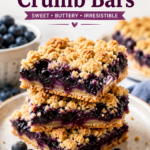
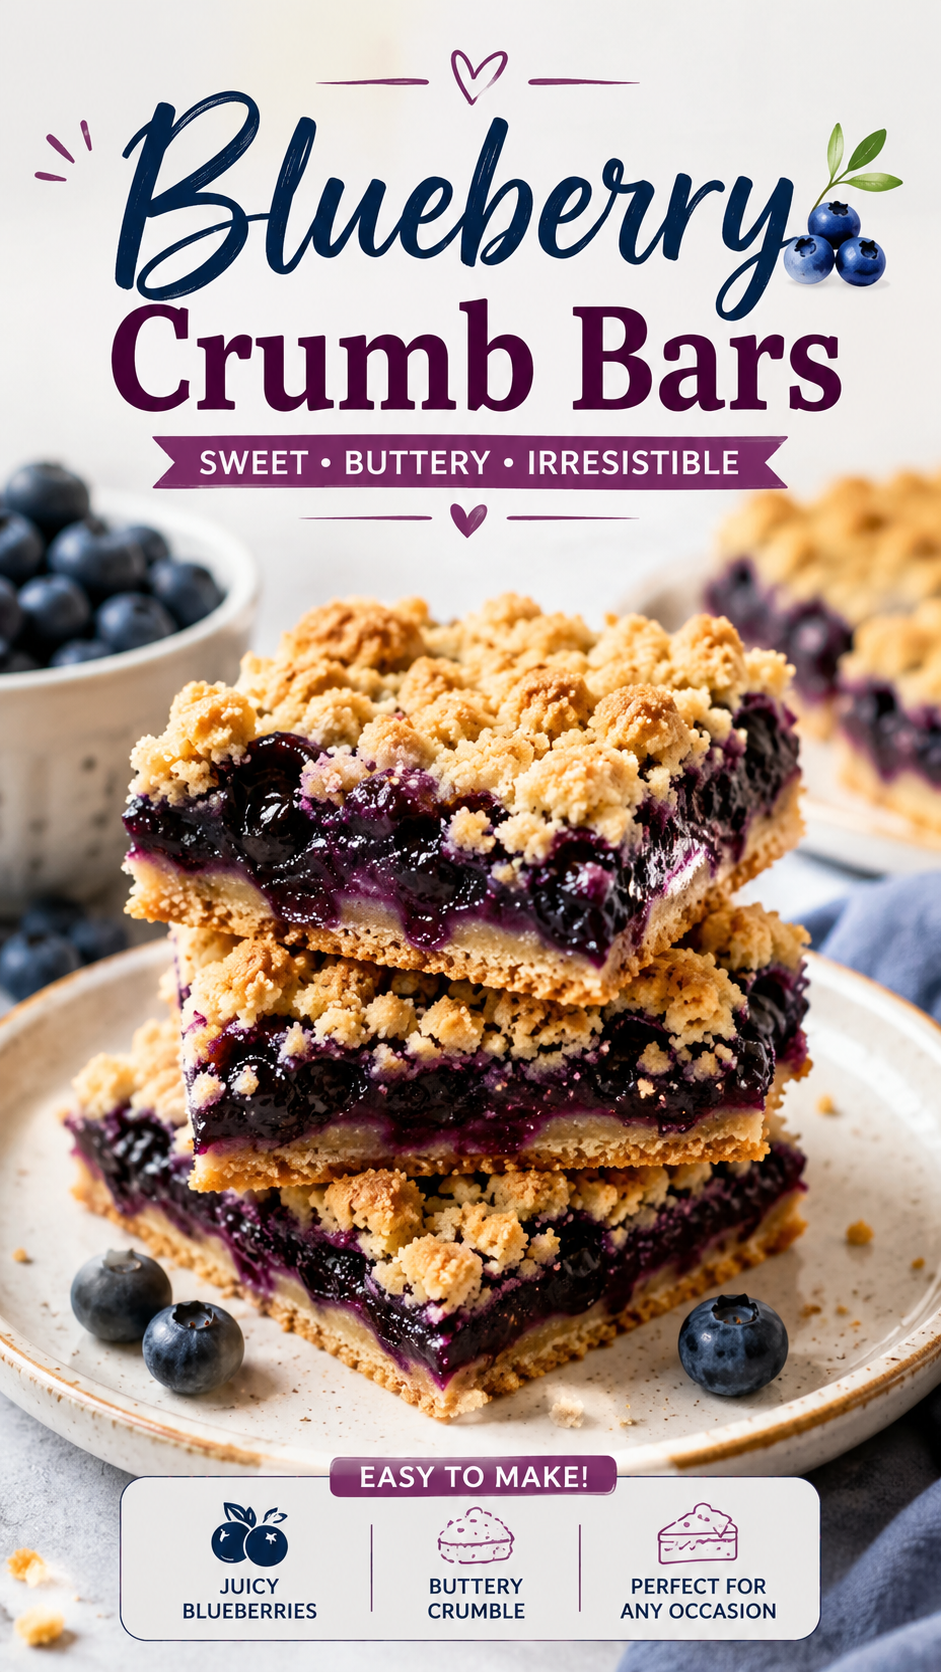
Blueberry crumb bars are basically a hybrid of a cookie, a pie, and a coffee cake. One buttery dough does double duty as the base and the crumble on top, and the middle gets stuffed with a thick, jammy blueberry filling that holds its shape when you cut into it.
No mixer required. No fancy pan. No blind baking a crust and praying it doesn’t shrink.
Just one bowl, one pan, and a payoff that looks way fancier than the effort it actually takes. 🫐
Why This Recipe Works
The dough is the real trick here. It’s a simple butter, sugar, and flour mixture that you make once and split in two.
Press most of it into the pan for the base. Bake the filling right on top. Then crumble the rest over the fruit before it goes back in the oven.
Same dough, two textures. The bottom bakes into something close to shortbread. The top turns golden and craggy, with little pockets that catch extra bits of blueberry as everything bubbles.
The filling itself gets a shot of lemon juice and a spoonful of cornstarch, which keeps it thick enough to slice into neat squares instead of a blueberry puddle.
What You’ll Need
For the crust and crumble:
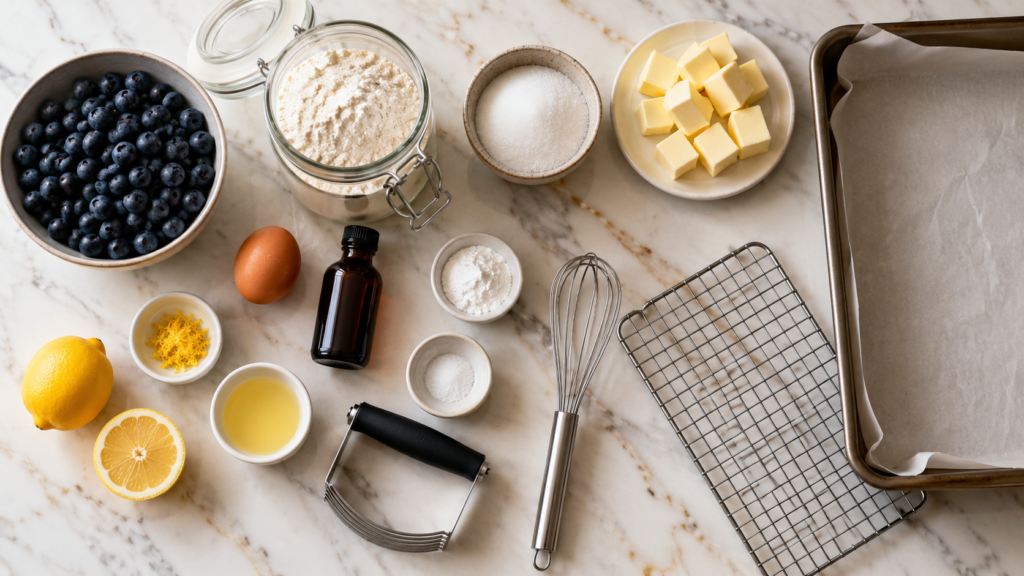
- 2 ½ cups (315g) all-purpose flour
- ¾ cup (150g) granulated sugar
- 1 teaspoon baking powder
- ½ teaspoon salt
- 1 cup (226g) unsalted butter, cold and cubed
- 1 large egg
- 1 teaspoon vanilla extract
For the blueberry filling:
- 4 cups (about 600g) fresh blueberries (frozen works too, don’t thaw first)
- ⅓ cup (65g) granulated sugar
- 2 tablespoons cornstarch
- 1 tablespoon fresh lemon juice
- 1 teaspoon lemon zest
Optional finishing touch:
- Powdered sugar, for dusting
Tools You’ll Need
- 9×13 inch baking pan
- Parchment paper
- Large mixing bowl
- Pastry cutter or your hands
- Medium saucepan or bowl for the filling
- Whisk
Pro Tips
Before you start, a few things I learned the hard way so you don’t have to.
- Keep your butter cold. Cold butter is what gives you those craggy, shortbread-like crumbles instead of a flat, greasy top. If your kitchen runs warm, pop the cubed butter in the freezer for 10 minutes first.
- Don’t skip the cornstarch. It feels optional, but it’s the difference between clean squares and a filling that runs everywhere the second you cut in.
- Line your pan with parchment and leave an overhang. You’ll be able to lift the entire slab out in one piece, which makes cutting so much easier and way less messy.
- Let the bars cool completely before slicing. I know, I know. But the filling needs time to set up. Cutting into it warm basically guarantees a gooey mess (still delicious, just not photogenic).
- Use frozen blueberries straight from the freezer. Thawing them first releases too much liquid and can turn your filling watery.
Step-by-Step Instructions
Make the Dough
- Preheat your oven to 375°F (190°C). Line a 9×13 pan with parchment, leaving some overhang on the sides.
- In a large bowl, whisk together the flour, sugar, baking powder, and salt.
- Add the cold, cubed butter. Use a pastry cutter or your fingers to work it into the flour until the mixture looks like coarse crumbs with some pea-sized bits of butter still visible.
- Add the egg and vanilla. Mix just until everything comes together into a shaggy dough. It should hold together when you squeeze a handful.
Build the Base
- Press about two-thirds of the dough into the bottom of your prepared pan in an even layer. Use the bottom of a measuring cup to smooth it out.
- Pop the pan in the fridge while you make the filling. This keeps the butter firm and helps the base bake up crisp.
Make the Filling
- In a medium bowl, toss the blueberries with sugar, cornstarch, lemon juice, and lemon zest until evenly coated.
- Pour the filling over the chilled crust, spreading it into an even layer.
Add the Crumble
- Take the remaining dough and break it into small, uneven clumps with your hands. Scatter it over the blueberry layer, leaving some gaps so the filling can peek through.
Bake
- Bake for 40 to 45 minutes, until the top is golden brown and the filling is bubbling around the edges.
- Cool the pan completely on a wire rack, at least 2 hours, before lifting out and slicing into squares.
Substitutions and Variations
| Original | Swap | Notes |
|---|---|---|
| Fresh blueberries | Frozen blueberries | Don’t thaw first, may need 5 extra minutes bake time |
| All-purpose flour | 1:1 gluten-free flour blend | Texture will be slightly more crumbly |
| Unsalted butter | Salted butter | Just omit the added salt |
| Blueberries | Raspberries or blackberries | Same measurements, equally good |
| Granulated sugar in filling | Coconut sugar | Slightly deeper flavor, darker color |
| Lemon juice | Lime juice | Works in a pinch, slightly different brightness |
Make-Ahead and Freezer Tips
These bars are actually better the next day, once the filling has had extra time to fully set.
- Make ahead: Bake completely, cool, and store covered in the fridge for up to 2 days before serving.
- Freeze the baked bars: Slice, then freeze in a single layer on a tray. Once solid, transfer to a freezer bag. They’ll keep for up to 3 months. Thaw at room temperature for an hour before eating.
- Freeze the unbaked dough: Wrap the dough (before pressing into the pan) tightly and freeze for up to 2 months. Thaw in the fridge overnight before using.
Nutrition and Pairing Suggestions
One bar (based on a 9×13 pan cut into 16 squares) comes in around 280 calories, with roughly 12g fat, 40g carbs, and 3g protein. These numbers are estimates, so if you’re tracking closely, run your exact ingredients through a nutrition calculator.
For pairing, these bars love:
- A scoop of vanilla bean ice cream, still slightly warm from the oven
- A strong cup of coffee or iced oat milk latte
- A drizzle of lemon glaze if you want to dress them up for a gathering
Leftovers and Storage
Store leftover bars in an airtight container.
- Room temperature: Up to 2 days
- Refrigerator: Up to 5 days, and honestly they taste great cold straight from the fridge
- Freezer: Up to 3 months, sliced and wrapped individually
Frequently Asked Questions
Can I use frozen blueberries? Yes, and you don’t even need to thaw them. Just toss them straight into the filling mixture. You might need a few extra minutes in the oven since frozen fruit releases more liquid.
Why is my filling runny? This usually means the bars were cut before fully cooling, or the cornstarch got skipped. Give the pan a full 2 hours to cool before slicing.
Can I double this recipe? You can, just use two separate 9×13 pans instead of one giant one. Doubling in a single pan throws off the bake time and the middle won’t set properly.
Do I need to peel or do anything special to the blueberries? Nope. Just rinse and pat them dry if using fresh ones, then straight into the bowl they go.
Can I make these dairy-free? Yes, swap the butter for a plant-based butter stick (not the tub kind, which has too much water). The texture holds up surprisingly well.
What’s the best pan size for this recipe? A 9×13 inch pan is the sweet spot. Going smaller means thicker bars and a longer bake time, so keep an eye on the oven if you adjust the pan size.
Wrapping Up
There’s a reason this pan never survives more than a day in my house.
The crumbly top, the jammy middle, the little hit of lemon that keeps it from tasting too sweet. It’s the kind of dessert that feels special without asking much of you in return.
Give these a try this week and let me know how they turn out in the comments. I want to hear if you added a twist, swapped the berries, or if it disappeared just as fast at your place as it did at mine. 🫐