I made my first focaccia because a video stopped me mid-scroll at 11pm.
Someone was pressing cherry tomatoes into golden dough like they were planting a tiny garden. I bookmarked it, forgot about it for two weeks, then finally tried it on a rainy Sunday with nothing better to do.
That loaf did not survive the afternoon. My husband ate the middle out of it standing over the counter before I even got a photo.
This bread is stupidly easy to make and looks like something a professional baker spent hours on. Nobody needs to know it took you 20 minutes of actual effort.
Here’s everything you need to make your own.
What You’ll Need
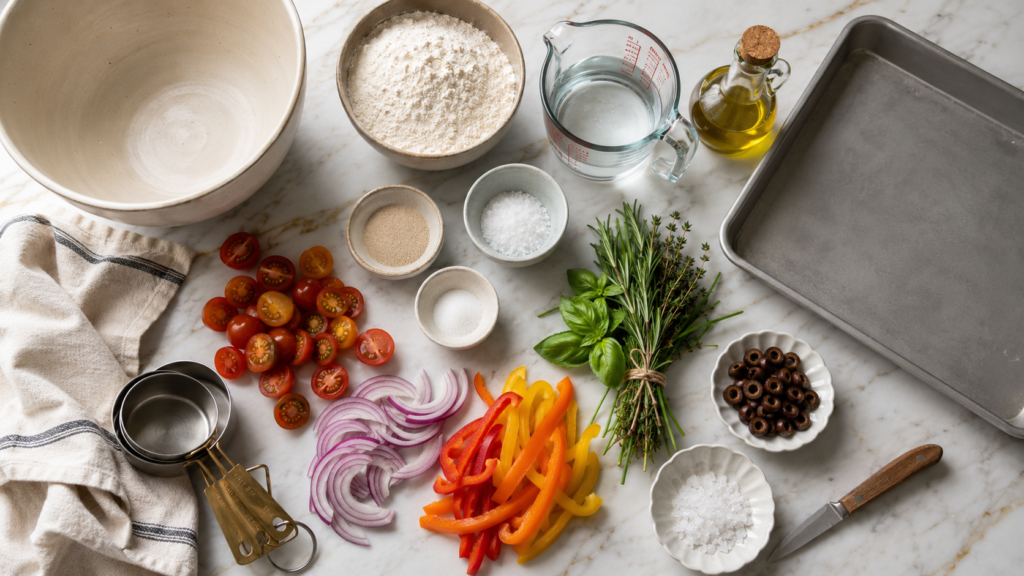
For the dough:
- 4 cups all-purpose flour (500g)
- 2 ¼ teaspoons active dry yeast (1 packet)
- 2 teaspoons kosher salt
- 1 teaspoon sugar
- 2 cups warm water (about 110°F)
- 5 tablespoons olive oil, divided
For the topping:
- Cherry tomatoes, halved
- Red onion, thinly sliced
- Bell peppers, thinly sliced (any color)
- Fresh herbs (rosemary, basil, thyme, chives)
- Sliced olives
- Flaky sea salt
- Extra olive oil for drizzling
You really can use whatever vegetables you have sitting in your fridge. This is more of a canvas than a strict recipe.
Tools You’ll Need
- Large mixing bowl
- 9×13 baking pan (metal works best)
- Measuring cups and spoons
- Kitchen towel or plastic wrap
- Small paring knife (for cutting your veggies into thin, pretty pieces)
How to Make It
Step 1: Wake Up the Yeast
Mix your warm water, yeast, and sugar in a bowl. Let it sit for 5-10 minutes.
You’re looking for a foamy top layer. If nothing happens, your yeast is dead and you need new yeast. This step saves you from baking a brick.
Step 2: Mix the Dough
Add flour, salt, and 3 tablespoons of olive oil to the yeast mixture. Stir with a wooden spoon or your hands until it comes together into a shaggy, sticky dough.
This dough is supposed to be wet. Don’t panic and add more flour.
Step 3: The First Rise
Drizzle a little olive oil in a clean bowl, plop your dough in, and cover it with a towel.
Let it rise somewhere warm for 1 to 1.5 hours, until it’s doubled in size.
Step 4: Prep Your Pan
Coat your 9×13 pan generously with olive oil. Like, more than feels necessary.
Transfer your dough into the pan and gently stretch it toward the corners with your fingertips. It’ll fight you a little. That’s normal.
Step 5: The Second Rise
Cover it again and let it rest for 30-45 minutes. It’ll puff up and become easier to stretch.
Step 6: Dimple It
Now for the fun part. Press your fingers firmly into the dough all over, creating little dimples. This is what gives focaccia its signature texture and all those pockets for olive oil.
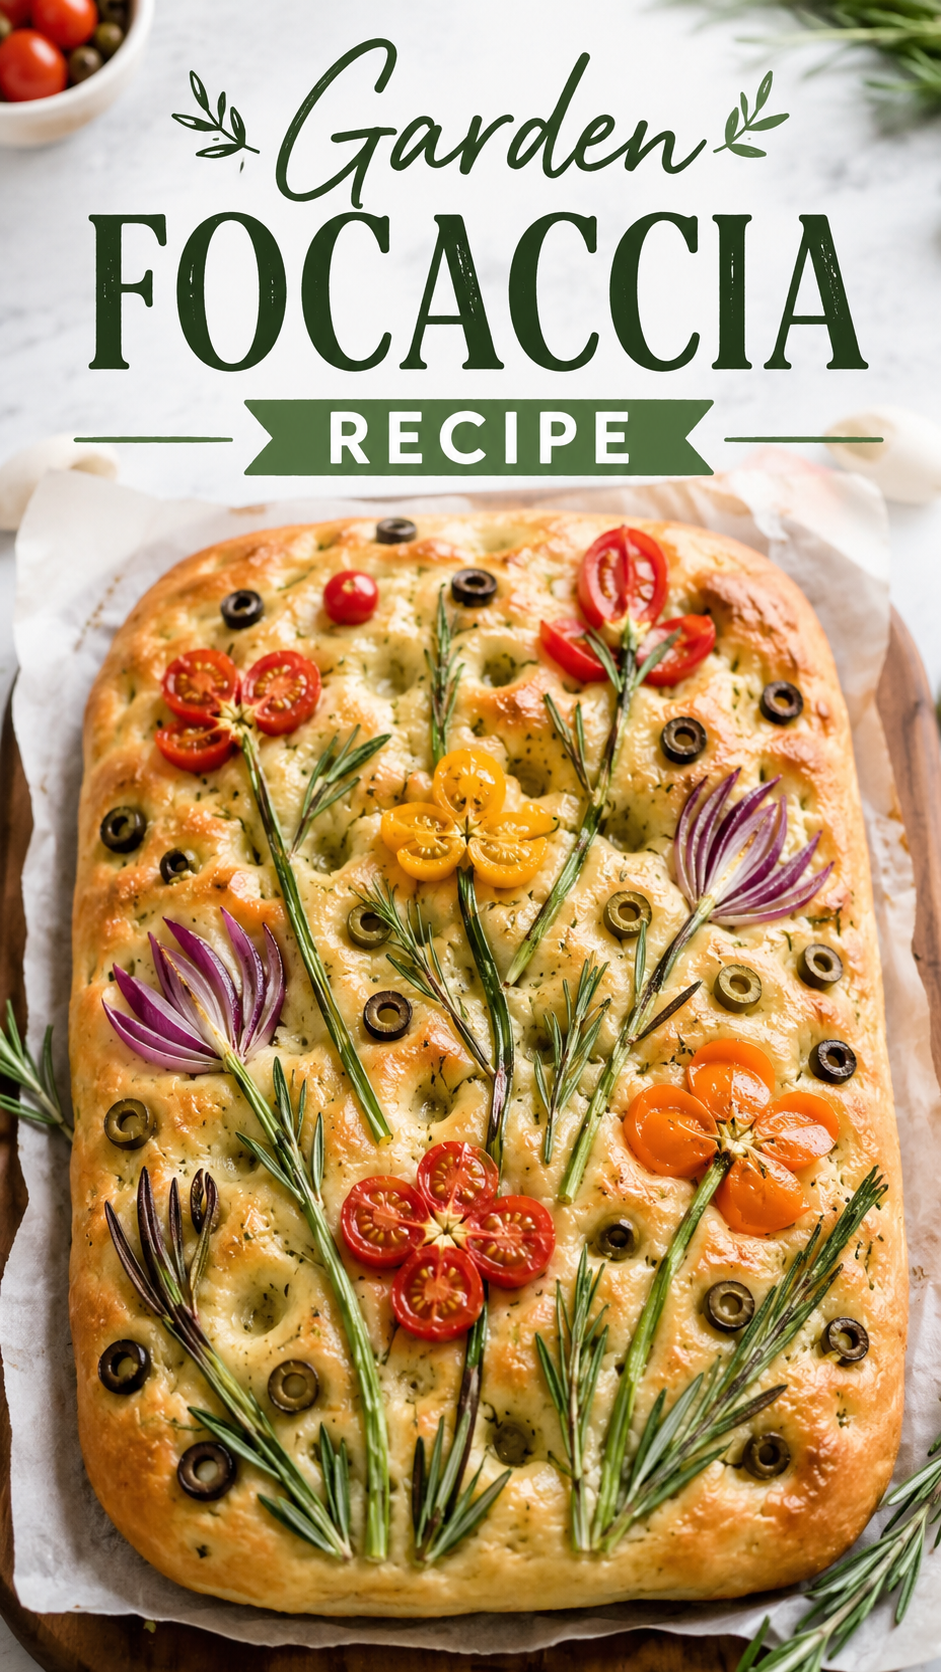
Step 7: Plant Your Garden
Time to get creative. Arrange your tomatoes, onion slices, peppers, and herbs across the dough like you’re designing a flower bed.
This is the step that turns a plain bread into something people photograph before eating.
Step 8: Bake
Drizzle with the remaining olive oil and a generous pinch of flaky salt.
Bake at 425°F for 22-25 minutes, until the top is deep golden brown and the edges are crispy.
Let it cool for at least 10 minutes before slicing. I know that’s hard.
Pro Tips
- Warm water matters. Too hot and you’ll kill the yeast, too cold and it won’t activate. Test it on your wrist like baby formula, it should feel warm but not hot.
- Don’t skip the dimpling. It looks like a small detail but it’s what creates those little olive oil pools that make every bite taste incredible.
- Push your veggies in deep. If they’re just sitting on top, they’ll dry out and burn before the bread finishes baking.
- Use a metal pan, not glass. Metal gets you that crispy, almost fried bottom crust that makes this bread so addictive.
- Let your dough rise somewhere genuinely warm. A cold kitchen will slow everything down and you’ll end up waiting way longer than expected.
Substitutions and Variations
| Original | Swap |
|---|---|
| All-purpose flour | Bread flour for extra chew |
| Cherry tomatoes | Sun-dried tomatoes |
| Fresh herbs | 1 tablespoon dried Italian herbs |
| Olive oil | Avocado oil |
| Bell peppers | Zucchini ribbons or thin asparagus |
Want it sweet instead of savory? Skip the veggies entirely and top it with sliced figs, a drizzle of honey, and flaky salt after baking.
Gluten-free? A 1:1 gluten-free flour blend works here, though the texture will be slightly denser.
Make Ahead Tips
You can make the dough the night before and let it rise slowly in the fridge instead of on the counter. This actually makes the flavor better, not worse.
Just pull it out about an hour before you plan to shape and top it, so it can come back to room temperature.
Nutritional Info and Pairings
One slice (of 12) comes in around 180-220 calories depending on your toppings, with roughly 6g of fat and 3g of protein.
This bread pairs beautifully with:
- A simple arugula salad with lemon vinaigrette
- Soup, especially tomato or minestrone
- A cheese board, sliced thin for dipping into oils
Time-saving tip: if you’re short on time, skip the second rise and go straight to dimpling and topping after the dough is shaped. It won’t be quite as airy, but it’ll still be good.
Leftovers and Storage
Focaccia keeps at room temperature, wrapped in a towel or foil, for 2-3 days.
To freeze it, slice it first, then wrap tightly and freeze for up to 2 months.
Reheat individual slices in a toaster oven or skillet to bring back that crispy bottom. The microwave will make it sad and chewy in the wrong way.
FAQ
Why is my focaccia dense instead of airy?
Your yeast is probably old, or your rise time wasn’t long enough. Warmth and patience are the real secret ingredients here.
Can I make this without a stand mixer?
Absolutely. This dough is meant to be mixed by hand. No fancy equipment required.
Do I have to use vegetables?
Not at all. Classic rosemary and sea salt focaccia is just as good, if a little less Instagram-famous.
Why does my dough feel too sticky to work with?
That’s completely normal for focaccia. Wet, sticky dough is what gives you that soft, open crumb inside.
Wrapping Up
This bread turns a random Tuesday into something that feels a little more special, without asking much of you at all.
Go make a loaf, get a little ridiculous with your vegetable arrangement, and let me know how it turns out in the comments below. I’d love to hear what toppings you tried and whether it disappeared as fast as mine did.