I burned my first attempt at this dish so badly the smoke alarm got involved.
Second attempt? My husband asked for the recipe before he’d even finished his plate.
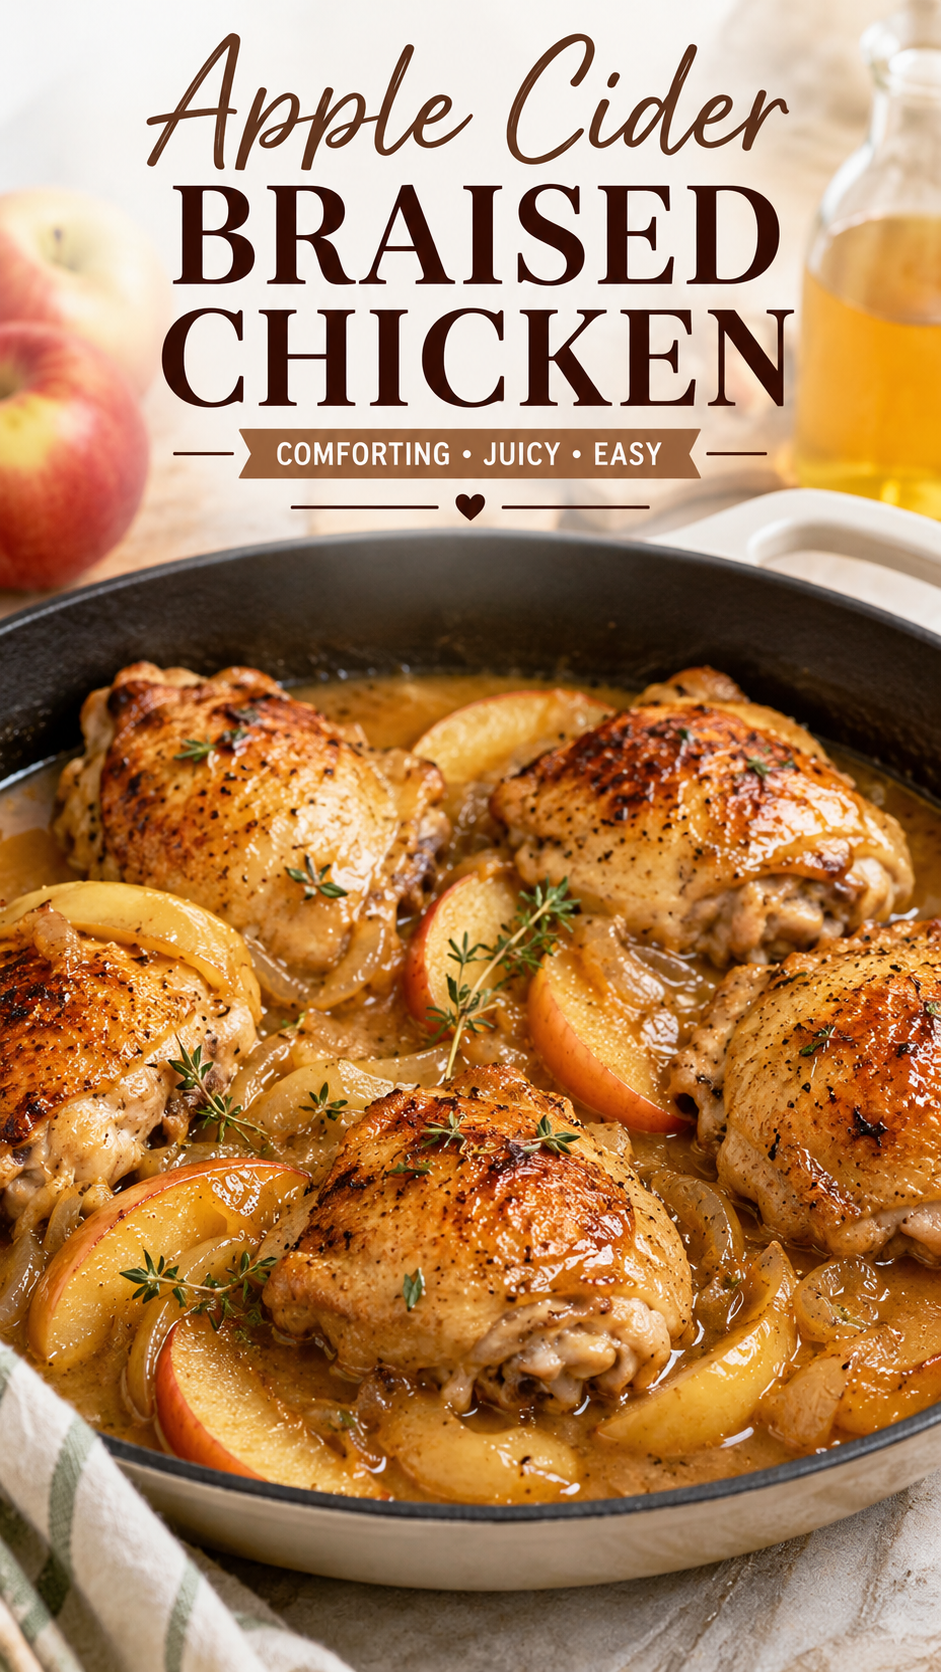
That’s the story of apple cider braised chicken thighs. It’s forgiving once you know the trick, and it tastes like fall decided to show up for dinner. Crispy skin, a sauce that’s tangy and a little sweet, and tender chicken that falls apart with a fork.
This is one of those recipes I make on repeat from October through December. It’s a one pan situation, it uses ingredients you probably already have, and it makes your whole kitchen smell like apples and thyme.
Let’s get into it.
What You’ll Need
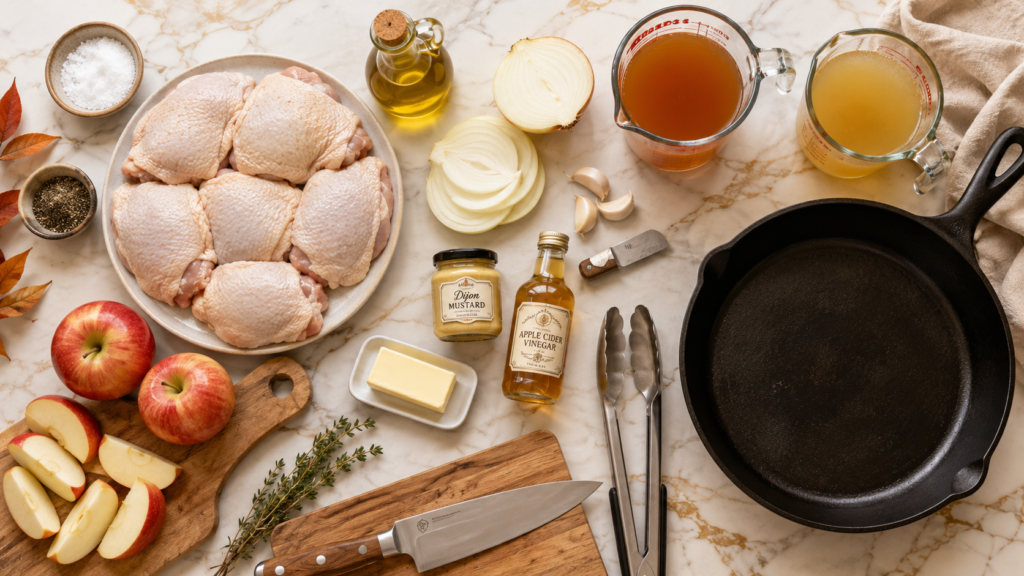
Here’s everything you’ll need to pull this together:
- 6 bone-in, skin-on chicken thighs
- 1 teaspoon salt
- 1/2 teaspoon black pepper
- 2 tablespoons olive oil
- 1 yellow onion, sliced
- 3 garlic cloves, minced
- 2 cups apple cider (not apple cider vinegar)
- 1 cup chicken broth
- 2 apples, cored and sliced into wedges (Honeycrisp or Gala work great)
- 2 sprigs fresh thyme (or 1 teaspoon dried)
- 1 tablespoon Dijon mustard
- 1 tablespoon apple cider vinegar
- 2 tablespoons butter
That’s it. No obscure ingredients, no last minute grocery run.
Tools You’ll Need
- A large oven safe skillet (cast iron is ideal here)
- Tongs
- A cutting board and sharp knife
- Measuring cups and spoons
If you don’t have an oven safe skillet, a Dutch oven works just as well.
How to Make Apple Cider Braised Chicken Thighs
Step 1: Season and sear the chicken
Pat the chicken thighs completely dry with paper towels. This matters more than you’d think.
Season both sides generously with salt and pepper.
Heat the olive oil in your skillet over medium high heat. Once it’s shimmering, add the chicken skin side down.
Let it sear undisturbed for 6 to 7 minutes until the skin is deep golden brown. Don’t move it around, just let it do its thing.
Flip and sear the other side for 3 more minutes. Remove the chicken and set it aside.
Step 2: Build the sauce
In the same skillet, add the onion and cook for 3 to 4 minutes until softened.
Add the garlic and cook for 30 seconds, just until fragrant.
Pour in the apple cider and chicken broth, scraping up all those browned bits from the bottom of the pan. That’s flavor you don’t want to leave behind.
Stir in the Dijon mustard, apple cider vinegar, and thyme.
Step 3: Braise
Nestle the chicken back into the skillet, skin side up. Tuck the apple wedges around the chicken.
Bring everything to a simmer, then transfer the skillet to a 375°F oven.
Braise uncovered for 30 to 35 minutes, until the chicken reaches 165°F internally and the sauce has reduced slightly.
Step 4: Finish it off
Remove the skillet from the oven and place it back on the stove over low heat.
Swirl in the butter until the sauce turns glossy.
Taste and adjust the seasoning if needed. Let everything rest for 5 minutes before serving.
Pro Tips
I’ve made this recipe more times than I can count, so here’s what actually makes a difference:
- Dry chicken skin is crispy chicken skin. Skip the paper towel step and you’ll end up steaming the skin instead of searing it.
- Don’t skip the sear. It only takes 10 minutes but it’s where most of the flavor comes from.
- Use a tart apple, not a sweet one. Honeycrisp and Granny Smith hold their shape in the oven. Softer apples like Red Delicious turn mushy.
- Check the temperature, not the clock. Ovens vary a lot, so pull the chicken at 165°F rather than trusting the timer alone.
- Let it rest. Five minutes off heat lets the sauce settle and the chicken stay juicy instead of watery.
Substitutions and Variations
This recipe is pretty flexible. Here’s how to adjust it based on what you have or what you’re craving:
| Original | Substitute | Notes |
|---|---|---|
| Chicken thighs | Chicken breasts | Reduce braise time to 20-25 minutes to avoid drying out |
| Apple cider | Apple juice | Slightly sweeter, still works well |
| Dijon mustard | Whole grain mustard | Adds texture to the sauce |
| Fresh thyme | Fresh rosemary | Gives it a more savory, woodsy flavor |
| Butter | Ghee | Good option if you’re avoiding dairy solids |
| Honeycrisp apples | Pears | A nice twist if you want something different |
Want it spicier? Add a pinch of red pepper flakes to the sauce. Want it heartier? Toss in halved baby potatoes with the apples before braising.
Make Ahead Tips
You can sear the chicken and build the sauce up to a day ahead. Store them separately in the fridge, then combine and braise when you’re ready to eat.
This also reheats really well, so it’s a solid option for meal prepping your week of dinners.
Storage and Leftovers
Fridge: Store leftovers in an airtight container for up to 4 days.
Freezer: This freezes well for up to 3 months. Thaw overnight in the fridge before reheating.
Reheating: Warm it gently on the stovetop over low heat with a splash of chicken broth to loosen the sauce. Microwaving works too, just cover it so it doesn’t dry out.
I’ll be honest, the leftovers might be even better the next day once the flavors have had time to sit.
FAQ
Can I use boneless chicken thighs?
Yes, just reduce the braise time to about 20 minutes since boneless thighs cook faster.
What can I serve with this?
Mashed potatoes, creamy polenta, or crusty bread are all great for soaking up the sauce. A simple green salad balances out the richness too.
Is apple cider the same as apple juice?
Not quite. Apple cider is unfiltered and has a deeper, more complex flavor. Apple juice works in a pinch, but the sauce won’t be quite as rich.
Why is my sauce too thin?
Let it simmer on the stovetop for a few extra minutes after the braise. It’ll reduce and thicken up.
Can I make this in a slow cooker?
You can, though you’ll lose the crispy skin. Sear the chicken first, then transfer everything to a slow cooker on low for 4 to 5 hours.
Wrapping Up
Apple cider braised chicken thighs are the kind of dinner that makes a random Tuesday feel a little more special. It’s simple enough for a weeknight, but it tastes like you put in way more effort than you actually did.
Make it once and I’m pretty confident it’ll earn a permanent spot in your fall rotation.
If you try this recipe, leave a comment below and let me know how it turned out. And if you have questions along the way, drop them there too. I read every single one.