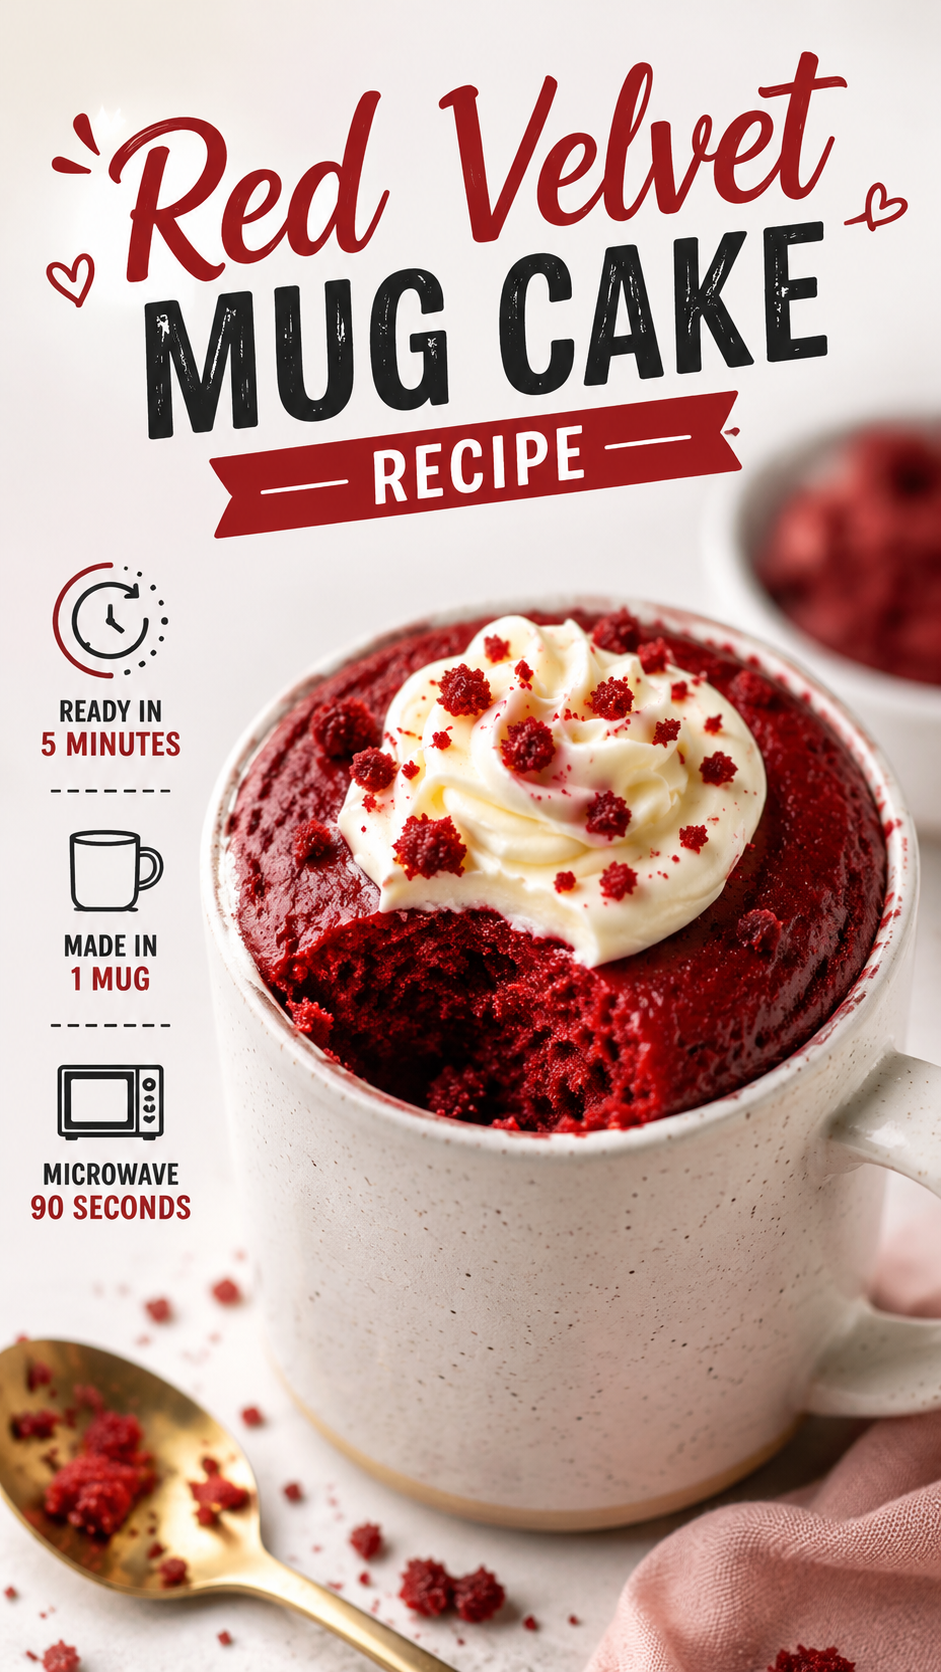
I microwaved a cake in my coffee mug at 11pm on a random Tuesday and it was better than half the red velvet cakes I’ve paid $8 a slice for.
That’s not an exaggeration. I timed it. Ninety seconds, one mug, zero regrets.
If you’ve never made a mug cake before, you’re about to become the person who does this constantly. Fair warning.
Why This One Actually Works
Most mug cake recipes taste like sad, rubbery sponge. This one doesn’t, and there’s a real reason why.
Red velvet gets its signature texture from a tiny bit of acid (vinegar) reacting with baking soda and buttermilk. That reaction is what gives it that soft, almost velvety crumb — hence the name.
I kept that chemistry intact, just shrunk it down to single-serving size. The result is a cake that’s soft in the middle, slightly set on the edges, and genuinely tastes like the real thing.
Not “fine for a microwave cake.” Actually good.
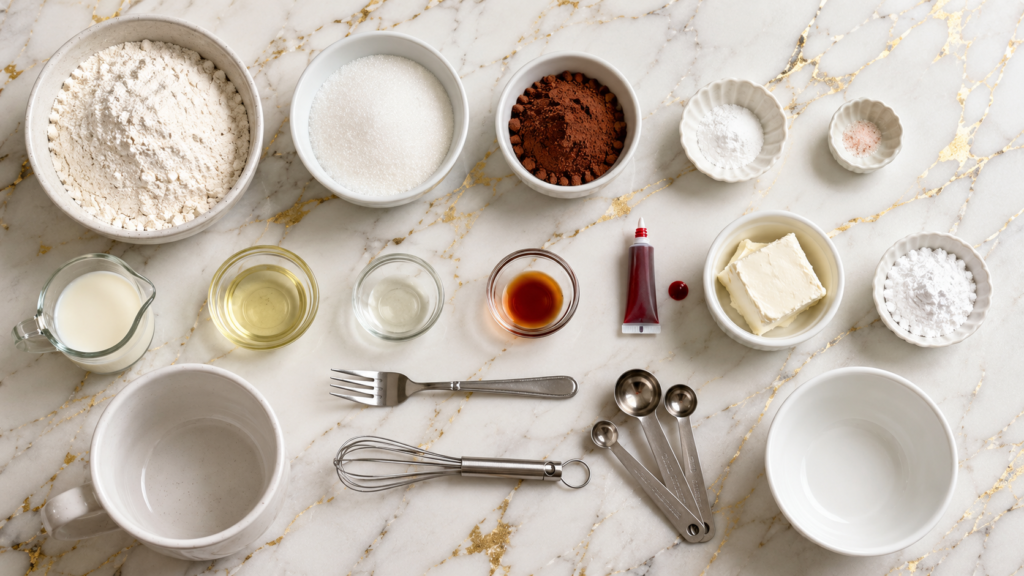
What You’ll Need
For the cake:
- 4 tbsp all-purpose flour
- 3 tbsp granulated sugar
- 1 tbsp unsweetened cocoa powder
- 1/4 tsp baking powder
- Pinch of salt
- 3 tbsp milk
- 1 tbsp vegetable oil
- 1/2 tsp white vinegar
- 1/4 tsp vanilla extract
- 2 to 3 drops red food coloring (gel works best)
For the cream cheese topping:
- 2 tbsp cream cheese, softened
- 1 tbsp powdered sugar
- Splash of milk (to thin it out)
That’s it. Nothing exotic, nothing you need to special-order.
Tools You’ll Need
- 1 microwave-safe mug (12 oz or larger — this matters, keep reading)
- A fork or small whisk
- Measuring spoons
- A small bowl for the topping
How to Make It
- Whisk the dry ingredients right in the mug. Flour, sugar, cocoa powder, baking powder, and salt. Mix until there are no cocoa clumps hiding at the bottom.
- Add the wet ingredients. Milk, oil, vinegar, vanilla, and food coloring go in next. Stir until smooth and you’ve got a deep red batter with zero white streaks.
- Microwave on high for 60 to 90 seconds. Every microwave is different, so start at 60 and check. The cake is done when the top looks set and springs back when you touch it.
- Let it sit for 2 minutes. I know. It’s hard. But it keeps cooking a bit from residual heat and the texture firms up perfectly if you wait.
- Mix your cream cheese topping while the cake rests. Just whisk everything together until smooth and pourable.
- Top it and eat it straight from the mug. No plate required, though I won’t stop you if you want to feel fancy.
Pro Tips (Learn From My Mistakes)
- Use a bigger mug than you think you need. A 12oz minimum. I used a small espresso-sized mug the first time and had red velvet lava all over my microwave.
- Don’t skip the vinegar. I tried once without it out of laziness. The cake was fine, but it lost that signature red velvet tang. It’s a small amount doing a lot of work.
- Gel food coloring beats liquid every time. Liquid drops water into your tiny batter and can throw off the texture. If you only have liquid, that’s okay, just use one less drop.
- Stop microwaving the second it looks set. Overcooked mug cake turns rubbery fast because there’s so little batter. 10 extra seconds is the difference between soft and tough.
- Room temperature cream cheese blends smoother. Cold cream cheese fights you and leaves lumps. 20 seconds in the microwave (separately, before mixing) fixes that instantly.
Substitutions and Variations
| Original | Swap | Result |
|---|---|---|
| All-purpose flour | Gluten-free 1:1 blend | Works well, slightly denser |
| Vegetable oil | Melted butter | Richer flavor, slightly heavier crumb |
| Milk | Oat or almond milk | Works fine, barely noticeable difference |
| Cream cheese topping | Whipped cream | Lighter, less tangy |
| Red food coloring | Skip it | Tastes identical, just brown instead of red |
| Granulated sugar | Brown sugar | Slightly deeper, caramel-ish flavor |
Want it dairy-free? Swap the milk for a plant-based version and use dairy-free cream cheese for the topping. Still works.
Make-Ahead Tips
Mug cakes are built for right-now eating, but you can prep smart.
Pre-mix the dry ingredients in small containers or snack bags ahead of time. When a craving hits, you just add the wet ingredients and go. This is basically a homemade instant mix.
I keep 3 or 4 of these pre-portioned in my pantry at all times. Don’t judge me.
Storage and Leftovers
Realistically, there won’t be leftovers. It’s one serving.
But if you double the recipe and don’t finish it, here’s what to do:
- Room temperature: Fine for a few hours, covered.
- Fridge: Up to 2 days, wrapped tightly. The texture firms up when cold.
- Reheating: 10 to 15 seconds in the microwave brings it right back to soft.
I wouldn’t freeze this one. The texture doesn’t bounce back the same way after thawing.
Quick Nutrition Snapshot
Rough estimate for one mug cake with topping, based on standard ingredient values:
- Calories: approximately 320-380
- This will shift depending on your exact brands and how much topping you use
If you’re watching sugar, cutting the granulated sugar down to 2 tbsp still gives you a good result, just slightly less sweet.
FAQ
Can I make this without a microwave? Yes. Bake it in an oven-safe mug or ramekin at 350°F for 15 to 18 minutes. The texture comes out a bit more cake-like and less soft-centered.
Why did my cake turn out dense or rubbery? Almost always overcooking. Microwaves vary a lot in strength, so start checking at 60 seconds even if the recipe says 90.
Can I make this ahead for a date night or small gathering? Pre-mix the dry ingredients for multiple mugs ahead of time, then microwave each one fresh when you’re ready to serve. It takes 90 seconds per mug, so this scales surprisingly well for a small group.
Do I need a specific type of mug? Any microwave-safe mug works, just make sure it’s at least 12oz. Wider mugs cook slightly more evenly than tall, narrow ones.
Can I add chocolate chips? Yes, and honestly it’s a great addition. A tablespoon folded into the batter before microwaving adds little pockets of melted chocolate.
Is this recipe kid-friendly to make? Very. It’s basically foolproof and kids love watching it puff up in the microwave window.
Wrapping Up
This is the recipe you make when you want cake but you do not want to turn on the oven, wash five dishes, or wait 40 minutes.
One mug, one fork, one very satisfying 90 seconds.
Make it, then come tell me in the comments how yours turned out. Did you go classic cream cheese topping or try a variation? I want to know. 🍰