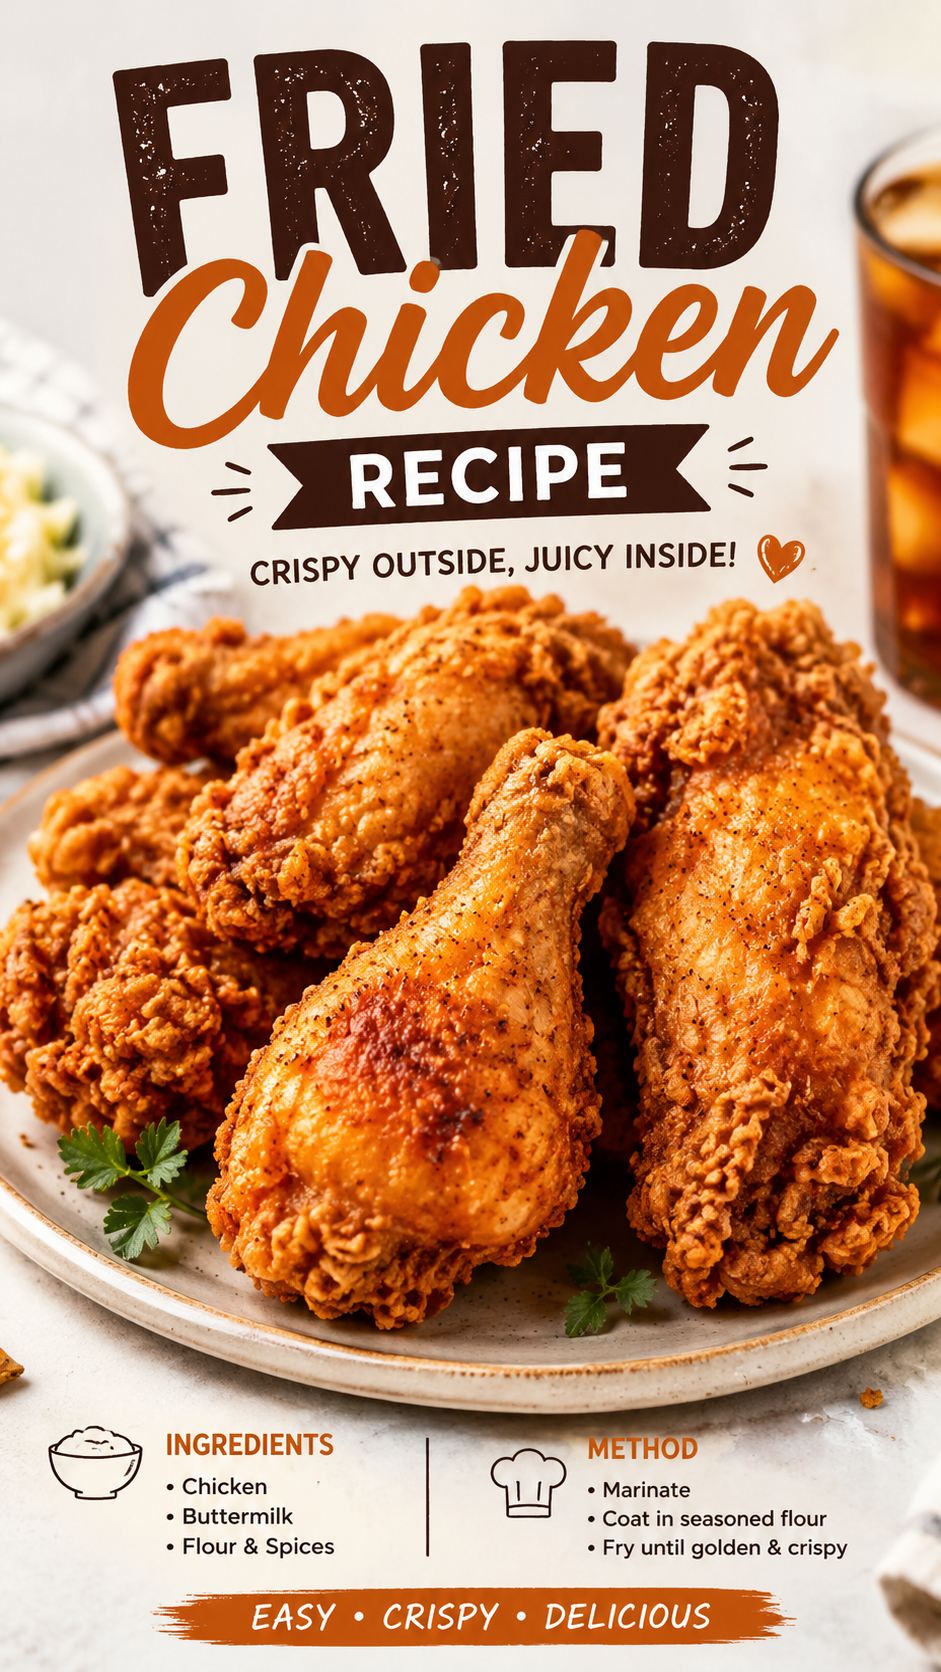
You’ve had fried chicken before. But have you had your fried chicken?
The kind that’s golden and shatteringly crispy on the outside, juicy all the way through, and seasoned so well you find yourself just… standing over the pan eating pieces before they even hit the plate?
That’s what this recipe does. And once you make it, ordering it somewhere else feels like a downgrade.
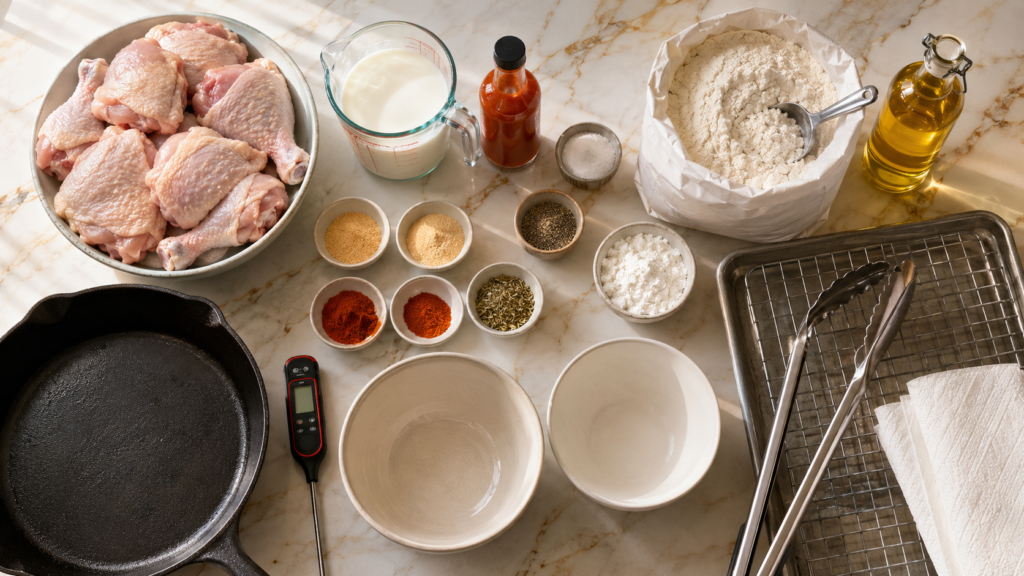
What You’ll Need
For the Chicken:
- 3 lbs bone-in, skin-on chicken pieces (drumsticks, thighs, or a mix)
- 2 cups buttermilk
- 1 tablespoon hot sauce (any kind you like)
- 2 teaspoons salt
- 1 teaspoon black pepper
- 1 teaspoon garlic powder
- 1 teaspoon onion powder
- 1 teaspoon smoked paprika
For the Coating:
- 2 cups all-purpose flour
- 1/2 cup cornstarch
- 2 teaspoons salt
- 1 teaspoon black pepper
- 1 teaspoon garlic powder
- 1 teaspoon onion powder
- 1 teaspoon smoked paprika
- 1/2 teaspoon cayenne pepper
- 1 teaspoon dried oregano
For Frying:
- Vegetable oil or peanut oil (enough to fill your pan 2-3 inches deep)
Tools You’ll Need
- Large mixing bowl (for the brine)
- Second large mixing bowl or shallow dish (for the coating)
- Large cast iron skillet or deep heavy-bottomed pot
- Cooking thermometer (a candy or deep-fry thermometer works great)
- Wire rack set over a baking sheet
- Tongs
- Paper towels
Pro Tips
A few things that genuinely make a difference here, especially if this is your first time:
- Don’t skip the overnight soak. The buttermilk brine is doing a lot of heavy lifting. It tenderizes the meat and gets that seasoning deep into the chicken. Four hours is the minimum, but overnight is where the magic is. You’ll taste the difference.
- Cornstarch in the coating is non-negotiable. This is the secret to that super crispy crust that actually stays crispy. Flour alone gives you a crust. Flour + cornstarch gives you a crunch.
- Let the coated chicken rest before frying. Once you dredge the pieces, set them on a rack for 10-15 minutes. The coating adheres better and you get a more even crust.
- Oil temperature is everything. Too hot and the outside burns before the inside cooks. Too cool and the chicken absorbs the oil and gets greasy. Keep it between 325-350°F and you’ll be golden (literally).
- Don’t crowd the pan. Fry in batches. Crowding drops the oil temperature and steams the chicken instead of frying it. No one wants soggy fried chicken.
Substitutions and Variations
No buttermilk? Mix 2 cups of whole milk with 2 tablespoons of white vinegar or lemon juice. Let it sit for 5 minutes until it curdles slightly. Done.
Want it spicier? Add an extra 1/2 teaspoon of cayenne to both the brine and the coating. You can also add a teaspoon of chili powder to the flour mix.
Gluten-free version? Swap the all-purpose flour for a 1:1 gluten-free flour blend and make sure your cornstarch is certified GF. Works really well, honestly.
Air fryer option? Coat the chicken the same way, spray generously with cooking oil, and air fry at 380°F for about 25-30 minutes, flipping halfway. You’ll get a solid crust, just not the deep-fried crunch.
No bone-in chicken? Boneless thighs work great and cook faster (about 8-10 minutes total). Boneless breasts work too but are easier to overcook, so keep an eye on the temp.
Make Ahead Tips
The good news is that most of the work here can be done in advance.
The brine: You can marinate the chicken up to 24 hours ahead. Just cover the bowl and refrigerate. The longer it sits, the more flavor you get.
The coating: Mix the flour and spices together and store it in an airtight container. It keeps well for weeks, so you can make a big batch and have it ready to go whenever the craving hits.
Note: Fried chicken is really best eaten fresh, right out of the pan. But if you need to hold it for a bit, keep it on a wire rack in a 200°F oven while you finish the remaining batches. This keeps it warm and crispy without steaming it.
Nutritional Breakdown (Per Serving, Approx.)
Based on 6 servings using a mix of drumsticks and thighs
| Nutrient | Amount |
|---|---|
| Calories | ~420 kcal |
| Protein | ~32g |
| Carbohydrates | ~22g |
| Fat | ~22g |
| Saturated Fat | ~5g |
| Sodium | ~780mg |
These are estimates and will vary based on the cut of chicken and how much coating sticks.
Dietary note: This recipe is dairy-free if you use the milk + vinegar substitute. For a lower-sodium version, reduce the salt in the coating to 1 teaspoon.
Meal pairing ideas: Coleslaw, mashed potatoes, corn on the cob, honey biscuits, or pickled jalapeños if you want some heat on the side.
How to Make It
Step 1: Brine the Chicken
Combine the buttermilk, hot sauce, salt, black pepper, garlic powder, onion powder, and smoked paprika in a large bowl. Add the chicken pieces, making sure they’re fully submerged. Cover and refrigerate for at least 4 hours, ideally overnight.
Step 2: Make the Coating
In a second large bowl or shallow dish, whisk together the flour, cornstarch, salt, pepper, garlic powder, onion powder, smoked paprika, cayenne, and dried oregano. Mix it well so the spices are evenly distributed.
Step 3: Coat the Chicken
Take a piece of chicken from the brine (let the excess drip off, but don’t shake it dry — that buttermilk helps the coating stick). Press it firmly into the flour mixture, turning and pressing until every surface is coated. Set it on a wire rack. Repeat with all the pieces.
Let them sit on the rack for 10-15 minutes. This step matters.
Step 4: Heat the Oil
Pour enough oil into your cast iron skillet or pot to reach about 2-3 inches deep. Heat it to 325-350°F over medium-high heat. Use a thermometer here — guessing doesn’t work well with frying.
Step 5: Fry the Chicken
Working in batches (don’t crowd the pan), carefully lower the chicken pieces into the hot oil using tongs. Fry for:
- Drumsticks and thighs: 12-15 minutes, turning once halfway through
- Breasts: 10-12 minutes
- Wings: 8-10 minutes
The chicken is done when the internal temperature hits 165°F and the crust is deep golden brown.
Step 6: Drain and Rest
Transfer the fried chicken to a wire rack over a baking sheet. Not paper towels — a wire rack. Paper towels trap steam underneath and make the crust soggy. A rack lets air circulate on all sides.
Let it rest for 5 minutes before serving.
Leftovers and Storage
Fried chicken keeps well in the refrigerator for up to 3-4 days in an airtight container.
Reheating: The oven is your best friend here. Place the chicken on a wire rack over a baking sheet and heat at 375°F for 15-20 minutes. It comes back to life in a way the microwave never could.
Freezing: Let the fried chicken cool completely, then freeze on a baking sheet until solid before transferring to a freezer bag. It keeps for up to 3 months. Reheat straight from frozen at 375°F for about 25-30 minutes.
Skip the microwave for reheating if you can — it makes the crust sad and chewy.
FAQ
Do I really need a thermometer?
For oil temperature, yes. A thermometer takes all the guesswork out and keeps you from either burning the crust or ending up with oily, undercooked chicken. An instant-read thermometer for the internal temperature of the chicken is also super helpful, especially if you’re new to frying.
Can I use boneless, skinless chicken breasts?
You can, but manage your expectations a little. Boneless, skinless breasts can dry out faster, so watch the timing. Boneless thighs are a much more forgiving option if you want to go the boneless route.
What oil is best for frying?
Peanut oil is the gold standard for fried chicken — it has a high smoke point and a neutral flavor. Vegetable oil works great too and is more budget-friendly. Avoid olive oil for deep frying.
My coating keeps falling off. What am I doing wrong?
A few possible culprits: you shook off too much of the buttermilk before coating, you didn’t press the flour in firmly enough, or you didn’t let it rest on the rack before frying. All three of those steps help the crust stick.
Can I bake this instead of frying?
Yes, with a caveat. You’ll get a good crust but not the same deep-fried crunch. If you go the baked route, preheat your oven to 425°F, place the coated chicken on a greased wire rack over a baking sheet, and bake for 45-50 minutes (flipping halfway). Spraying the chicken with cooking oil before it goes in helps the crust get more golden.
How do I know the oil is ready if I don’t have a thermometer?
Drop a tiny pinch of flour into the oil. If it sizzles immediately, you’re close. Or dip the end of a wooden spoon in — if bubbles form around it steadily, the oil is ready. A thermometer is still the best way though.
Wrapping Up
This is one of those recipes that sounds a little involved on paper but is actually very doable, even on a weeknight if you planned ahead and did the brine the night before.
And once you taste it? Crispy crust, juicy inside, seasoned all the way through — you’ll understand why people get so passionate about fried chicken.
Give it a try and drop a comment below. I’d love to hear how it went, what variations you tried, or any questions you have. 🍗