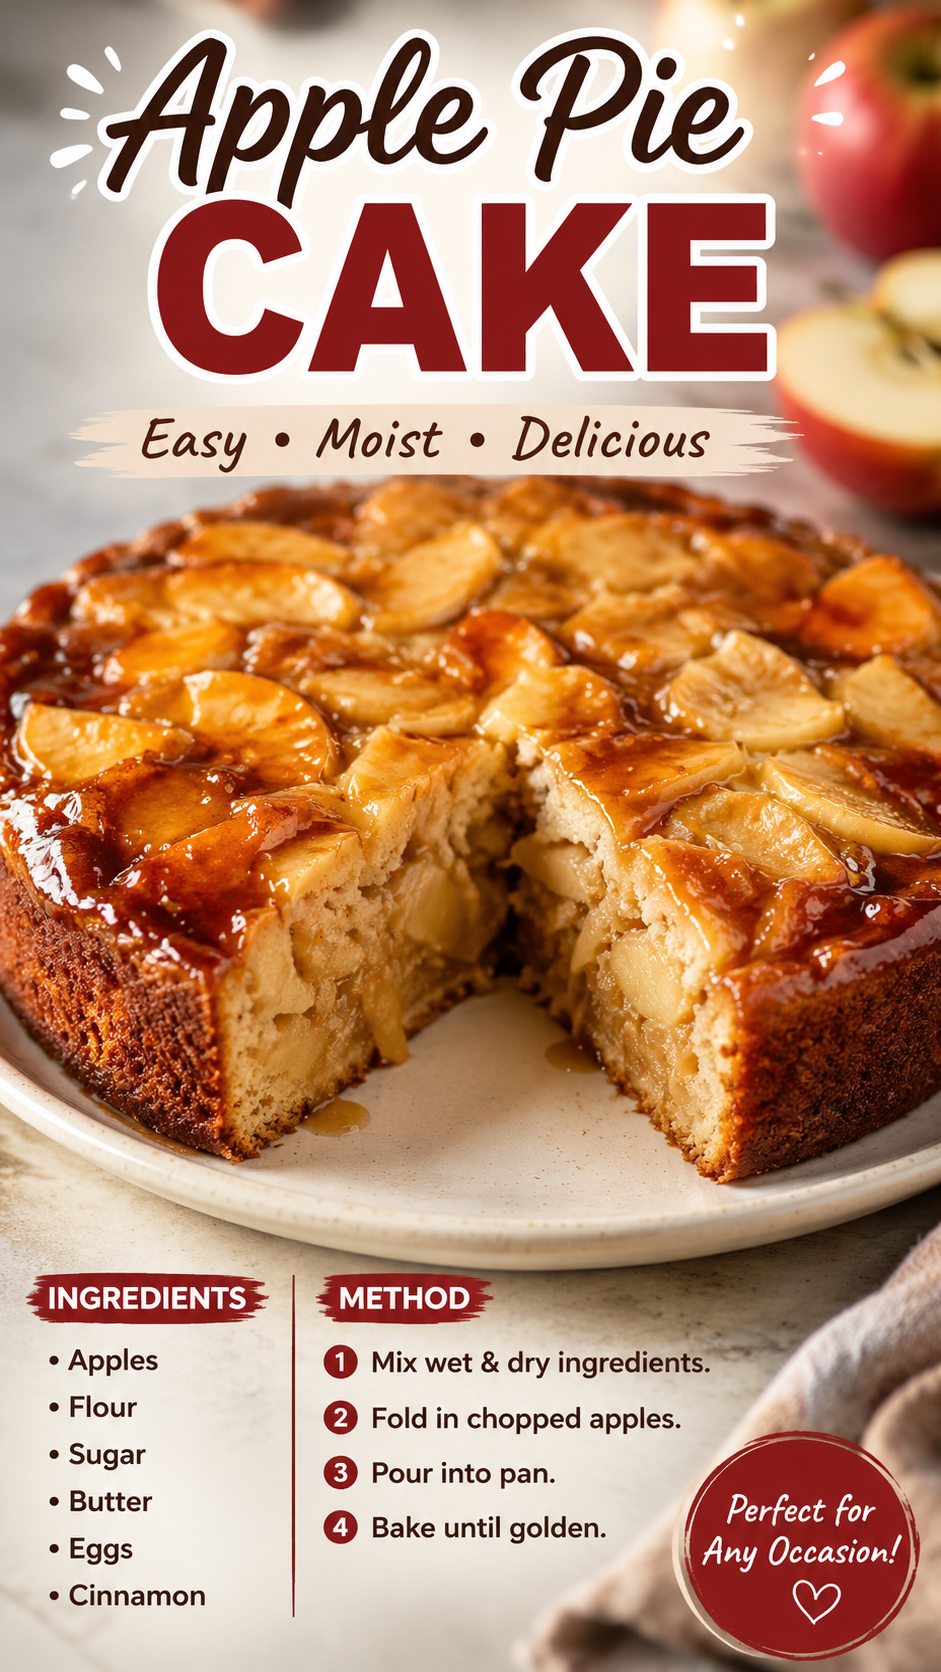
Why pick between apple pie and cake when you can just… have both?
That’s the question that got me into my kitchen last fall, and honestly, I haven’t looked back since.
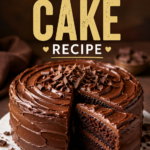
This apple pie cake is exactly what it sounds like. A soft, buttery cake loaded with cinnamon apples, baked until the edges go golden and the middle stays tender.
It’s got pie energy. Cake texture. Zero identity crisis.
And the best part? You don’t need pastry skills, a rolling pin, or any of that fussy pie-crust drama.
Let’s get into it.
What You’ll Need
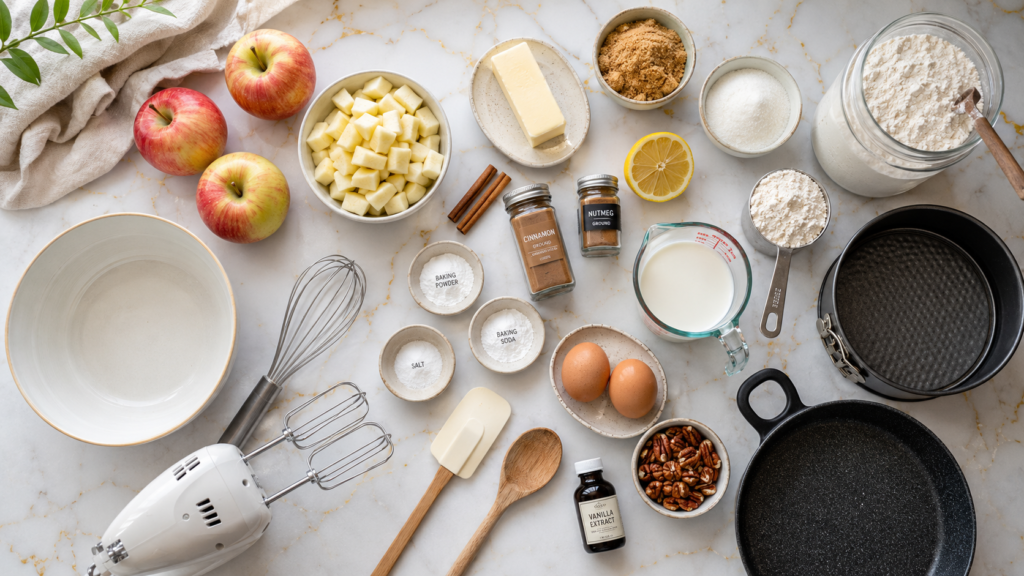
Here’s everything going into this cake:
For the apples:
- 3 medium apples (Honeycrisp or Granny Smith), peeled and diced
- 2 tablespoons butter
- 1/4 cup brown sugar
- 1 teaspoon cinnamon
- 1/4 teaspoon nutmeg
- 1 tablespoon lemon juice
For the cake batter:
- 2 cups all-purpose flour
- 1 1/2 teaspoons baking powder
- 1/2 teaspoon baking soda
- 1/2 teaspoon salt
- 1 teaspoon cinnamon
- 3/4 cup unsalted butter, softened
- 1 cup granulated sugar
- 2 large eggs
- 1 teaspoon vanilla extract
- 3/4 cup buttermilk
For the topping:
- 1/3 cup brown sugar
- 1/2 teaspoon cinnamon
- 2 tablespoons cold butter, cubed
- 1/4 cup chopped pecans (optional, but I’m not going to pretend it’s not amazing)
Tools You’ll Need
- 9-inch springform pan or deep cake pan
- Large mixing bowl
- Hand mixer or stand mixer
- Medium skillet (for the apples)
- Whisk
- Rubber spatula
How to Make It
Step 1: Cook down the apples. Melt the butter in a skillet over medium heat. Toss in your diced apples, brown sugar, cinnamon, nutmeg, and lemon juice.
Cook for about 5-6 minutes, stirring occasionally, until the apples soften slightly and the sauce thickens. Set aside to cool while you make the batter.
Step 2: Preheat and prep. Preheat your oven to 350°F. Grease your pan and line the bottom with parchment paper. Trust me on the parchment, it saves you from a sticky mess later.
Step 3: Mix the dry ingredients. In a medium bowl, whisk together the flour, baking powder, baking soda, salt, and cinnamon. Set aside.
Step 4: Cream the butter and sugar. In your large bowl, beat the softened butter and granulated sugar together until light and fluffy. This takes about 2-3 minutes, don’t rush it.
Step 5: Add the eggs and vanilla. Beat in the eggs one at a time, then mix in the vanilla.
Step 6: Combine. Add the dry ingredients in three batches, alternating with the buttermilk. Start and end with the flour mixture. Mix just until combined, overmixing makes the cake dense.
Step 7: Layer everything. Pour half the batter into your prepared pan. Spread half the cooked apples over it. Add the rest of the batter, then top with the remaining apples.
Step 8: Make the crumble topping. Mix the brown sugar, cinnamon, and cold butter with your fingers until it looks like wet sand. Sprinkle it over the top along with the pecans, if using.
Step 9: Bake. Bake for 50-60 minutes, until a toothpick inserted in the center comes out clean (a few moist crumbs are fine). Tent with foil halfway through if the top browns too fast.
Step 10: Cool, then slice. Let the cake cool in the pan for at least 20 minutes before removing it. I know waiting is brutal here, but slicing it too soon turns it into apple soup.
Pro Tips
- Don’t skip drying your apples after dicing. Pat them with a paper towel before cooking. Extra moisture makes for a soggy cake bottom.
- Room temperature ingredients matter more than people think. Cold eggs and butter don’t blend smoothly, and you’ll end up with a lumpy batter.
- Use a springform pan if you have one. It makes removing this cake about a hundred times easier than fighting it out of a regular pan.
- Test doneness in the center, not the edges. The edges will always look done first because of the apples underneath.
- Let it rest overnight if you can. This cake actually tastes better the next day once the apple flavor settles into the crumb. Wild, but true.
Substitutions and Variations
- Apples: Granny Smith gives more tartness, Honeycrisp gives more sweetness. A mix of both is honestly the move.
- Buttermilk: No buttermilk? Add 2 teaspoons of lemon juice or vinegar to regular milk and let it sit for 5 minutes.
- Gluten-free: Swap the flour for a 1:1 gluten-free baking blend. The texture stays surprisingly close to the original.
- Dairy-free: Use plant-based butter and a dairy-free milk with a splash of vinegar in place of buttermilk.
- Spice it up: Add a pinch of cardamom or ginger to the apple mixture for a warmer, slightly spicier flavor.
- Nut-free: Just skip the pecans in the topping. The crumble still works perfectly without them.
Make Ahead Tips
You can cook the apple filling up to 2 days in advance and store it in the fridge. Just bring it to room temperature before layering it into the batter.
The full cake also freezes well. Wrap individual slices tightly in plastic wrap, then foil, and freeze for up to 3 months.
Nutrition and Pairing Notes
Each slice (based on 12 servings) comes in around 320 calories, with roughly 14g of fat, 45g of carbs, and 4g of protein. Numbers will shift slightly depending on your exact apples and add-ins.
This cake pairs beautifully with:
| Pairing | Why It Works |
|---|---|
| Vanilla ice cream | Classic apple pie energy, warm and cold contrast |
| Salted caramel sauce | Adds richness and a little extra indulgence |
| Hot coffee or chai | Balances the sweetness with warmth and spice |
| Whipped cream | Light, simple, lets the apples shine |
Leftovers and Storage
Store leftover cake covered at room temperature for up to 2 days, or in the fridge for up to 5 days.
Warm individual slices in the microwave for about 15-20 seconds before serving. It brings back that fresh-from-the-oven texture.
For longer storage, freeze slices as mentioned above. Thaw overnight in the fridge before reheating.
FAQ
Can I use canned apple pie filling instead of fresh apples? You can, though the texture will be softer and sweeter. Fresh apples give you more control over the spice level and bite.
Why did my cake sink in the middle? This usually means it needed a few more minutes in the oven, or the oven door was opened too early during baking.
Can I make this in a 9×13 pan instead? Yes. Just reduce the bake time slightly and check for doneness around 40-45 minutes.
Do I have to peel the apples? It’s recommended for the smoothest texture, but if you don’t mind a little extra chew, you can leave the skins on.
Can I double this recipe? You can, but bake it in two separate pans rather than one larger one. It bakes more evenly that way.
Wrapping Up
This apple pie cake is the kind of recipe that turns a regular afternoon into something worth remembering.
It’s cozy, it’s a little nostalgic, and it somehow manages to taste like fall no matter what season it actually is.
Give it a try this week. Then come back and let me know how it turned out in the comments below. I genuinely want to know if you added the pecans, swapped the apples, or found your own little twist.
And if anything trips you up along the way, ask away. I’m always happy to help troubleshoot.