You know that meal you come back to again and again, the one that just hits differently on a cold night?
This is it.
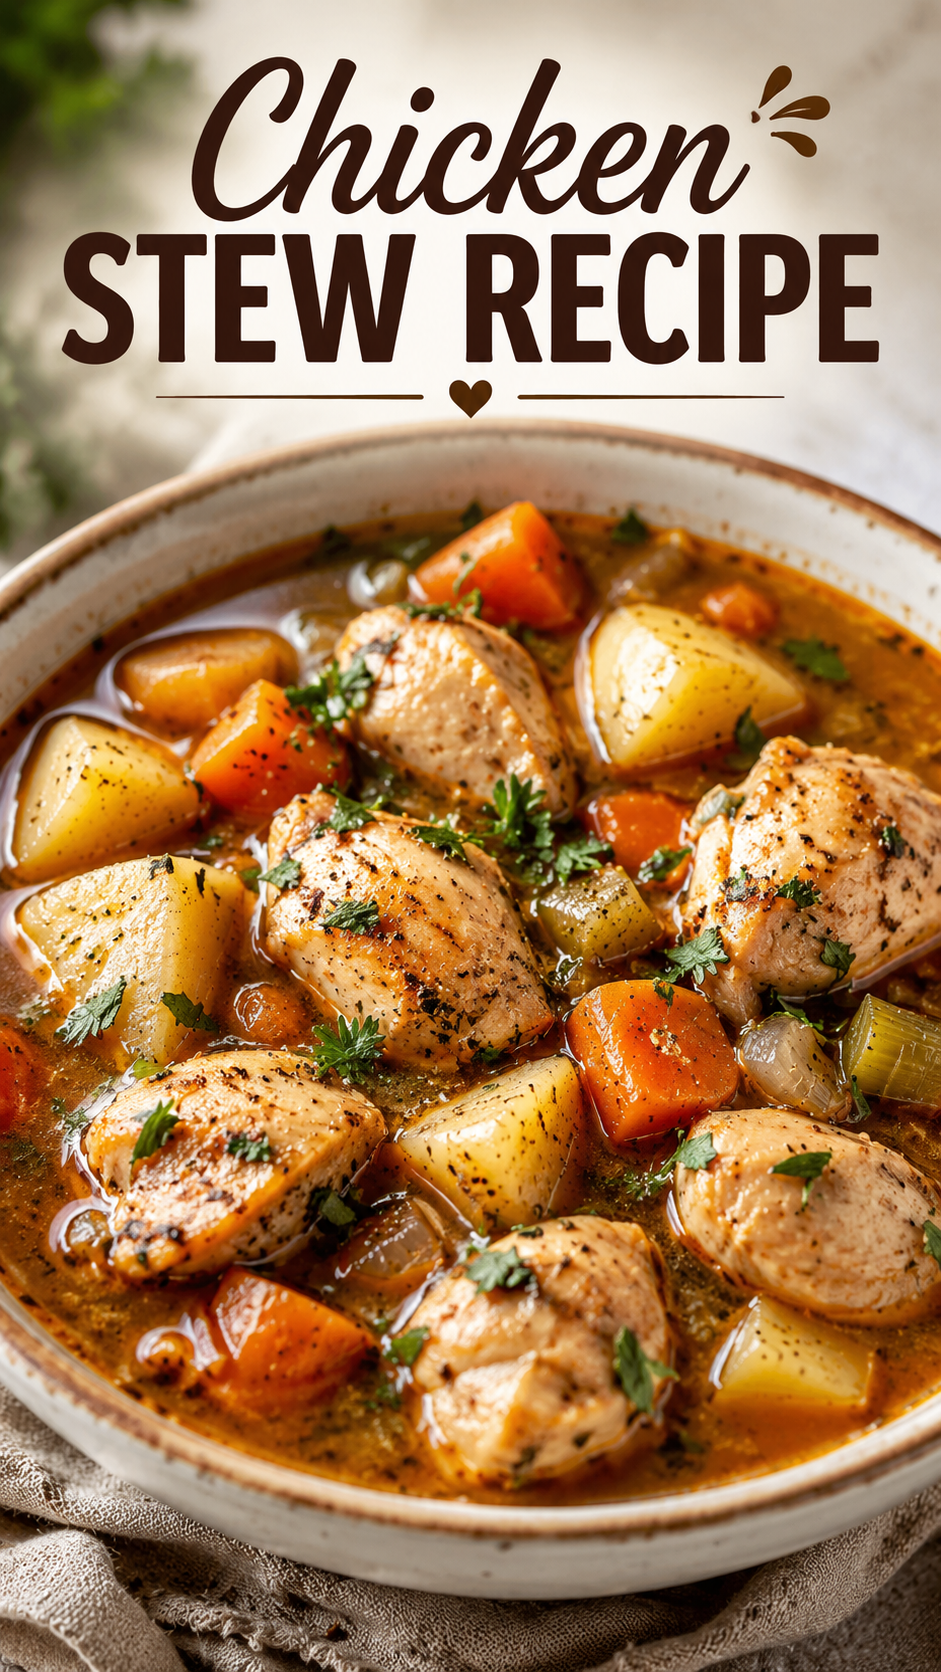
This chicken stew is thick, rich, loaded with tender chicken and vegetables, and tastes like it’s been simmering on someone’s grandmother’s stove all day. Except it hasn’t. It comes together in about an hour, which honestly feels like cheating.
And once you make it, you’ll understand why stews like this have been on dinner tables for centuries. 😌
What You’ll Need
For the stew:
- 2 lbs (900g) bone-in, skin-on chicken thighs (about 4–5 pieces)
- 3 medium carrots, peeled and cut into chunks
- 3 medium Yukon Gold potatoes, cubed (about 1-inch pieces)
- 2 stalks celery, sliced
- 1 large yellow onion, diced
- 4 cloves garlic, minced
- 1 can (14 oz / 400g) diced tomatoes
- 3 cups (720ml) chicken broth (low sodium preferred)
- 1 cup (240ml) water
- 2 tablespoons olive oil
- 2 tablespoons tomato paste
- 1 teaspoon dried thyme
- 1 teaspoon dried rosemary
- 1 teaspoon smoked paprika
- 1/2 teaspoon black pepper
- 1 teaspoon salt (plus more to taste)
- 2 tablespoons all-purpose flour (for thickening)
- Fresh parsley for garnish
Tools You’ll Need
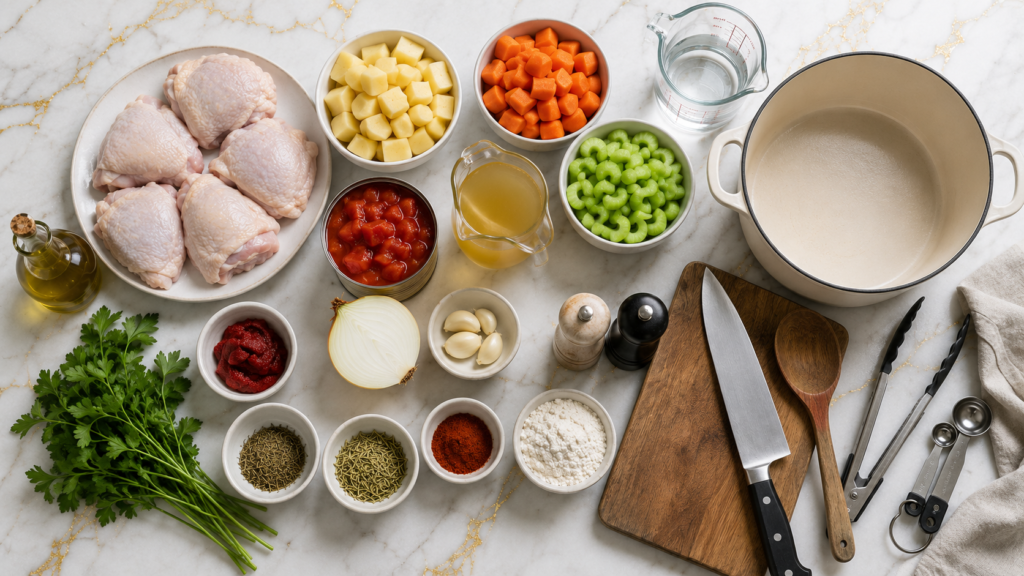
- Large Dutch oven or heavy-bottomed pot (at least 5-quart)
- Wooden spoon or spatula
- Chef’s knife and cutting board
- Measuring spoons and cups
- Tongs (for browning the chicken)
- Ladle for serving
Pro Tips
These are the things that actually make a difference, not just filler advice:
- Brown the chicken first. Don’t skip this. Browning the skin creates a layer of flavor (called the Maillard reaction) that you simply cannot get any other way. Those golden, slightly caramelized bits on the bottom of the pot? That’s called the fond. It’s liquid gold once you deglaze.
- Use bone-in, skin-on thighs. Chicken breasts go dry and chewy in a stew. Thighs stay juicy and pull apart beautifully. The bones also add a richness to the broth that boneless chicken just can’t deliver.
- Add the tomato paste early. Cooking it in the oil with the aromatics caramelizes it and deepens the flavor by about a mile. Raw tomato paste added directly to the broth tastes flat and acidic by comparison.
- Don’t rush the simmer. Low and slow is your best friend here. A hard boil will toughen the chicken and break up the vegetables. Keep it at a gentle bubble and let everything come together properly.
- Taste before you serve. Always. Season at the end, not just at the beginning. Broth concentrates as it cooks, so what felt well-seasoned an hour ago might need a small adjustment before you ladle it into bowls.
Substitutions and Variations
Chicken:
- Boneless thighs work in a pinch (reduce cook time slightly)
- Rotisserie chicken can be shredded and added in the last 15 minutes if you want a shortcut
- Whole chicken pieces (legs, drumsticks) all work great
Vegetables:
- Swap potatoes for sweet potatoes for a slightly sweeter, earthier flavor
- Add parsnips for a subtle nuttiness
- Mushrooms (cremini or button) added with the onions add a deep, savory layer
- Frozen peas stirred in at the very end for a pop of color and freshness
Broth:
- Vegetable broth works if that’s what you have (flavor will be lighter)
- Add a splash of dry white wine when deglazing for extra depth
Make it creamy:
- Stir in 1/4 cup heavy cream or coconut cream in the last 5 minutes
Make it spicy:
- Add 1/4 teaspoon cayenne or a diced jalapeño with the onions
Make Ahead Tips
This stew is better the next day. Full stop.
The flavors meld overnight in a way they just don’t when freshly made. Here’s how to use that to your advantage:
- Make it 1–2 days ahead and refrigerate. Reheat gently on the stovetop over medium-low heat, adding a splash of broth or water if it’s thickened too much.
- Freeze for up to 3 months. Let it cool completely before portioning into freezer-safe containers. Thaw overnight in the fridge, then reheat on the stove.
- Prep the vegetables ahead and store them in the fridge for up to 24 hours, so you just have to cook when you’re ready.
Nutritional Breakdown (Per Serving, Approx.)
Based on 6 servings
| Nutrient | Amount |
|---|---|
| Calories | ~380 kcal |
| Protein | 32g |
| Carbohydrates | 22g |
| Fat | 17g |
| Fiber | 3g |
| Sodium | ~620mg |
Note: Values vary based on chicken size and exact ingredients used.
Diet swaps:
- Gluten-free: Replace flour with cornstarch (1 tablespoon) or a gluten-free flour blend
- Dairy-free: Already dairy-free as written
- Lower carb: Skip potatoes, add cauliflower florets instead
- Paleo: Use arrowroot starch instead of flour
Meal pairing ideas:
- Crusty sourdough bread (for dipping, obviously)
- A simple green salad with lemon vinaigrette
- White or brown rice to stretch it further
- Buttered egg noodles for a chicken noodle stew spin
How to Make It
Step 1: Season and sear the chicken
Pat the chicken thighs completely dry with paper towels. Season generously on both sides with salt and pepper.
Heat olive oil in your Dutch oven over medium-high heat. Once hot, add the chicken skin-side down. Don’t move it. Let it sear for 5–7 minutes until the skin is deep golden brown. Flip and cook another 3–4 minutes. Remove and set aside.
The chicken won’t be cooked through yet. That’s fine.
Step 2: Cook the aromatics
Pour off all but about 1 tablespoon of fat from the pot. Add the diced onion and celery, and cook over medium heat for 5 minutes, stirring occasionally, until softened.
Add the garlic and tomato paste. Stir and cook for another 2 minutes until fragrant and the tomato paste has darkened slightly.
Sprinkle in the flour and stir to coat everything. Cook for 1 minute.
Step 3: Build the broth
Pour in the chicken broth and water, scraping up all those browned bits from the bottom of the pot with your spoon. Those bits are flavor. Get every single one.
Add the canned diced tomatoes (with juices), thyme, rosemary, and smoked paprika. Stir to combine.
Step 4: Add everything back in
Nestle the browned chicken thighs back into the pot. Add the carrots and potatoes.
Bring to a boil over high heat, then reduce to a low simmer. Cover and cook for 35–40 minutes, until the chicken is completely tender and falling off the bone and the vegetables are soft.
Step 5: Shred the chicken
Remove the chicken from the pot. Using two forks, shred the meat away from the bones and discard the bones and skin.
Return the shredded chicken to the pot. Taste and adjust salt as needed.
Step 6: Serve
Ladle into bowls, garnish with fresh parsley, and serve immediately.
Leftovers and Storage
Good news: this stew keeps beautifully.
- Fridge: Store in an airtight container for up to 4 days. The stew will thicken as it sits. Just add a splash of broth when reheating.
- Freezer: Freeze for up to 3 months in airtight containers or freezer bags. Thaw overnight in the refrigerator.
- Reheating: Low and slow on the stovetop is best. Add liquid as needed. Microwave works too (medium power, stirring halfway through).
One thing to note: potatoes can get a bit grainy after freezing. If you plan to freeze the stew, consider leaving the potatoes out and adding freshly cooked ones when you reheat.
FAQ
Can I use chicken breasts instead of thighs?
You can, but the texture won’t be the same. Breasts tend to dry out with longer cooking times. If you use them, add them 20 minutes into the simmer rather than at the start, and don’t overcook.
My stew is too thin. How do I fix it?
Mix 1 tablespoon of cornstarch with 2 tablespoons of cold water. Stir it into the simmering stew and let it cook for 5 minutes. It’ll thicken up nicely. Alternatively, let it simmer uncovered for an extra 10–15 minutes to reduce.
My stew is too thick. What do I do?
Just add more broth or water, a little at a time, until you reach the consistency you like. Taste and re-season after adding.
Can I make this in a slow cooker?
Yes! Sear the chicken and cook the aromatics first on the stovetop (this step is worth doing even for slow cooker versions). Then transfer everything to the slow cooker and cook on LOW for 7–8 hours or HIGH for 4–5 hours. Shred the chicken before serving.
Do I have to brown the chicken first?
Technically, no. But the flavor difference is significant. That browning step adds a depth that you’ll miss if you skip it. It takes 10 extra minutes and it’s completely worth it.
Can I add wine to this recipe?
Absolutely. Add 1/2 cup of dry white wine after cooking the aromatics and let it cook for 2 minutes before adding the broth. It adds a lovely complexity.
How do I know when the chicken is done?
It should be completely tender and pull away from the bone easily with a fork. If there’s any resistance, keep simmering. Internal temperature should be at least 165°F (74°C).
Wrapping Up
If there’s one recipe you make this season, let this be it.
It’s the kind of meal that makes the whole house smell incredible, the kind that people ask you for the recipe after their first bowl, the kind you’ll find yourself making on repeat just because it’s that good.
Give it a try this week. And then come back here and tell me how it went in the comments. Did you add anything? Make any swaps? Have a question I didn’t cover? I read every single comment and love hearing how these recipes work out for you. 🍲